May 2014 Blog Posts

Hello Friends! 

It's Kristine with you today and I am excited to show you a few of my DIY Filler Cards for my 2012 Life Documented Album.

I first drooled on the entire DIY & DIY Boutique collections and then decided on which elements I was going to use. Most of them made the list and ended up scattered on my entire scrapbook table! I decided I was going to do a "set of 24" just to have on hand and maybe trade some with friends for their own Life Documented albums.  

I used some DIY Boutique papers and cut them up 3x4" knowing they are double sided I could use the A or B sides, I also used the DIY Office Card Foundations. Using a few scraps of paper and of course lots of pop dots, DIY stickers and chipboard I was able to create a great variety of cards.  

I began creating these cards a little late in the evening, a few hours after a little over 1:30am I looked at the clock and I seriously couldn't stop! This project is perfect for Crops or Scrapbook nights with friends! So fun to do ;-)  and sharing them for Card Swaps even better! The DIY products are for sure a must have in your stash!

Here's are a few finished Life Documented pages using a few of my own filler cards.  

Here's a few close-up shots.

and a few close up shots of my Filler Cards.

This Collection is fabulous to create your own journal cards, pages, mini albums and so much more - it's endless! As you can see these are just too much fun to create, Give it a try, add them to your Life Documented pages and Please share them with us!

Supplies Used : 


5142

5143

5148


DIY BOUTIQUE

5100

5127

5128

5141


ALBUM

4037

2004


Hey everyone!  Andrea here with you today to share a mini album made with the new Hello Baby collection from Simple Stories.  You’re going to love the soft, gender friendly colors in these papers and embellishments!  I love that the collection focuses on baby’s first year, and a friend was kind enough to let me use her son Logan as my muse for this project; it documents his first six months.

I used a Burlap Binder as the base for the album.  Because it already has texture and pattern, I wanted to keep the cover simple; a cut file, photo, and a few embellishments was all it needed.  I matted one of the Insta-Squares (You) as a title, and made the photo of those cute little feet the focal point of the album cover.

The inner pages are a mix of Pocket Pages, papers from the collection, SN@P! Pages, and SN@P! Pockets.  These left me plenty of room for photos, embellishments and journaling.

I love the great shapes of the SN@P! Pages and how they accent the album.

Here’s a few close-ups of some of the great embellishments in the collection:

I cut the frames for each month out of the 12 x 12 Tiny Details paper and pop dotted them over the photos that coordinate with Logan’s age.

Here’s a few more of the pages:

And there you have it!

Thanks so much for joining me today.  I love using the collections from Simple Stories in my projects because EVERYTHING you need is right there and coordinated; simple!  And I’ll love this collection even more when I get to use it to document my first grandbaby in October.

I hope you’re inspired to pick up a collection and whip together something fabulous!

Supplies

Hi there! Kim here in sunny Arizona, gearing up for a long, hot summer. But, you know what? Call me strange, but summer is my favorite season of the year, even here in AZ. Maybe it’s because I was born right here in Phoenix. Regardless, I say “bring it on”.

I have a feeling more of you will be summer converts after seeing and crafting with our new Good Day Sunshine collection. How could you resist the sun drenched colors, the warmth of the wood grain, and my favorite? The touch of vintage in the photo inspired products.

The new release will be hitting stores in just a week or two, but in the meantime, here’s a peek at two cards I’ve created with the new collection.

I hope that tides you over until you get your hands on this lovely new collection! Take care and enjoy a great kick off to summer!

Supplies

Hi everyone! Lisa here to add a bit of sunshine to your day. The projects I'm sharing with you today will give you a good look at one of Simple Stories brand new releases called Good Day Sunshine. I don't know about you, but I get all excited about new releases. I definitely can't wait for the reveals and I especially love to see the product in action. This collection is definitely a must have for all of your summer photos.

Let's start off with a card that's definitely summer sweet.

I love the mix of colorful contemporary and vintage elements in this collection. With so many colors to work with, it was easy to put this card together by layering a number of Bits & Pieces (index card, Polaroid frame, banner and ice cream truck) over a piece of multi-colored text paper. Fundamental Cardstock Stickers, enamel dots and ribbon help to finish it all off.

Next up I have a layout to share. I couldn't believe how perfectly this photo of my niece, aboard her paddle board, coordinated with the rainbow of colors in this collection.

Let's take a closer look at some of the details on this page:


Although the SN@P! Pockets are perfect for holding journaling tags or cards, sometimes I like to use them as a decorative element on a project. Think about layering embellishments on top of the pocket and adding to the design already printed on them.

I used a mix of Bits & Pieces and Chipboard Stickers in the upper right hand corner of the page. The chipboard adds dimension and layers nicely with the diecut pieces.

This last detail shot shows a mix of Bits & Pieces and stickers. I hand-stitched around the outer edge of the cloud with embroidery floss to add some texture. The yellow floss adds color and helps the cloud stand out against the background paper.


I hope you enjoyed getting a good look at Good Day Sunshine. It's a fun collection to consider for recording all of your summer memories and colorful summer photos.

Supplies

Hi everyone! Allison here today with a Life Documented layout using the brand new Good Day Sunshine collection and I have a new double page sketch that mixes traditional scrapbooking with the SN@P! Pocket Pages.

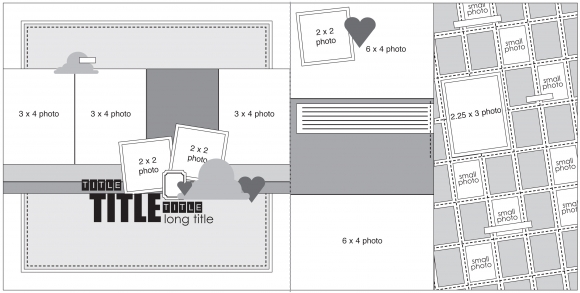
You can download the full sketch with measurements and placements here Life Documented Sketch #11.  The left side of the sketch is designed in a more traditional style of scrapbooking while the right side of the sketch uses a combination of photos, cards, and paper to fit the Sn@P! Pocket Page, Design 7.

Here's my layout based on the sketch above.

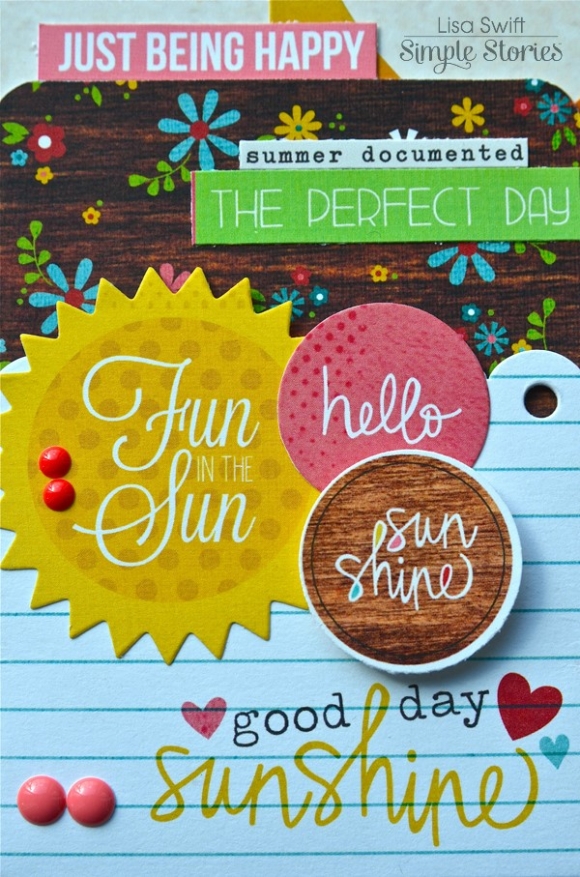
The instant I saw Good Day Sunshine I knew that our beach pictures from last summer would go with it perfectly! What a fun and bright collection and it's full of so many great elements and designs! It really made putting my layout together so easy.

On the left page I created a large sunburst for one of the background squares on the sketch. The yellow ombre paper was just right for this kind of design. I always enjoy trying to find ways to incorporate the theme of my layout into the design of the papers too. A sunburst was a great fit for not only my pictures but the Good Day Sunshine collection too.

The sunburst may look like individual strips but, since part of the sunburst is behind the photos, I was able to keep that part of the paper intact. This made it so much easier to adhere it on to the white cardstock behind it. I just cut the little strips out between each piece of the sunburst, stopping before I went all the way to the center.  Trying to make sure that each individual strip is perfectly adhered could take some time! This way it all went down at once saving me lot of time and possible headaches!

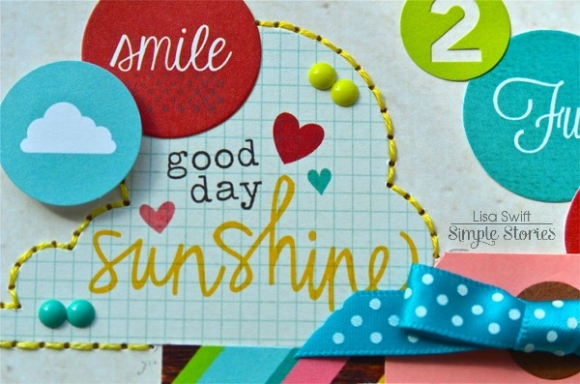
I added some hand stitching to the sunburst design and finished it with some yellow enamel dots on a few of the stitched lines.  I used clouds to accent the sunburst design. The first cloud is above the photos with a brad and word sticker attached to it.

At the bottom of the photos I added waves made with a circle punch. I really like using this simple technique on water pages. All you have to do is cut a strip of paper to the size you need and then use a circle punch to punch little half circles along one side of the strip. It's so easy! I especially like layering multiple "wave" strips.  I added a few smaller photos, my title, and another cloud over the wave strips. I loved the little hearts on the cloud so I added some more hearts on both sides of it.

On the right page I used the SN@P! Pocket Page, Design 7; this is one of my favorite Pocket Page designs because of that large 6 x 12" pocket on the right! I used a 6 x 12" piece cut from the "Life is Beachy" patterned paper for that pocket. I was drawn to the design of this paper and thought it would be fun to use some small pictures in place of some of the rectangles.

I used one larger photo in place of four of the rectangles and then used smaller photos to cover a few of the smaller ones.

I also used foam adhesive and a small cardstock mat behind each photo. I wanted to make sure the photos stood out and took center stage.

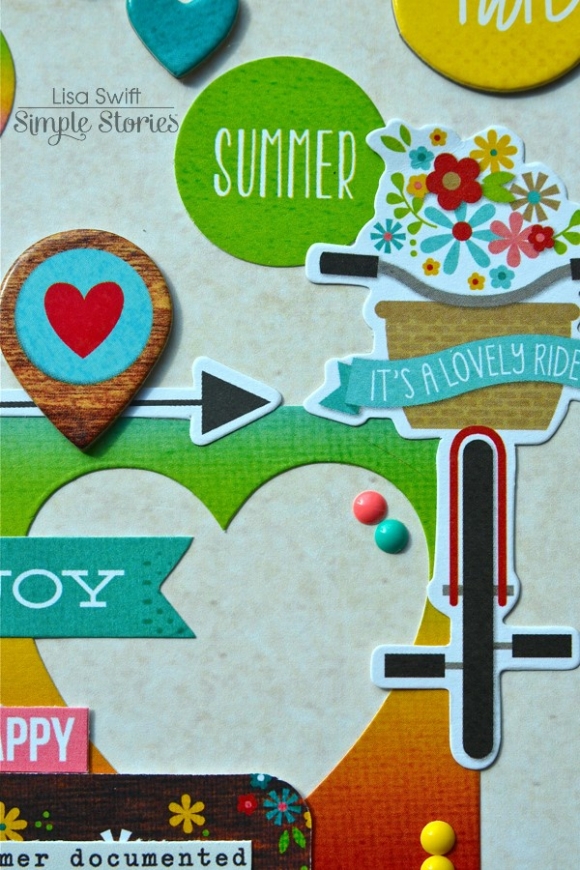
I had a photo with a lot of empty space and I happened to have one more photo that I wanted to include on the layout. An easy solution was to add the smaller photo to the empty space. I then finished it with the "hello summer" heart.

The "Every summer has a story" SN@P! Cut is one that stood out to me. I printed out a picture I had taken at the beach of the water crashing into the sand and adhered it behind the card so that the sand and water would show up in the letters. Since the card specifically says "story" I thought,  "what could be a better place to put my journaling"?

I'm using the 12x12 SN@P! faux leather album in black for all of my Life Documented layouts. The quality of the faux leather is top notch and I love the stitching accent on them. They are beautiful! I also used the 12x12 Sn@P! Pocket Pages, Design 7 from the Variety Pack. I enjoy using several different styles of Pocket Pages and since the Variety Pack has so many great options and designs, I have a lot to choose from.

I hope you enjoy using the new sketch!

Supplies

Pages