September 2014 Blog Posts

Howdy!  Layle here with you today.  Welcome to Day 3 of the Simple Stories & Therm O Web Product Swap! 

Both design teams have swapped products and will be sharing on our blogs all week long.  Join us for some great inspiration as well as a chance to win a prize package from Therm O Web! 

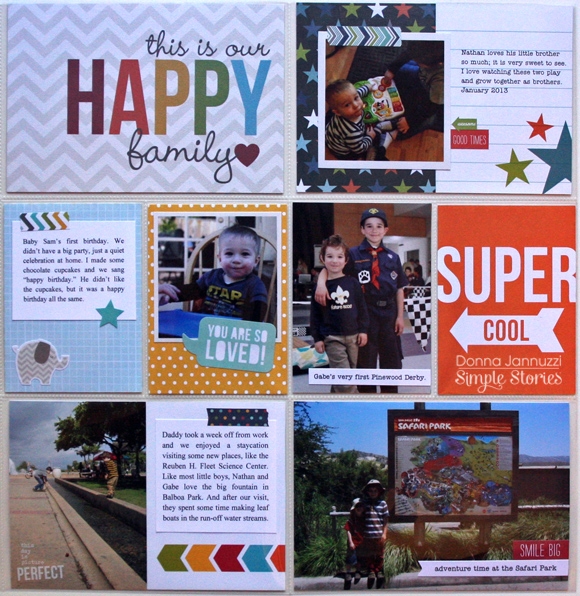
Today Kirstine Davidson shares a few 6x8 Life Documengted pocket page spreads -

________________

Hello Friends! 

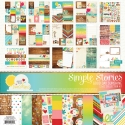
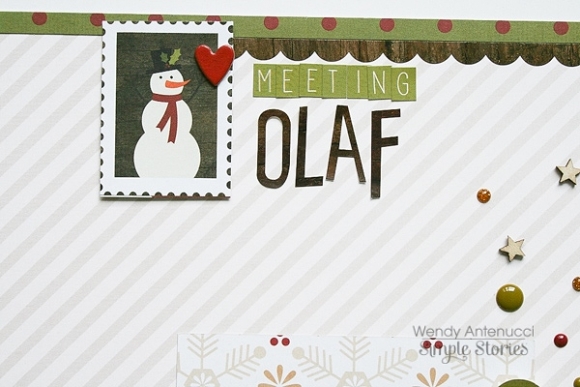
It's Kristine with you today and I am here to share with you my October 2012 Life Documented spread using the NEW Seasons SN@P! Set!

Often times we are overwhelmed by products and photos. It's hard to decide what to use - what not to use and this post is just that! I decided for the month of October I was going to simplify and use a few photos and few products. What's awesome about the Seasons SN@P! Set is that you can do several spreads with just a few cards! 

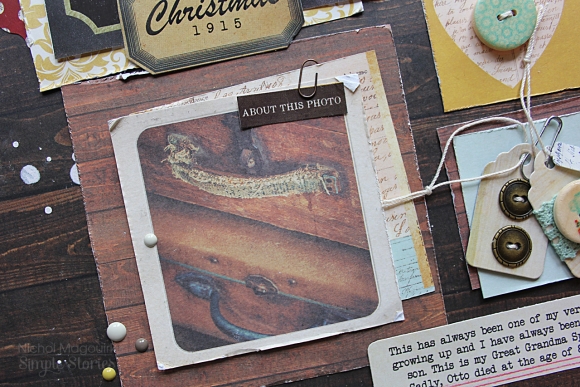
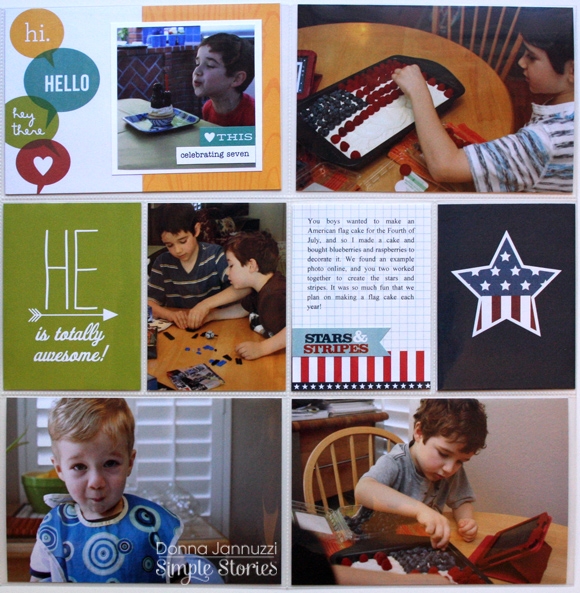
I first sorted all the FALL/AUTUMN/HALLOWEEN Cards, Insta Squares & Pieces and a few Stickers. Some cards I wouldn't use such as Halloween cause I didn't have any photos of hubby and i being ghostly! But what i did instead is use the B Side of the card for a coordinating background to my photo! 

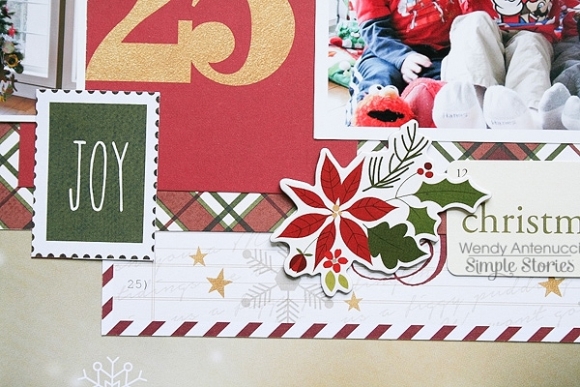
If you look closely to the Autumn Filler Card - I Sprayed it with Thermo Web Glitter Dust. I love this stuff!! It gives my card a glitter effect in seconds! 

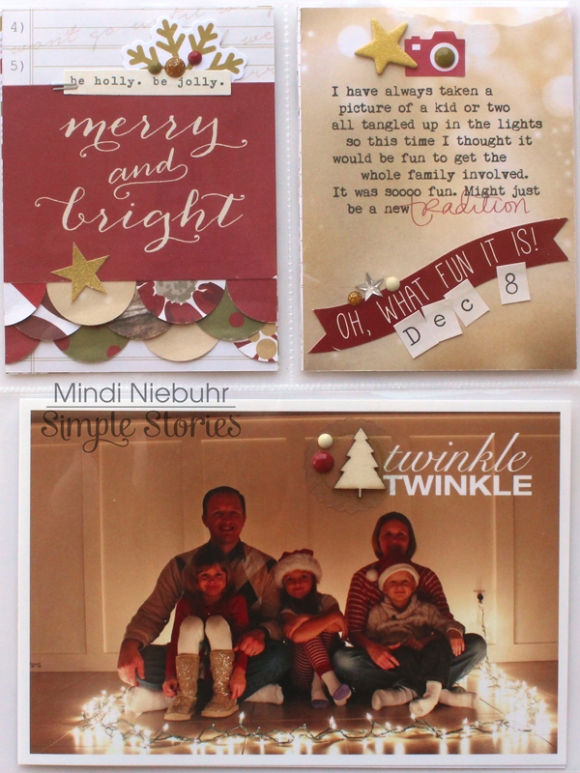
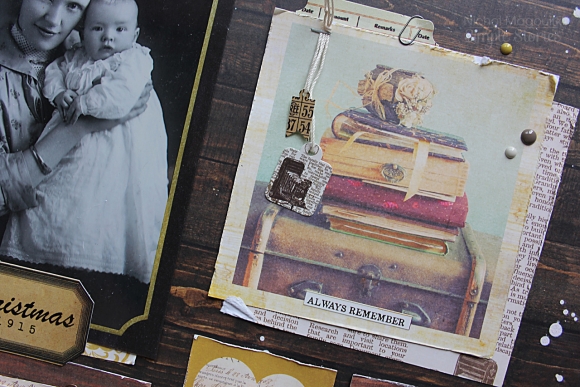
I love the simplicity of this spread. I only took a few cards, cut up some pieces from 3x4 cards or 4x6 cards and added Stickers using Thermo Web - 3D Foam Sticky Strips and Zots 3D. 

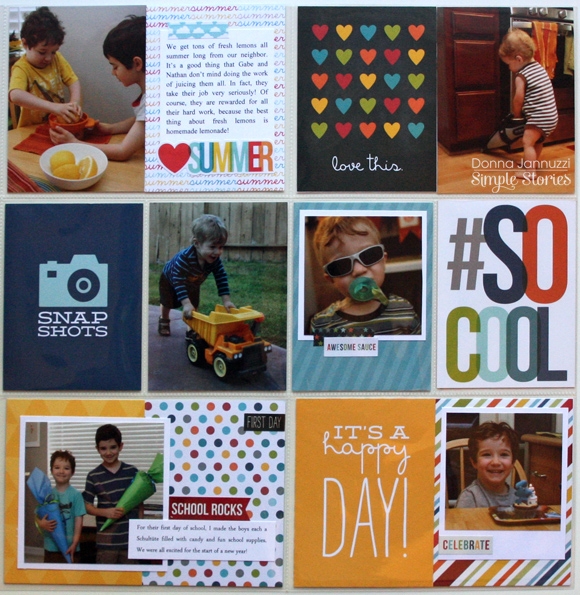
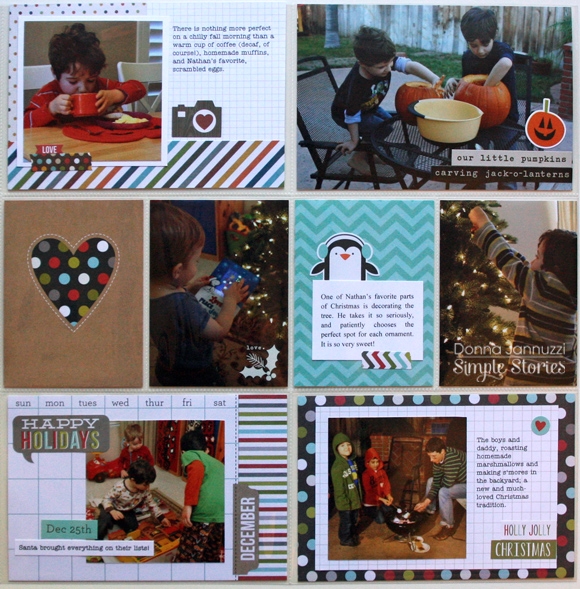
Here are individual pages of my spread. 

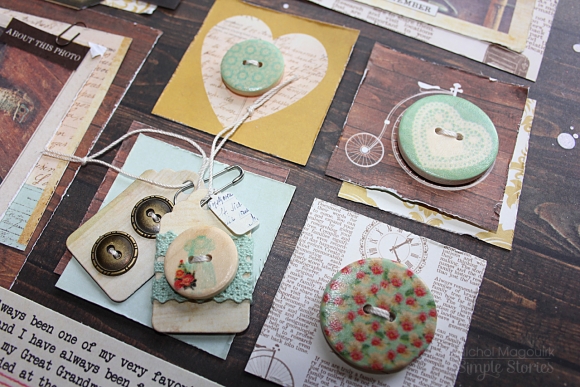
Look at this filler card - even the dots are glittered!! SO Easy with a little spray! 

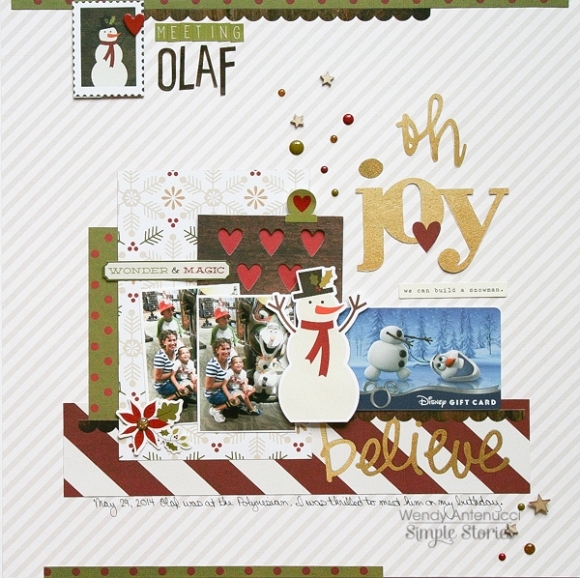
Here are 2 more close up shots - 

So with just a few awesome SN@P! products you can create an awesome spread for your LIfe Documented album. No stress on which products to use, just select a few from the Seasons SN@P! Set and you are ready to create!

Thermo-Web Adhesive
ZOTS™ SINGLES • SMALL
ZOTS™ SINGLES • 3-D
3D WHITE FOAM STRIPS 1/2"

Glitter Dust - Silver
Sticky Dot Mini Runner

__________

Now for the fun part!  Enter via the Rafflecopter widget below and we'll draw one lucky winner on Sunday to win this awesome prize from Therm O Web! 


After you enter, head on over to the Therm O Web blog to see what their team has created.  Make sure to enter there as well - they're giving away a prize featuring our new Sweater Weather Collection!

a Rafflecopter giveaway

Want to follow Therm O Web?  Here you go!

Web:  www.thermoweb.com

Facebook: www.facebook.com/thermowebmimi

Blog: http://blog.thermoweb.com/

Twitter: https://twitter.com/ThermOWeb

Instagram: http://instagram.com/thermoweb

Pinterest: http://www.pinterest.com/thermoweb/

Join us again here tomorrow for more inspiring projects!


Supplies

Hi Simple Stories fans! Rebecca Keppel here today with a Simple Stories SN@P album documenting the fun of summer. Simple Stories created the SN@P albums and pieces with people like me in mind. People who love the idea of mini albums, but kind of freak out at the idea of making them lol!  When you typically create layouts and design with a larger space such as 8.5x11 or 12x12, the smaller format can be a bit scary. Not so with SN@P! albums. Much of the work is done for you and the parts that are not done are super user-friendly. You can easily complete an entire album in one weekend. I used the Good Day Sunshine collection to make a SN@P album documenting all the fun we had this past summer. The Teal Chevron Burlap album is gorgeous as is, but I decided to tie some trims and add a 4x6 card with stitching for the cover mounted on a scallop cut piece of wood grain paper. It's always nice to have the year on the cover too.

The inside cover page says it all, doesn't it?!

The first page features the last day of school! Anyone already looking forward to that again? The 6x8 SN@P! pages feature awesome die cut pages and they really don't need any embellishing at all, they create such a statement on their own. I love how you can see the next page through the die cut letters.

 I am in love with the Pocket Page formulation here. It includes two 4x4 pockets perfect for either Instagram photos OR the 4x4 cards and four 2x2 pockets again perfect for mini photos or cards. The sun die cut page is AWESOME! I loved backing it with a sky page :)

 I used the full 6x8 pages to introduce each month of the summer.

 On the back of the intro page I used a typewriter to journal about the main events from that month. On the right you see another die cut page. This is one that came with the album. It is awesome as-is, but I thought it was fun to spritz it with some coordinating mist.

 Another die cut page - LOVE THEM - and you get a bunch in the pack. This Pocket Page is fun for a bunch of photos and one journaling card.  I like to mix handwritten and typed journaling in one album.

Love that the 3x4 cards are double sided so the green polka dot is just the backside of the card from the previous page. I simply added a chipboard sticker to spice it up ;) On the right you can see a couple of pictures that were smaller than the pockets. One is mounted on a 4x4 card, and one is stuck in a pocket with a 2x2 card behind it. Don't worry about having just the "right" size.

 In this whole spread there is really only one 4x4 photo, but it feels like there is lots going on thanks to the Good Day Sunshine cards, brads, stickers and SN@P pages.

 Here is July's introduction. No photos at all here, just journaling.

 The SN@P cuts are fun too. On the left one is backed with a 4x6 card so you see a fun pattern through the lettering.

 I used the 4x6 transparencies on a photo from the previous page and the one on the left here. What's nice about the 4x6 pockets is that you don't need to adhere the transparency, just slip it into the pocket in front of the photo.

 The banner die cut SN@P page is another of my favorites. I love that it is a unique size and shape that allows you to see the page behind it.

 The 6x8 pages can also be used to highlight one large photo like I've done on the right here.

 And again here on the left. Stickers and chipboard can be fun on the empty space of a photo.

 Here is the introduction of August the final month.

 Here I have more journaling and a 4x6 photo that I made into a vertical strip collage before printing. On the right is the last title page and introduces our last weekend of the summer.

 I had fun added little bits to the top of pages with binder clips. The Today is a Simple Stories die cut available here in the Silhouette online store.

 Last, but not least, the final page to my album.

This album was fast and simple to pull together, but I love the colors, the bits and pieces and of course all the memories it holds! I can't wait to make my next SN@P! album!

Supplies

Hi Everybody ! Mindi here with you today sharing a few pocket page layouts using a combination of Cozy Christmas and Christmas SN@P!. They go together so perfectly ! 

I have a confession to make. I love Christmas. I love Christmas Paper. All things related to Christmas. 

I could work on Christmas projects all year round. Lucky enough for me, I still have yet to finish my December album from 2013. Kind of forgot about it actually, crazy enough. 

Here is my first page. I started out with one of the Cozy Christmas SN@P! pages as a background. I fell in love with the cut out stars and it was the perfect size for my album, especially since it matched perfectly with the theme of our "family/lights photo shoot". I decided to make my photo smaller in size, as to not cover up all of the stars and knowing that I wanted to embellish around the photo. 

For the back side of the SN@P! page I went with the same look as the front. A smaller photo and some embellishments.    It was paired up with a 6x8 pocket page. 

I had fun with this filler card. I took one of the SN@P! cards and cut it down. That way I had room for my fun layered circles on the bottom. I started out with a bunch of 1 inch patterned paper, punched out circles. Finished it off by lining them up and layering them on top of each other in a staggered way for a fun textured look.  

I was having so much fun with my album that I just keep right on going. Finishing off the other side of the pocket page.

I just love these SN@P! cuts! They are such an easy and fun way to add a little bit extra to your layouts. Originally the wood grained snowflake cut piece was 4x6. I cut it in half and added a strip of patterned paper to the end, adding patterned paper to the back side here and there. 

I finished off the pocket page by adding a few embellishments to my journaling card and photo. Adding both the bits and pieces and the enamel dots to my layouts are always something that I love to do. They let me be creative, while adding texture and making each one unique.

For this particular project I am using the 6x8 SN@P! Binder in Red. It is the perfect size for something like this and I love both the creme and the red color of the album. 

Thanks for joining me today !  

Hi everyone!  It's Wendy with you today to share some recent layouts I made using the Cozy Christmas collections!

My layout Dec 25 came together in just a short amount of time with the use of the SN@P! Cuts card. conveniently also my title.  I placed my pictures on either side of the card, but I needed a little more interest to my page - hello SN@P! Journal Page!  These pages work great on layouts, and it just takes a little creative planning to cover the holes.  A border strip grounds my design and gives it some visual interest.  I love the border strip of stamps and couldn't resist cutting them out to use as elements scattered on my page.  

A few die cut pieces and chipboard finished out this simple page.


Sometimes you just have to make a layout based on the product; when I saw the sticker "We can build a snowman", my layout Meeting Olaf was born.  Even though I was working with a Christmas collection, this picture was taken in the summer, so just have fun with papers and make them work for you!

My design was very similar in this layout as my Dec 25 layout (and a lot that I create), I used a border strip to ground my design and I used various Sn@p cards and Sn@p cuts to layer behind my photo.  These cards not only make great title and journaling spots, but the are so easy to layer behind your photos.  

You can see I snuck in another one of the fun stamps from the border at the top of my page.

A few sprinkles scattered throughout my page (You can see a fun tip here, http://www.simplestories.com/blog/autumn  for placement.) were the final touches.

I hope you were inspired to pull out your collections and just play, make them fit and just enjoy creating!

Supplies

Hi Paper Crafters! Nichol here today with two new projects showcasing the gorgeous new Legacy Collection. The rich colors and antique-style collection lends itself perfectly to scrapbooking those heritage photos we have sitting in shoe boxes. Don't feel like you're limited to only heritage layouts, though. This collection would also make stunning pages for those guys in our lives, scrapbooking a European vacation or combine elements with other collections to make one-of-a-kind designs for any theme!

For my layout share today, I created a page around a very favorite heritage family photo that my mom had printed for me. It's always been a favorite photo and I absolutely love how the Legacy Collection perfectly compliments it.

To create my page I first spritzed the Dark Wood/Newsprint 12x12 paper with white Mister Huey to add some distressing and let the droplets dry completely.

Next, I layered a 4x6 Legacy Journaling Card under my 4x6 photograph. A transparency frame from The Story of Us Collection worked perfectly with the design of my page and dressed up the photograph. I printed the date on a Legacy label sticker and placed it near the bottom of the photo. I tucked a couple of tab stickers along the left edge of my photo and adhered the layered piece in the upper left quadrant of my page.

Next to my photograph I layered a couple of the 4x4 journaling cards, distressing the edges of the cards with my fingernail. I added some string to the Legacy tag stickers and stapled them to the left corner of the layered 4x4 cards and added a phrase sticker near the bottom before adhering the embellished cards to the top right quadrant of my page. I tucked a tab sticker under the top edge of the cards and added Legacy Enamel Dots and a clip to finish this square.

In the lower left quadrant of the design I layered two 3x3 journaling cards on a 4x4 journaling card, distressing the edges with my fingernail. I added a phrase sticker, enamel dots and a mini clip to finish this square.

For the lower right quadrant of my page I layered a few of the 2x2 journaling cards, adhering them in a square. I embellished the squares with buttons, and trims from my scrapbook stash. I die cut a couple of tags from one of the Legacy 4x6 journaling cards and embellished those with buttons, trims and a Legacy sticker tag before securing to one of the 2x2 squares.

Finally I printed my journaling on one of the Legacy 12x12 patterned papers, trimmed it down and attached it to my page as shown.

I love creating layered tags. Whether you use them to embellish scrapbook pages, cards or like me, are attaching them to a pinboard to create a fall inspiration board, tags are a great way to unleash your creativity on a small canvas! I am a big fan of using repetitive designs on my pages and could easily incorporate several of these tags on a scrapbook page when I no longer am displaying them on the pinboard.

I layered lots of the Legacy journaling cards on my tags, finishing the pieces with bits of ribbon, ephemera, washi tapes and other embellishments from my scrap stash. I die cut a butterfly from one of the journaling cards and adhered it to the first tag (top left). I die cut the tag itself from a 4x6 journaling card (top center) before embellishing with ribbon and a wood charm. I trimmed down a 4x4 card for camera tag (top right) and trimmed the 3x4 card from the 12x12 paper to adhere on top. I distressed the edges with my fingernail and "secured" the pieces to my tag with washi tape. A couple of small tags die cut from Legacy 2x2 journaling cards and embellished with a Legacy heart sticker, a phrase sticker and ribbon finish this tag.

I have been obsessed with all this shaker lately so I created a shaker tag by die cutting a leaf shape from one of the 3x4 Legacy journaling cards, adhering a transparency cut to the same size behind the "window", then applying a layer of foam tape, inserting sequins and finishing the shaker by adding another 3x4 card as the backing! A hole punched through the top makes this shaker card an instant tag (bottom left). Some wooden letters, twine and a Legacy word sticker finish the tag.

I attached the "F" Legacy 2x2 journaling card with buttons to a tag wrapped with organza trim and burlap (bottom middle). The wooden clothespin from the DIY Collection works perfectly with this fall themed set of tags. For my last tag (bottom right) I die cut a couple of the journaling cards with banner die cuts and attached them to a tag. I wrapped some ribbon around and tied it in a bow, added a Sweater Weather phrase sticker, metal key and ribbon to finish the tag.

Hello Simple Stories fans!

I'm excited to share this layout with you because it has happy memories for me.  This was during this past summer when my cousin was visiting and it was time for the girls to get together for a Tea party!

My photos had a rather soft tone to them and I decided to use the Hello Baby collection because the colours were just perfect. Yes, I used a baby collection and there is definitely no babies on this layout!  It's a great collection with soft blues, pink and neutral tones as well.

I used my Silhouette Cameo to cut out out the centre design (Lattice) from the Wood Veneer paper and then backed it with some patterned paper.

On the centre section I then cut out the title banner 'It's a lovely day' (a Simple Stories cut file which you can find in the Silhouette Online store).

After adhering my photos in place along the top & bottom edges I adhered some of the cut-out pieces (from the centre) along the sides using foam squares for some added dimension and visual interest.  In the centre of each block I adhered an Enamel Dot from the Hello Baby collection.

Thanks for stopping by.

Supplies

Hi there! Donna here with you today, and I’m really excited about today’s project! I don’t keep a Life Documented album, but something that I’ve always wanted to do is to find the best way to include all the “extra” photos I take each year into our family scrapbooks. You know, the ones that never make it onto layouts. Today I want to share with you the photos and stories that fill in gaps of 2013 using Pocket Pages and Sn@p! Collections:

Even though the idea behind this project was to include my extra photos, I knew that I needed to set limits in order to make it manageable. To start, I decided to use only two Design 3 pocket pages which altogether make 32 slots for photos or journaling/title spots. I knew that to keep the project doable, I wouldn’t be able to include all of our extra photos. When choosing photos from the year I aimed to pick somewhere between 25 and 28.

Part of why I’ve put off this endeavor before was because it seemed too overwhelming. So, I also limited my product choices deciding not to use any embellishments other than stickers, and keeping mainly to using SN@P! Sets already in my stash. I relied most on the Him and Everyday SN@P! Sets, but also used Baby Boy, Family, Christmas, and Summer.

As you’ll see below, I also included two cut-out elements cards from Sea to Shining Sea. I really wanted to include one photo of each of my sons creating our Fourth of July flag cake. They had so much fun doing this, but I never made a scrapbook page to document it.

It feels good to finally have that story recorded!

I don’t take tons and tons of photographs, but I take enough that they can’t all make it onto layouts. Plus, some of them, while cute, aren’t all that great. Perhaps they are too dark, or maybe out of focus. Sometimes, there really isn’t enough story there to warrant an entire page. This third page includes a few photos that fit into those categories.

Also, while I don’t create my layouts in chronological order, I do store them in my albums in chronological order. So when I created this fill-in-the-gaps project, I decided to put the photos in order as the year progressed. So you’ll see on this last page photos from fall, Halloween, and Christmas.

These two pocket pages will be placed behind the year-in review spread I make each year (which is more a highlights layout of photos already scrapbooked) and together they will give a more complete picture of our year.

Some more close-ups of the pages, here is a birthday photo of Sam:

As it says in the journaling, we had a very simple celebration at home. And because Sam did not like the cupcakes, I really didn’t have all that many photos of him, well, celebrating. But again, it is good to finally have at least one photo in our albums documenting that special day.

The photo below is from our first day of school last year.

In this case, I actually do have more photos from the day and have meant to scrapbook them, but have just never got around to doing it. I may go back and to do that, but if I don’t, I’ll at least have some record of that day.

Finally, in some cases there really isn’t much to say about a photo. I do get bored sometimes scrapbooking the same types of stories over-and-over again each year. So for instance, while I love our annual trip to the pumpkin patch, carving the pumpkins isn’t really my thing. But I did take a photo of the boys cleaning their pumpkins last year:

The photo is pretty self-explanatory, but I decided to embellish it simply with some stickers from the new Frankie and Friends collection.

With all the product choices available to scrapbookers today it is so easy to get overwhelmed with options. Add to that feeling the multitude of photos that we take in the course of the year. As I worked on this project I kept repeating to myself, keep it simple! In the end, my project fulfills my goals, and it is in keeping with my style.

The best part of completing this project is that my boys saw the pages on our kitchen table as I was photographing them, and they were so happy to see all our memories from the previous year in one place. This project was easy, fun, doable, and honestly, fast too. Thanks for stopping by and letting me share it with you!

Supplies

Hi everyone! Allison here with a Life Documented layout using the Sweater Weather collection and I've got a new sketch to share with you that combines traditional scrapbooking with the SN@P! Pocket Pages.

You can download the full sketch with measurements and placements here.

The left side of the sketch follows a traditional style of scrapbooking design and the right side uses the SN@P! Pocket Page, Design 6.  Here is my layout based on the sketch:

I can't believe that Fall is right around the corner! There is a part of me that is sad that Summer is coming to an end but I can't deny that I'm really looking forward to Fall! One of my favorite things in the Fall is our annual trip to the pumpkin patch. We pack so many great activities into one day and it's always a fantastic time. Sweater Weather was such a terrific complement for documenting our trip to the pumpkin patch.

The 4x12" Elements strip is always one of my favorites to use in every Simple Stories collection. Not only do I love the designs on them but also how easy it is to use them on a layout and add a design around/on them.

For this layout I used the 4x12" strip with the Autumn quote as my title and added some detail photos on the left edge of it.

Along the bottom of the 4x12" strip I used a row of photos. You could easily adjust this part of the sketch to fit what you want to use and could around with different photos sizes.

I added an little extra photo to some of the empty space on the 6x4" photo. A lot of times I like to sneak in photos where I can! I take so many pictures that I try to use as many I can!

On the right page I used a combination of cards and photos with the SN@P! Pocket Page, Design 6

I added a few extra details, like the "love" and heart pieces, to some of the photos.

On this picture I added a little cluster of hearts and the "family" piece to the edge of the photo. I also added some detail stitching to the largest heart. I love the sweater look to that heart!

On the "together" card I added a few sweater hearts cut from patterned paper and added a few stitched lines over them.

I'm using the 12x12 SN@P! faux leather album in black for all of my Life Documented layouts. I love the quality of the faux leather and the pretty accent stitching! I also used the 12x12 SN@P! Pocket Pages, Design 6 from the Variety Pack. I love how many great designs and options you get with the Variety Pack!

Pages