April 2015 Blog Posts

Congratulations to Diane Fleming - the random lucky winner of the Paisleys and Polka Dots Enchanted mini book kit!

This mini is absolutely awesome. It truly is "Enchanted". This would be perfect for my granddaughters. Thank you so much for an opportunity to win.


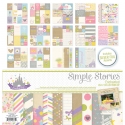
Hi everyone, it's Audrey, and today I have a couple of thank you cards to share with you, made with the beautiful I AM... collection.

AudreyPettit-IAm-GratefulCard

I absolutely adore the script font of this beautiful wood veneer sentiment, and wanted to make it the focal point of my first card. Love the large size and how it takes center stage in this simple card design. I decided to alter the wood veneer a bit, to make it stand out even more. And once I did, I got me thinking of other ways to highlight the wood veneer embellishments. So for both my cards today, I decided to really focus on these fun accent pieces, and show you some different things you can do with them.

AudreyPettit-IAm-GratefulCard2

The Wood Veneers are beautiful in their natural state, but are also super easy to alter and embellish to create your own unique embellishments. The "grateful" sentiment piece used here was colored with a Worn Lipstick Distress Marker, which was a perfect match for one of the striped 4x6 SN@P cards from the collection. It only took a minute to color, and I love how the sentiment really pops off the card now, especially layered against a bit of black paper from the 6x6 Paper Pad.

AudreyPettit-IAm-GratefulCard3

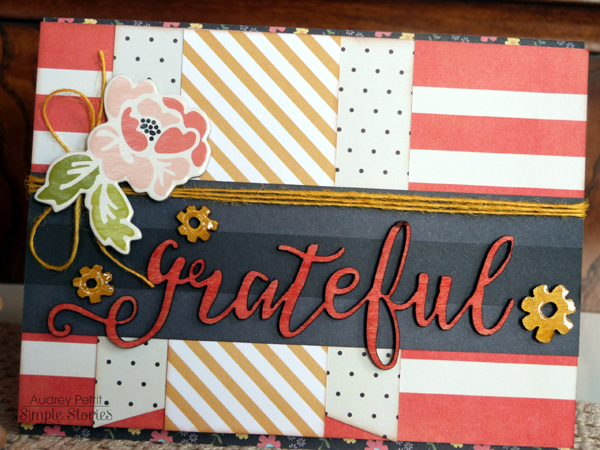
A smaller 3x4 SN@P Card and papers from the 6x6 pad make up the base of the card. I wrapped the card with yellow twine and added a chipboard flower to the bow. Then to help frame the focal sentiment, I added a few small flowers from the Wood Veneers, this time colored with markers and given a coat of Glossy Accents. Love how the wood finish looks with all that shine.

My second card also features lots of the Wood Veneer accents, along with layers of pretty papers from the 6x6 Paper Pad.

AudreyPettit-IAm-ThankfulCard2

This time I used both markers and ink pads to apply color to the arrow, bird, and hearts, and you can see a bit of the difference if you look closely. The arrow, hearts, and the legs of the bird were colored directly with a marker, and you may notice the color is deeper and richer on those areas. I used an ink blending tool to apply Distress Inks to the bird's body. It's definitely a softer look by applying color this way, but it's a great way to blend different colors without harsh lines.

AudreyPettit-IAm-ThankfulCard3

Once my wood pieces were colored, they were all coated with embossing ink and heat set with clear embossing powder. It's not quite as glassy as the glossy accents, but a wonderful shiny finish and visual texture, still. Hope I've given you some fun ideas for using the adorable I Am Wood Veneers on your next card projects! Enjoy! 

Supplies

Hey there!  It’s Vicki here with a peek at a 6x8 SN@P! album I put together for a workshop I taught last weekend.  When the Life Documented Planner and Scrapbook Lines were revealed I knew I had to create a project that would marry the two together!  I absolutely adore the rainbow of colors in this line and it was so much fun to work with!!!  Take a look at what I came up with…
 
 
This project is an album that will house one year of memories!  It is over 125 pages!
 
Here is a closer look at the cover…
 
 
I stenciled the cover with Distress Ink and added a 4x6 card, a diecut camera and some stickers and button.  I like to add a nice wide ribbon to my 6x8 SN@P! albums.
 
 
This project utilized the Monthly Dividers from the Life Documented Planner collection.  They were perfect for splitting up the sections in my book.  Here is an Upcycling idea for this years planner…keep the divider pages and turn it into an album next year!
 
This album is full of pockets, flaps and flip outs.  Here are a few photos of the inside pages….


When you build your next SN@P! album, cut some of your 3x4 cards in half to create pockets, make side flaps and layered pockets, too!  This Life Documented line works really well with elements from the Daily Grind collection if you have hoarded that line like I have!
 
That’s it for me today!  Thanks for letting me share a little glance at this Year in Review 6x8 SN@P! album I put together.  I hope it inspires you to look at some of the planner products in a different light.

Supplies

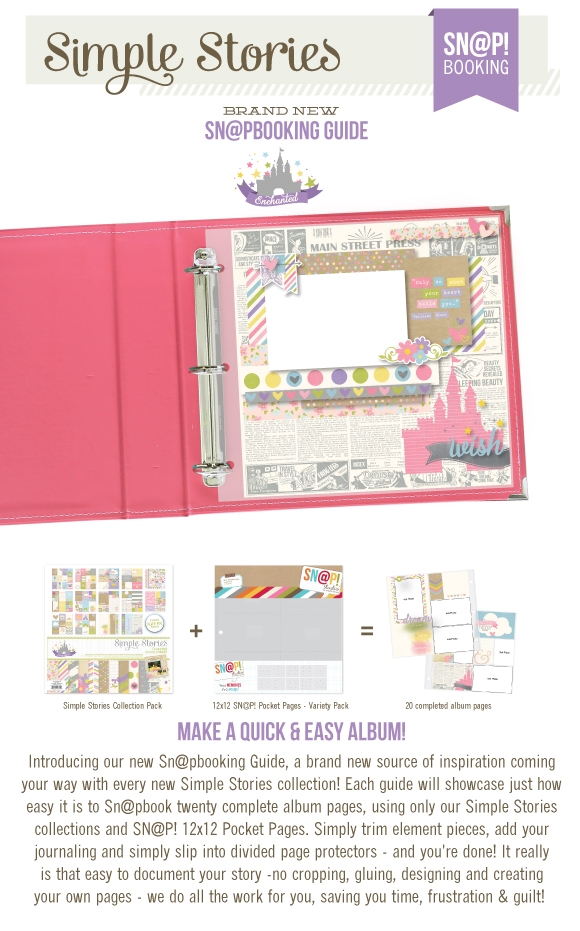
Click here to download the Enchanted SN@PBOOKING Guide!  Visit the Project Downloads area of our website for more free downloads!

Hi everybody ! It's Mindi here with you today sharing some pocket pages documenting my week 5 of 2015. I am using the new Fresh SN@P! Pack
 
 
This new Fresh SN@P! Pack is full of great cards and bits & pieces. It's perfect for documenting those everyday moments. 
 
I started my title card by cutting out the arrow from one of the 2x2 square cards in the pack. I added the "week" stamp after I had printed my dates on the card and the number 5. I finished it up with a few embellishments here and there. 
 
 
My pockets really started coming together as I played around with the misc. paper embellishments from the kit. I added a few to some photos and even cut up another 2x2 card to add a title to my journaling card. 


I have to say that this particular card might just be my favorite ! I knew immediately what story that I was going to tell with it. This week I caught all my family members, and yes even myself, playing on an electronic device ! And I'm so glad that I snapped some photos to go along with it ! I think we can all relate to this fun card, am I right ?!! 
 
To make the title for this card I used the word family directly from the silhouette store here. I love the look of the word! 
 
 
Let's move onto the second page now. 
 
This today card is another one of my favorites. I think it is perfect for lots of journaling, which is what i did. I surprised the kids with some new sidewalk chalk to play with outside. I added some embellishments to the bottom. When I am planning out my journaling cards I love to leave room for embellishments, that part makes it personalized. 
 
 
To finish off my second page I got busy playing around with some more of the bits & pieces. The possibilities are endless, so go for it!  The circle journaling card in particular - I thought it would be fun to group all the circle pieces together on one card. 


You don't need to look further than the SN@P! Packs for lots of fun cards and embellishments to add to your pocket pages. These packs are all color coordinated to make documenting your life effortless. Now I encourage you to go forth and get those memories and stories scrapped ! 
Hi everyone!
 
Teri here, and I'm excited to share with you some cards I created with Simple Stories' new Happy SN@P! Pack!  With Simple Stories' SN@P! Packs, creating a lot of cards easily is... well... a snap!  They come with a generous assortment of SN@P! cards , squares and Bits & Pieces die-cuts. Because of that you can put a lot of coordinating projects together quickly! I just love that!
 
 
To save time and to keep the supplies I used to make my cards to a minimum, I deviated a little from a standard size card. Instead of making standard A2 sized cards, my cards are each 4" x 5 1/4". I find that size accommodates the size of the SN@P! Cards nicely.
 
 
I decorated the base of this first card with a large 4x6 SN@P! card. 
 
 
Then I added a few die-cuts. To give the flowers a little extra dimension, I added a smaller flower on top of the pink one. I love that extra pop.
 
For this card, I layered four squares together to make one big rectangle panel to add the die-cuts to. 


I created the background for my Enjoy card by cutting up two 4x6 SN@P! Cards.
 
 
To give the card a more personalized touch, I added the heart die-cuts, as well as half of a circle die-cut. I also poked a hole through one of the hearts and brought a little twine through it, tying a bow in the front of the card. Twine is a great to way a little extra "umph" to a card without a lot expense or bulk.
 
 
I applied some of the same design tactics in making my "You Make Me Happy" card. 
 
 
I again created the background by cutting up two large 4x6 SN@P! Cards. And then I added some die-cuts and twine to the card.
 
 
For this last card, I used a 4x6 SN@P! Card as my background paper. And then I added a 3x4 SN@P! Card to it. I love that layered look.
 
 
I finished the card off with a couple die-cuts, enamel dots and that butterfly square!
 
 
I plan to give these card as a set as a gift to a one of my friends. And to really make it gift-worthy, I also put together a matching frame.
 
 
I just used a standard size frame that would fit a 4x6 picture.  I removed the glass and put a 4x6 SN@P! Card inside it. Then I chose a 3x4 SN@P! Card with some inspiring words. I added a few die-cuts and enamel dots. To make the die-cuts really stand out, I used foam tape to adhere them to the frame.
 
 
Pretty fun, huh?
 
Well, thanks for stopping by today! I'll see you again soon!

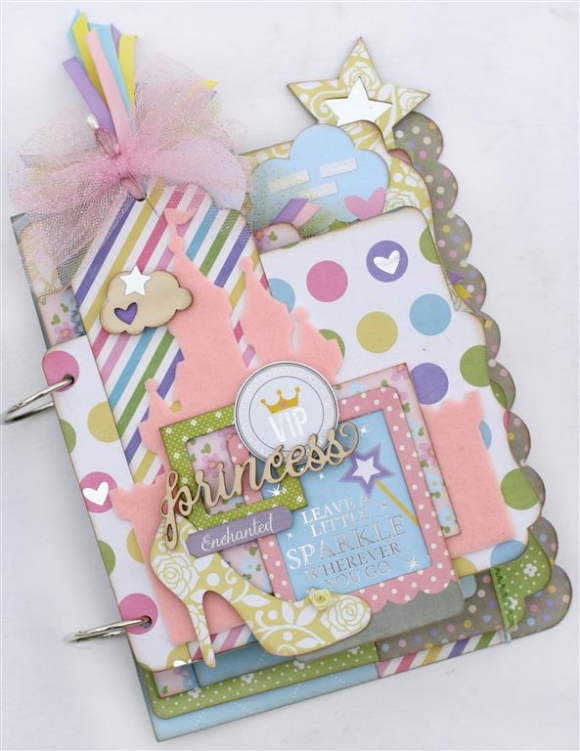
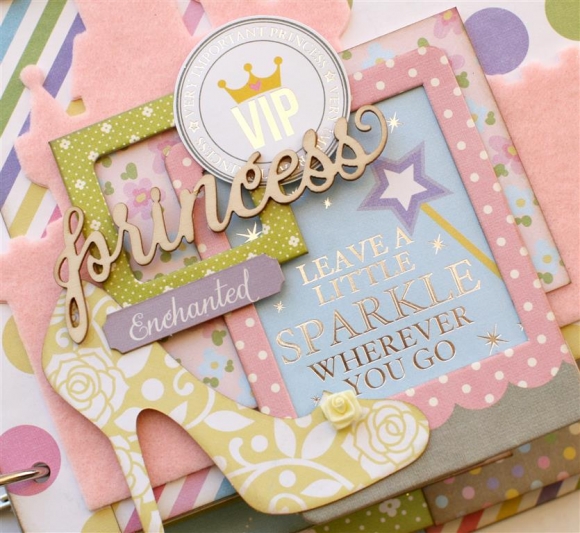
Howdy friends!  If you've been a Simple Stories blog follower for a while, you may recall a designer named Julie Johnson that we've featured a few times and her AMAZING mini book kits through her company Paisleys and Polka Dots.  Julie has created another amazing kit, this time with our Enchanted collection; even better, she's offered us a kit to give away to one of our random lucky readers!

Paisleys and Polka Dots offers unique mini album, layout, DIY, and card kits.  Maybe you find yourself in need of some inspiration, you are too busy and need something quick and easy, or you just can’t figure out those cutting instructions from a pre-designed kit.  Paisleys and Polka Dots takes the guess work out of designing, so they are perfect for beginners, but also detailed enough for the seasoned scrapper to appreciate. All kits are pre-cut and packaged by page, so there is no more guessing what goes where.  Their kits are also perfect for crops; grab a few of your tools and supplies and you are good to go.  New kits are released at the beginning of each month and there is no subscription to join, so you choose only the kits you like. 

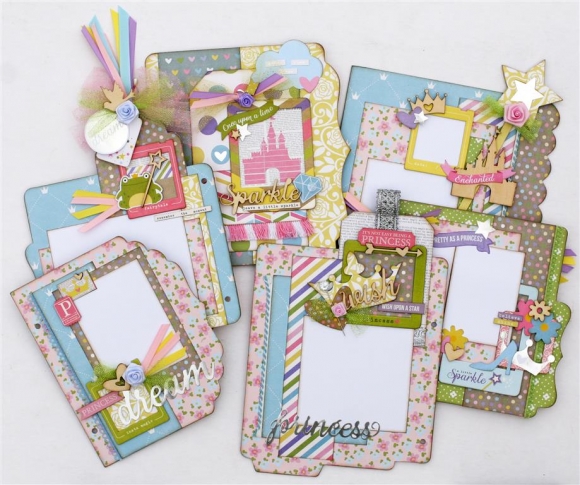
Here are a few pictures of the completed mini book from her Enchanted kit - 

If you'd like to win one of these amazing kits from Julie, leave a comment on this blog post by end of day Tuesday, April 14th by midnight mountain time and we'll pick and announce the random lucky winner here on the blog on Wednesday.  Good luck!!

Visit Paisleys and Polka Dots at www.paisleysandpolkadots.com  and on their blog at www.luv2createscraps.typepad.com/paisleysandpolkadots for more information about their kits!

Supplies

Hi everyone! Allison here with a layout using the Say Cheese II collection. I’ve also got a new sketch to share with you that combines traditional scrapbooking design with the SN@P! Pocket Pages.
 
 
You can download the full sketch with measurements and placements here.
 
The left side of the sketch features a more traditional style of layout design while the right side uses the SN@P! Pocket Page, Design 6.
 
Here is my layout based on the sketch.
 
 
While at Disneyworld a few years ago on Spring Break we had a blast exploring all the magical wonder that you can in that place. My youngest, Jackson, was a Mickey fanatic so it was amazing to get to experience all that we did and see how happy he was there. At the end of our second day both of my boys were hot and exhausted from walking around and what better cure for that than cooling down with a Mickey shaped ice cream. They made a huge mess of themselves but it was the perfect end to our two day Disney visit. 
 
Say Cheese, both the original and II, were instant favorites for me. (There’s a slight chance that I’ve said that about every Simple Stories collection!) Vacation albums can sometimes be intimidating because usually you have a huge amount of photos to get into an album. I used the original Say Cheese collection to document one of our Disney trips and I was blown away at how quickly those pages went together and in an album! 
 
 
I love the gold foil details on some of the papers in the collection! I used the Never Grow Up sheet for my background and used the gold “magic” become part of my title.
 
 
I simply added “messy” to complete the title and then added a few Enamel Dots to help accent the stars on the paper.
 
 
I also used some of the Enamel Dots and the Bradz to create Mickey ears to fit with the theme of my layout.
 
 
I used the Chipboard frames for two smaller photos and then added some stars, enamel dots, and the arrows. I really liked how the large variety of frames in the package!
 
 
To help tie the journaling into the rest of the page, I added some of the same star, Enamel Dots, and Bradz embellishments. 
 
 
For the right page I used a combination of photos and cards with Pocket Page, Design 6. 
 
 
I fell in love with the photo overlays in this collection! I used three of them on just this one layout! To accent the 3x4 black, star card I added some Enamel Dots and stickers.
 
 
On the “wish upon a star” card I added two rows of small 1” photos. I printed them so that they would kind of look like film strips. I used more Enamel dots, Bradz, and an arrow to add some detail the card. 
 
 
I used another one of the chipboard frames with a smaller photo on the 3x4 card and a photo overlay on the photo next to it. 
 
I hope you enjoy using the new sketch! 

Supplies

Pages