May 2017 Blog Posts

Jeanne here today with some colorful cards for the emoji lover in your life!  Let’s face it.. who doesn’t love emoji’s?  I don’t care if you're 15 or 50 they’re a fun way to spice up your text messages and social media!  The Emoji Love collection from Simple Stories is total eye candy.. bright colors, net lingo, and super fun emoji icons will have you smiling from ear to ear.

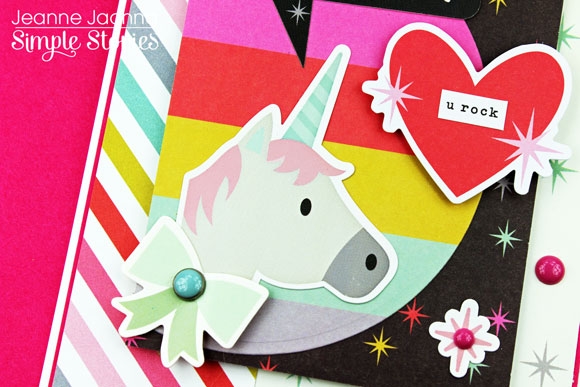
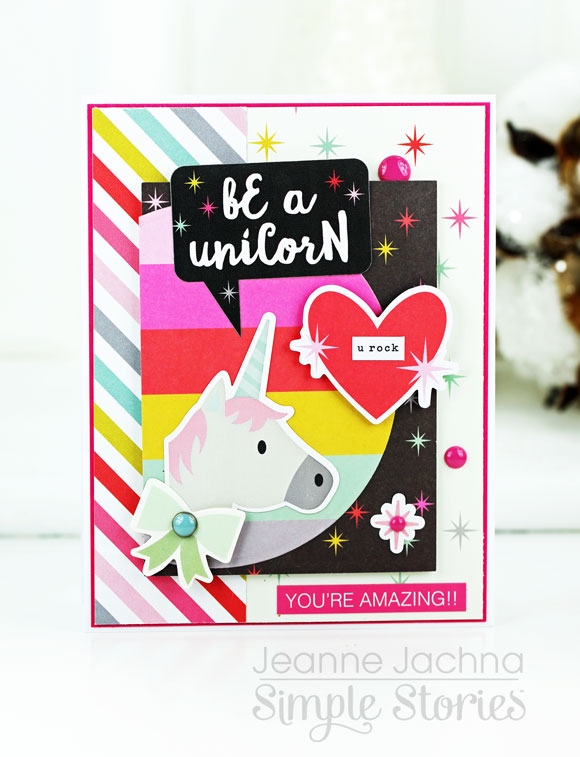
Need a special card for a tween or teen in your life?  You can’t go wrong with the unicorn emoji.  This one says “Be a Unicorn”!  Unicorns are unique and rare.. this sends a positive message that you don’t have to be the same as everyone else.  Be different.  Just be you! 

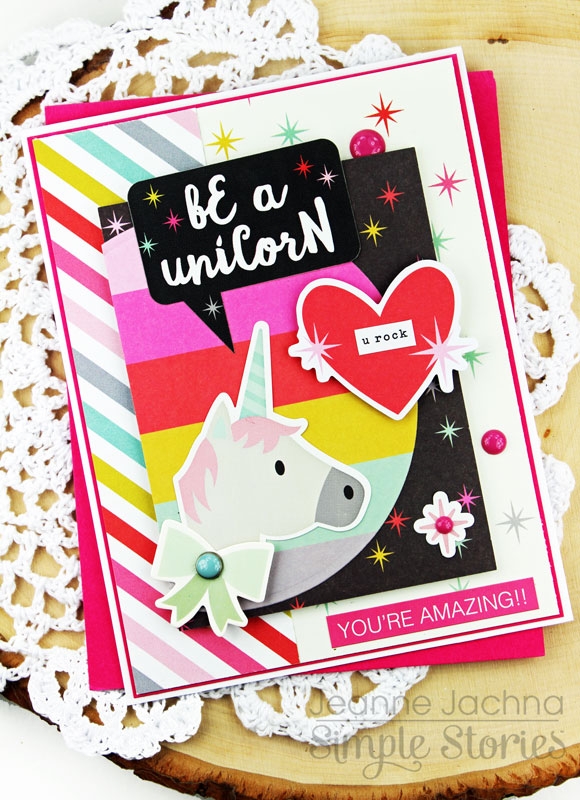
I started out with a background of papers from the Emoji Love 6x8” pad.  Rainbow stripes on one side, and stars on the other.

For my focal point I selected two 3x4 cards from the Emoji Love SN@P! Pack.    The pack contains 112 double sided cards to choose from.  I cut the a rainbow stripe card with a circle die (you can also use a punch) to create a semi circle, and layered it over another card with a star print on black. 

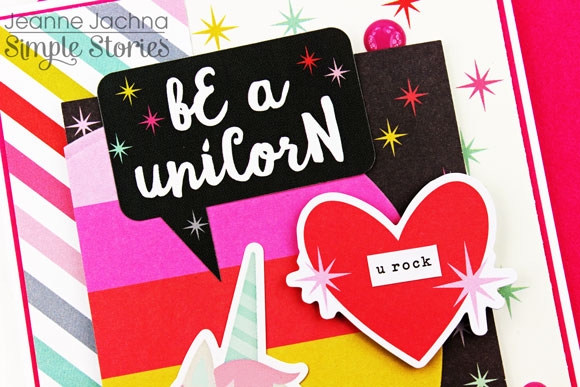
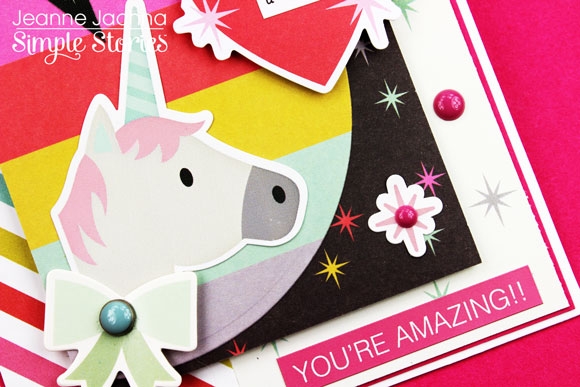
I topped that with a unicorn and “be a unicorn speech bubble” sticker from the Combo Sticker.  This sticker sheet can be purchased individually and is also included in the 12” paper pack.   The sparkle heart is a die cut from the Bits and Pieces pack.  I added a word sticker over the heart that says u rock, and another sticker from the Combo Sheet along the bottom.  The finishing touches for me are always a bit of bling.. a decorative brad bow and some shiny color matched enamel dots.

_________________________________

One of the girls in a mood over a guy?  Maybe a bad break up?  I’ve seen them come and go.. and the one thing that sets things right is a girls night out!  This would be a great card for my teenager.  I’d tuck in some movie tickets and a little extra cash for some junk food.   How about a birthday card for a best friend? 

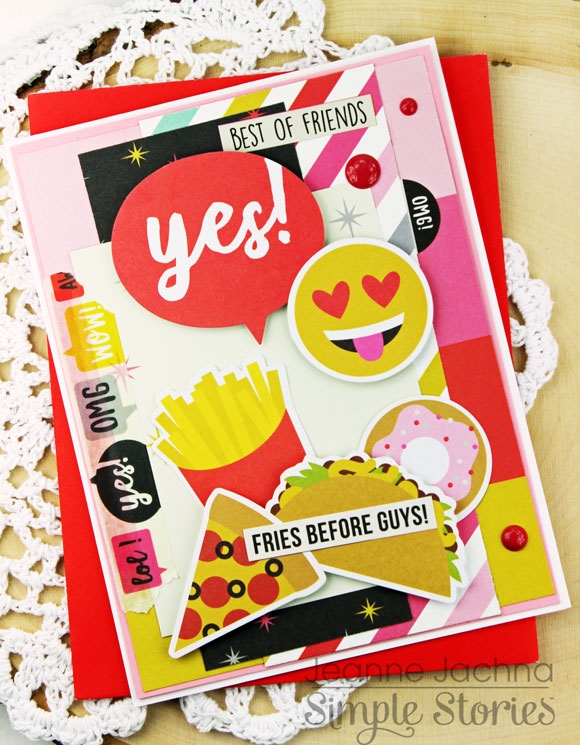
I mixed more Emoji Love papers for the background before adding a 3x4 SN@P! card.  I added a bit of Expressions Washi Tape along the edge to look like it’s holding the card in place.

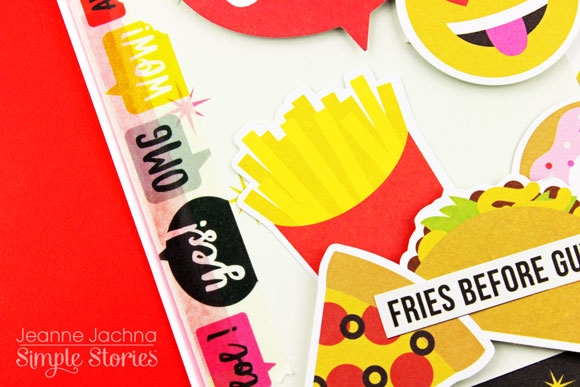
All the cool food shapes are from the Bits and Pieces pack.  There are 47 die cut ready to work with pieces you have lots to choose from. 

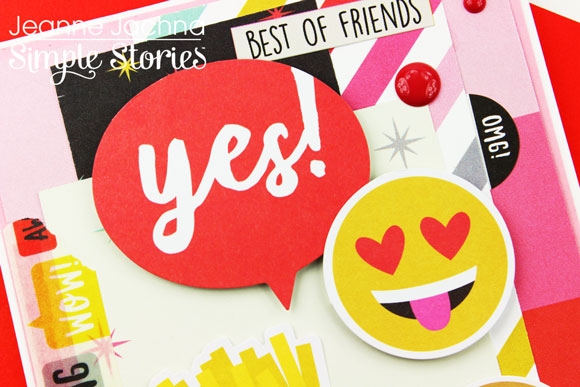
Even the “Yes! word bubble and heart eyed emoji are from the Bits and Pieces!  

I love the round tab stickers in the 4x6 sticker pack.  They make great accents.  Can you spy the little “OMG” one on my card? 

SaveSave

Supplies

Do you ever just find yourself looking at a page or project you have created and wonder ‘Where did that come from?!’   More often than not, something totally awesome will come of something that’s driving you nuts! I had ideas about how the two pages I am going to share with you today were going to turn out, and let me tell you, they were nothing like this! Not that I’m complaining, lol. I love them both now, but they didn’t start out that way ;)
 
 
Nope #whatever! is a fun page about my sometimes crazy kids, who are getting to an age where they just won’t ‘smile nicely’ for the camera anymore! I pleaded with them to stand at the edge of beautiful Lake Somerset, but they just mucked around. The photos that came of it were so funny though and the #Whatever simple set was the perfect match for them.
 
 
Now this next part might sound a bit nuts, but ever since I first saw the front ‘info’ page of the Reset Girl Simple Basics Kit, I just wanted to use it on a project. I LOVE how all the papers displayed next to each other… it’s such an awesome mix of prints and colours! I trimmed the individual prints down in to strips and attached them to my Instax photos - a perfect fit!
 
 
I put the photos aside and started combining papers and embellishments to create my page. I put everything together and…. hated the outcome. #ohdear! So I pulled it apart, keeping the major elements to re-use and chose a new sheet of paper - yummy Mint Hashgrid by the Reset Girl. I added elements on top and still thought it was all a bit too busy, so I decided to give it all a good wash with some white acrylic paint. Instantly, it looked way better! I continued to place the rest of the elements on the page and I was so happy with the outcome.
 
 
For my title, I have combined a hand-cut word ’NOPE' from the 4x6 #Whatever elements and some stickers from the Cardstock sticker sheet.
 
 
Those little snippets of paper from the info page peek out on either side of my central band. As you can see in the image above, I cut them in half (or thereabouts) so they would ‘stretch’ further. This is a great technique if you want to make stickers go further too
 
 
It was all quite spontaneous once I got fully going, so I wasn’t too fussed if things weren’t perfect. There are no rules in this glorious creative pastime of ours, so go with what makes your heart happy!
 
 
A bit of journalling and (all-time faves) enamel dots, finish off the page.
 
 
Don’t be afraid to make a change if something isn’t working for you or if you just feel like having a go. It can be so rewarding!
 
________________________________
 
L❤︎VE
 
In stark contrast, this next page is super ‘clean’. I do feel myself wondering on a small level if it maybe needs a few more ‘things’, but you know what? It’s OK if it’s not the ‘normal’!
 
 
I had plans for a big photo and it just didn’t do it for me, so I went about trimming my photo down and cutting out some areas of a sheet of Love & Adore ‘With all my Heart’. I removed a teensy bit extra from the grid, so our faces could show through a bit better. It’s one of only a handful of really lovely photos of my DH and I, and I like the way it sits up in that left hand corner, sending the flow of the page down diagonally.
 
 
What followed was a hearty explosion! I’ve grabbed all the hearts I could find, in the stickers and ephemera in this collection and placed them in the matching area on the paper. I use this technique often and have kept the same colours together because I think this is a great way to add interest while keeping it less ‘busy’.
 
 
Here you can see how the heart cardstock stickers look different to the more matte finish of the heart stickers from the 4x6 Sticker Sheets and how both of those look different again to the heart chipboard and die cut shapes.
 
 
Another little detail on this page is the semi-circular shapes I have added at various intervals along the black grid line. I simply snipped the coloured part off from the little circle stickers in the 4x6 Sticker Sheets and used them in the co-ordinating coloured areas.
 
 
The last little touch was this ‘xoxo’ ticket shape from the Bits & Pieces pack. I’ve adhered it to the page with a wave-like shape, so it looks like a little fabric tag. I think it adds a bit of a 'stitched' feel to it. As if it could be something you would pick up at a market or something. Am I sounding crazy? Lol, maybe.
 
 
The point to both of these pages is just go where the moment is taking you. Have fun, enjoy the process and get those fingers busy!
 
Til next time!


Supplies

Hello everyone, my name is Kelly and I am one of the new Carpe Diem creative team members! I live in the Netherlands and I am totally addicted to decorating my planners, you can find me on Instagram as createplannernl.  For this first blog post I decided to show you how I setup my Ivory Carpe Diem planner using the Domestic Bliss collection.

The first thing I do when I am setting up a new planner is place all the supplies I want to use (such as clips, washi, bits and pieces, stickers, paper, etc) around me so I can see everything. I have a little cupcakeholder which is perfect to put in all the smaller items so you can easily look through them and see them. Now the fun can begin!

I always start by filling the front pockets, this is one of the things I love about these planners. I try to use all the different patterns of the collection by adding journaling cards, clips and bits and pieces. The enamel dots fit perfectly in one of the pockets, so I decided to put them in there.

I added a little sample of the washitapes in one of the pockets. I cut down a little card and wrapped the washitape a few times arround it. It’s very easy to create and this way you always have your washi on hand when you take your planner with you.

In the large side pocket I like to store a few stickersheets which I want to use in my planner. For decoration I used a borderpunch to create the doily lace effect on the scrapbook paper in the back.

Now that the front pockets are done, it’s time to start on a front dashboard! Since this is the first thing you will see when you open the planner, this is very important. I selected a scrapbook paper, cut it down to size and punched some holes. Because in my opinion the front pockets are very busy, I decided to keep the front dashboard a little bit more calm this time. I used the letters ‘Hello’ and three 4x4 cards from the SN@P pack.

With the Domestic Bliss A5 planner insert set you get six dividers, which you can customize to your own needs by choosing your own tab headers. I chose these sections: Planning, Important, Budget, Chores, To do and Menus.

After the first divider I put some undated monthly and weekly plannerpages. I decorated the ‘This month’ page with some washi and stickers and wrote down a few important appointments and goals.

In the ‘Bits and pieces’ pack I found four little button pieces and I immediately figured they would look amazing as DIY paperclips. I just glued them on rosegold paperclips and let them dry overnight. This is a fun and easy way to make you own paperclips!

On this blog I wanted to show you how I decorated the first week of May. I always begin with placement of washitape strips, thereafter I write down important appointments and then I decorate blank spaces with stickers or little cards.

I love using pocket pages in my planners and because I don’t have a tool to make them myself, I decided to use a pocket page that are originally designed for the SN@P albums. I punched four extra holes so it fits the planner perfectly! I selected some 2x2 and 3x4 cards with quotes and patterns to give it a pop of color.

When I setup a planner, I always create a DIY bookmark. I selected one of the scrapbook papers (‘Loads of fun’), cut it down to size and punched six holes. To decorate it I used some pieces and stickers.

I love these ‘to do’ pages and the ‘to do’ bookmark! In the back pocket I put some extra 4x6 cards and clear stickersheets.

Now the setup of this planner is complete, I can start using it every day. I hope I have inspired you today on this blog and see you next month. Have a great day!

Supplies

Pages