July 2018 Blog Posts

Hello Friends! It's Kristine Davidson here today and I'm sharing a layout I recently created using the nice and bright HELLO SUMMER collection. I really enjoy working with nice bright colors and this red with yellow combination screams fun and SUMMER for Me! 

My cousin is currently living in Trinidad and lucky me to have permission to use photos of her and the kids! 

I called this layout BEACH PLEASE because we all want a little sand in our toes! I used a cut file background and cut up individual pieces to create my background. This allowed me to use several papers and really not use that much of a 6x8 sheet. It is also a great way to use some left over pieces and you could also mismatch collections. 

I used some chipboard pieces, stickers and diecuts for my embellishment clusters because that's fun and easy for me to do. I always use the cluster and create different levels with some popdots. Adding some sewing around my cut file also creates a uniform look for me.

I hope you are enjoying your summer adventures and if you manage to stop at a scrapbook store pick up this awesome summer collection! 

Visit us on Social Media - @SimpleStories_ and @KristineDavidson 

Happy Summer!

Supplies

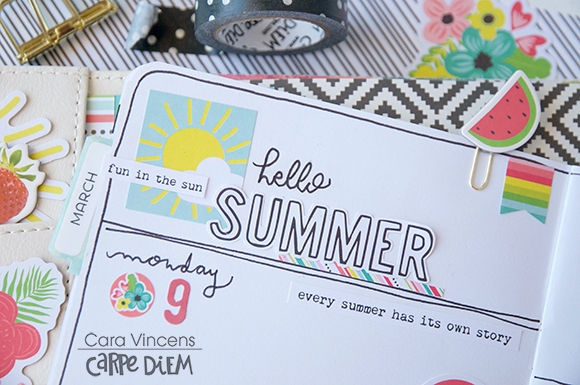
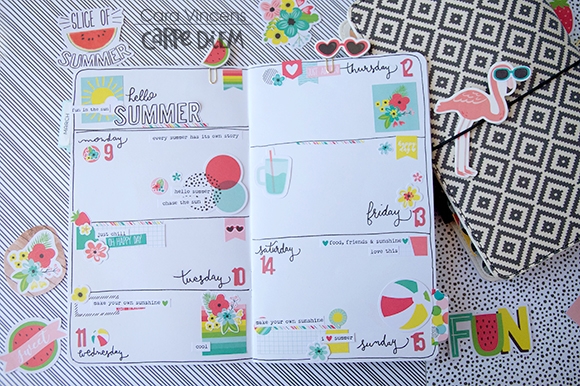
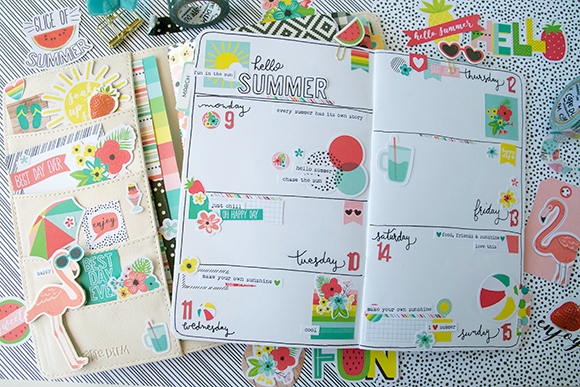
 You may have fewer activities and tasks to plan in the summer months but that doesn’t mean that you have to skimp on the decorations. "Hello, my name is Cara and I’m completely addicted to fun, happy, colourful planner products!” I think I added as many pretty products as would fit on this weekly spread! 

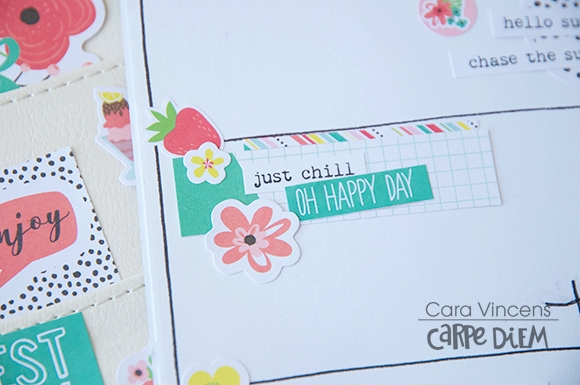
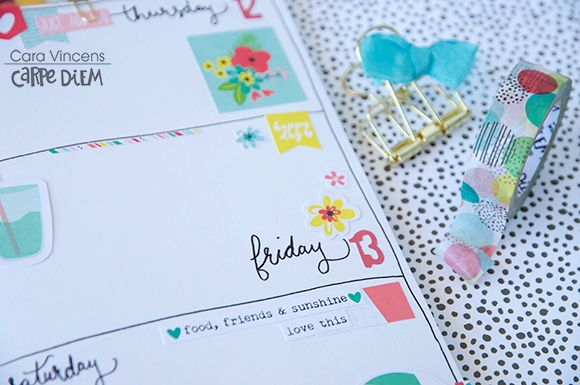
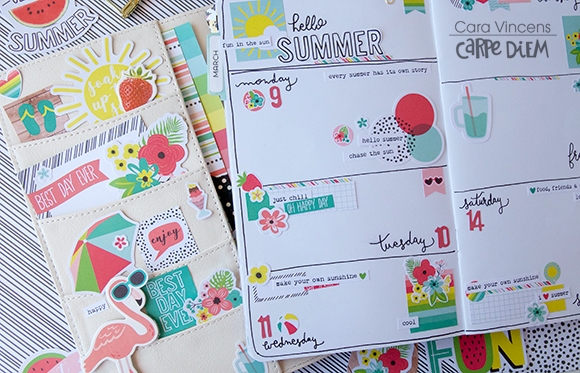
I started with blank pages and drew in the week and added the days. Planning with little stickers allows you to layer and layer, so you can add lots without cluttering the pages.  Here I’ve layered stickers and die cuts and I even trimmed down that striped sticker so that it’s a small strip and I cut up the rest and spread it around the spread.

You can see another one here at the top of Friday’s box. Eep, next week Friday is the 13th! Are you superstitious or is Friday the 13th just another day for you? I tend to have good luck, actually! Speaking of numbers, I used the Numbers Sticker Tablet for the dates. I love how the 2 digit numbers are already put together for you, it makes life that much simpler.

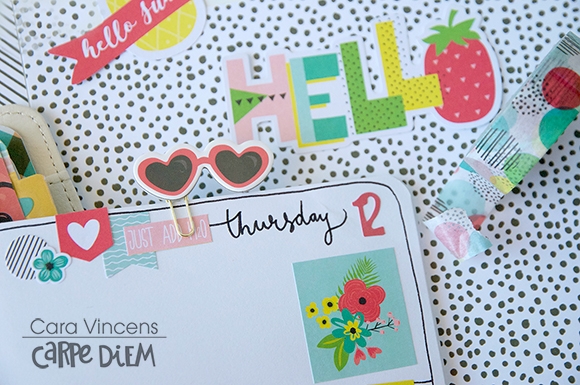
I LOVE making planner clips with the chipboard pieces, so I made one with the cute heart shaped sunglasses and also with the flamingo. The clip for the flamingo is actually stuck to the back of it’s body so the clips it hidden by it’s legs! I also gave it a cool pair of sunglasses, too!

The pockets were fun to decorate. I grabbed some of my favourites from the collection and tucked them all in. I layered some of the patterned papers from the 6x8 book and tucked them in the long pocket in the back, added a bit of wash and a flower die cut and done!

If you’d like to see my process video, keep an eye on my YouTube channel, it’ll be out on Monday! 

Keep cool and have a great summer’s day. Happy planning!

Supplies

FAB

Hello Simple Stories fans!

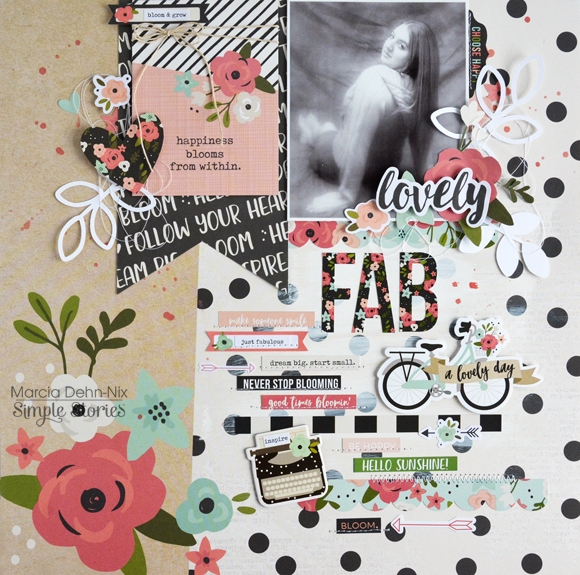
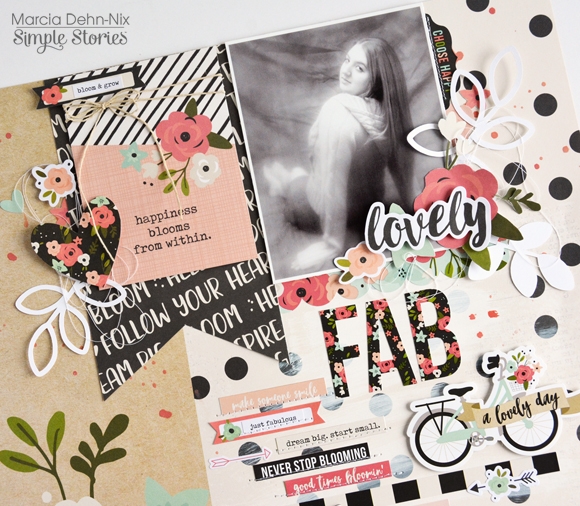
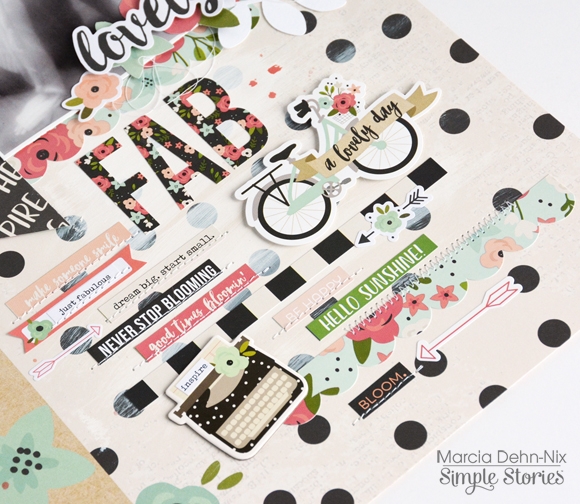
Marcia here today. It's summer and my flower gardens are in full bloom. My beautiful flowers inspired me to play with the new Bloom collection. This gorgeous collection is full of bright colorful flowers with an awesome color palette. The black pattern papers make those colorful flowers seem even more vibrant. With all the flowers, it's perfect for scrapping girls of any age.

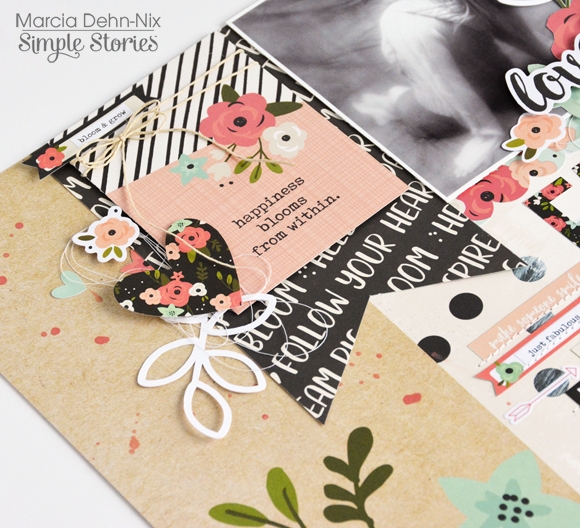
I arranged my black and white photo at the top of my layout along with a 3x4 journal card layered over one of the black pattern papers. The base of my layout is theEvery Day Countspattern paper. I love the two-toned paper and the mixed patterns.

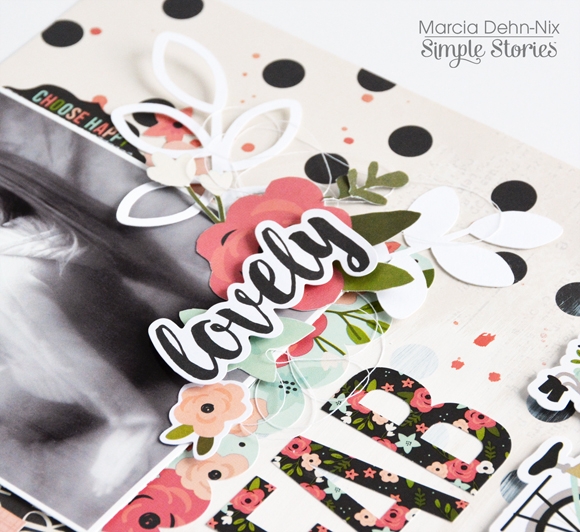
To create my embellishment clusters, I layered lots of bits and pieces die cuts, stickers, chipboard, and even some fussy cut flowers.

The FAB stickers make an eye catching title with those pretty flowers on the black background.

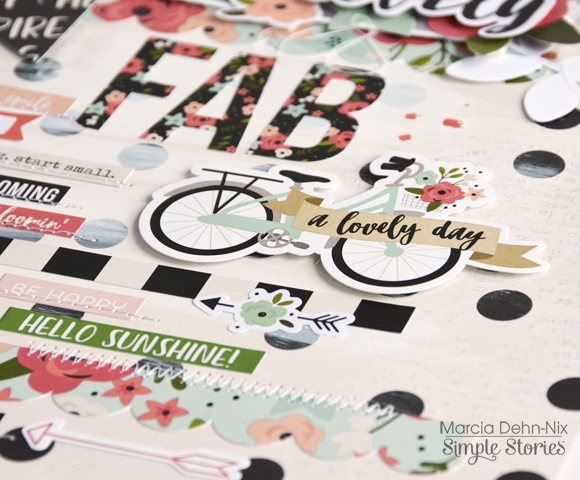
On the lower half of my layout, I went crazy with phrase stickers mixed in with border stickers from the combo sticker sheet. Machine stitching adds some texture and some foam tape and chipboard adds dimension for interest.

I love all the encouraging phrases and it was fun to combine them all on this layout. I hope you are all having an awesome summer and taking time to smell those beautiful flowers.

Thanks for stopping by, have a great week!

Supplies

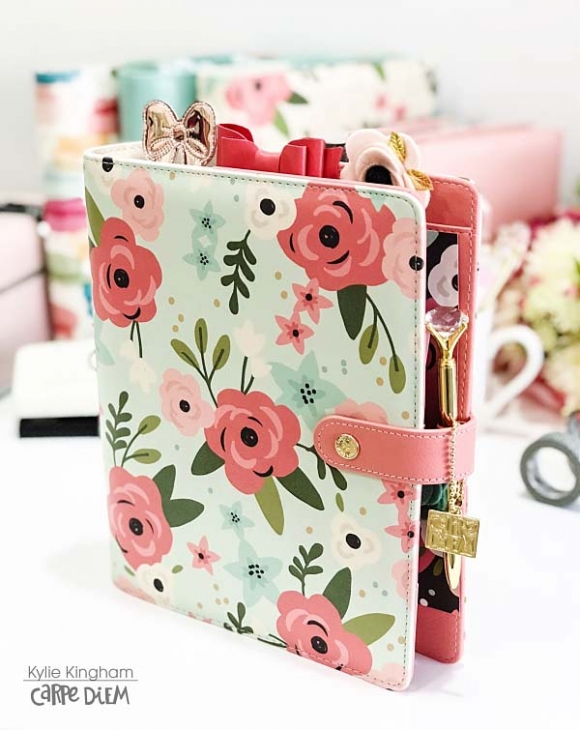
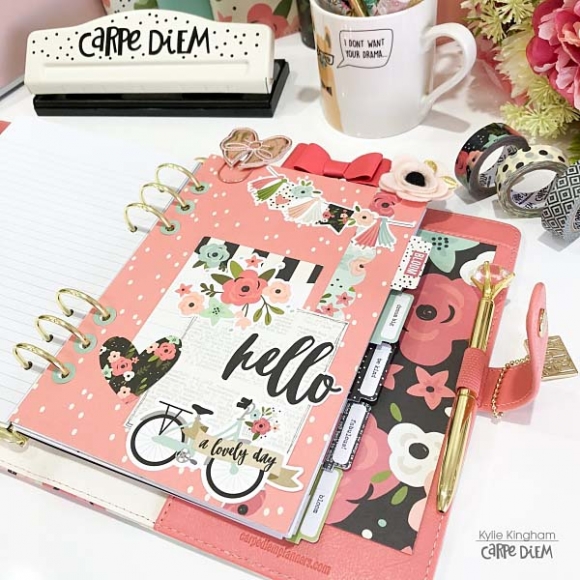
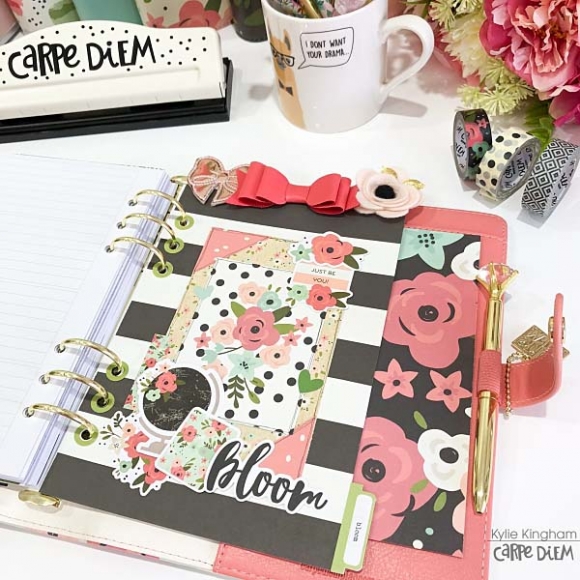
Hello friends! It’s Kylie with you today and I’m sharing how I created some pretty planner dashboard/dividers in my new A5, Mint Blossom planner. I’m totally in love with this planner and love the large blossoms featured on its cover.

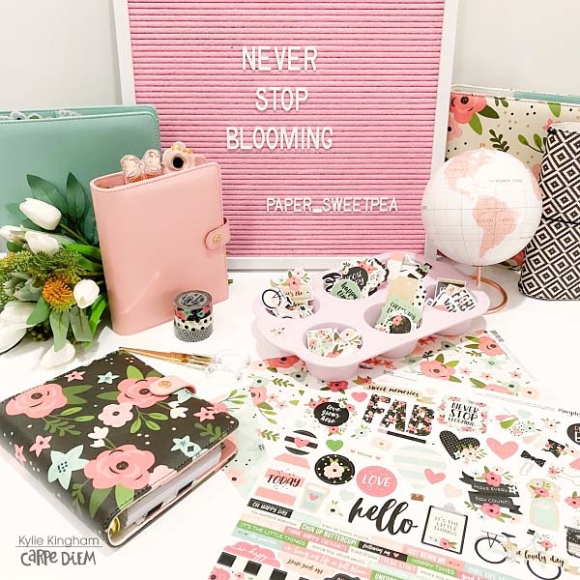
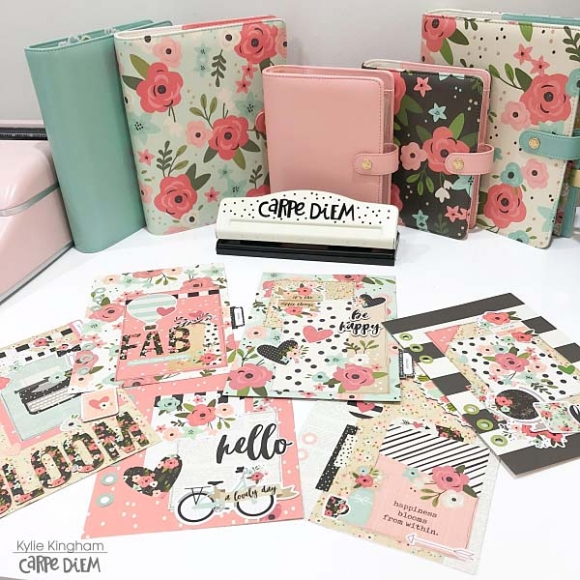
I thought the new ‘BLOOM’ collection by Simple Stories would be the perfect match for this planner, but loved how it also looked with my cutesy Black Blossom personal planner too! Decisions, decisions! In the end I did decide on my A5…..

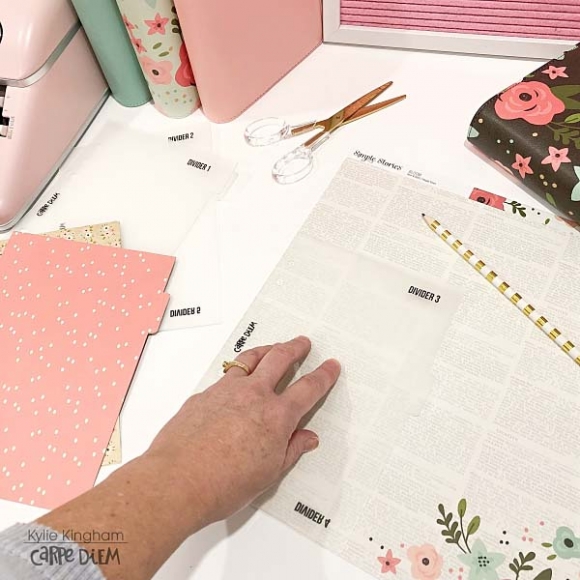
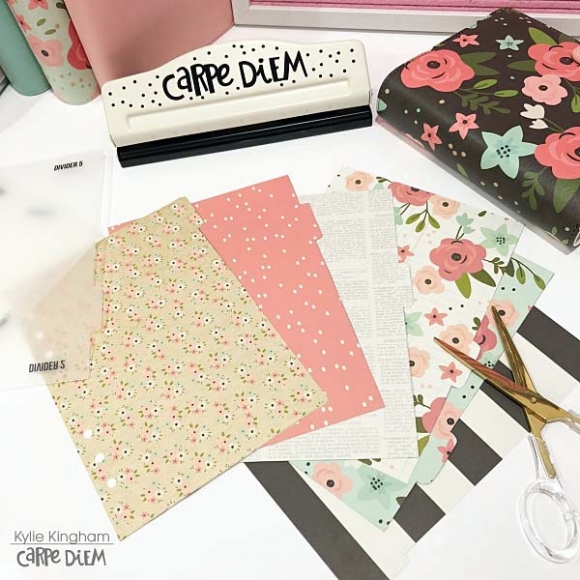
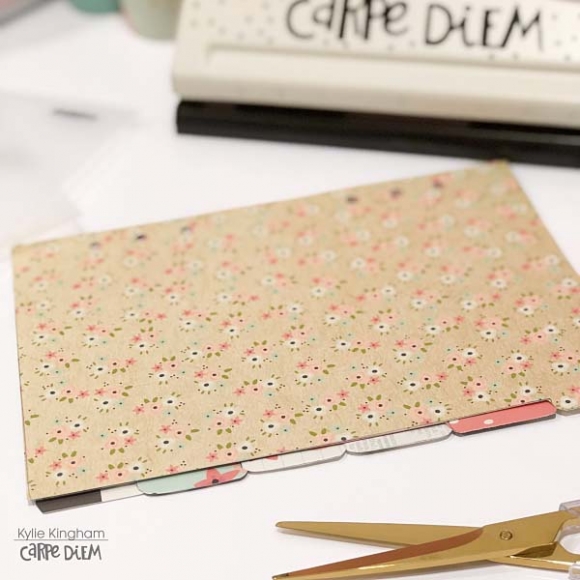
I really wanted to personalise my planner by making my own dashboards. This process was made SO easy thanks to the A5 divider templates. There are 3 tabbed templates, however by flipping them and using the back side of them enables you to make 6 tabbed dividers if you wish! So simple, all I did was trace them and cut them out.

The templates also have the ring holes marked that you can punch out, however I used my trusty Carpe Diem planner punch. Once I had them all cut out I loved seeing all the different paper combos of the BLOOM collection stacked in my dividers.

FUN FACT: Did you know the divider templates are also made in the personal planner size??

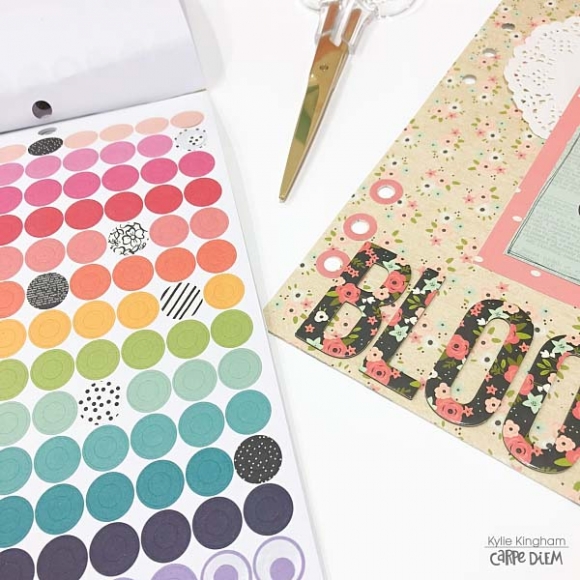
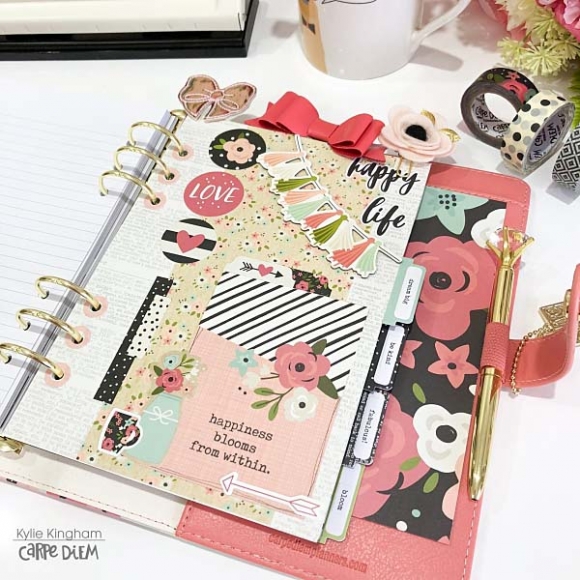
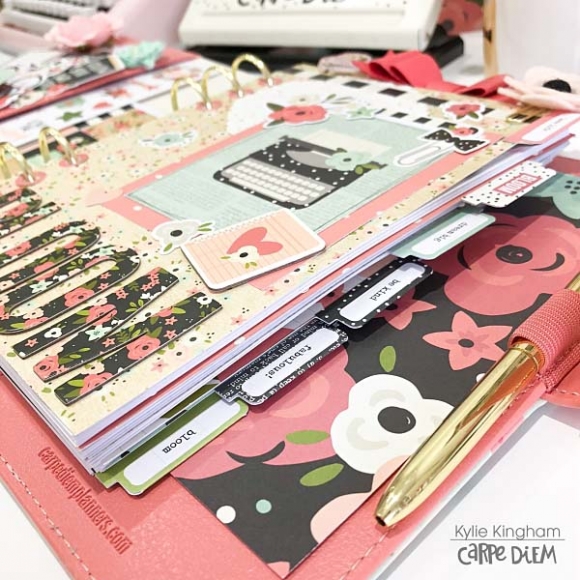
To reinforce the ring holes and to make them look super pretty, I added some reinforcement stickers from the Tabs Sticker Tablet. There was loads of colours to choose from. I also added some of the adhesive tabs over my dashboard tabs for contrast.

The really fun part was layering the many beautiful papers, die cuts and stickers to each dashboard. Once finished the colours looked amazing!

 Here’s a little look inside my planner once I had added each dashboard. In the inside cover I always love to add some favourite embellishments and the big pockets are perfect for storing sticker sheets.

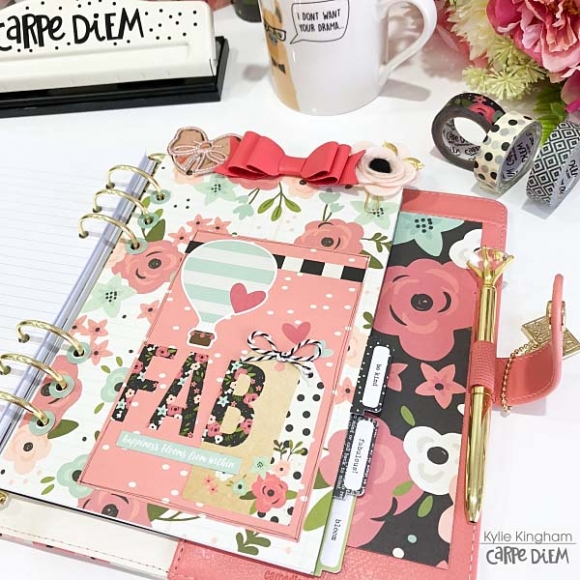
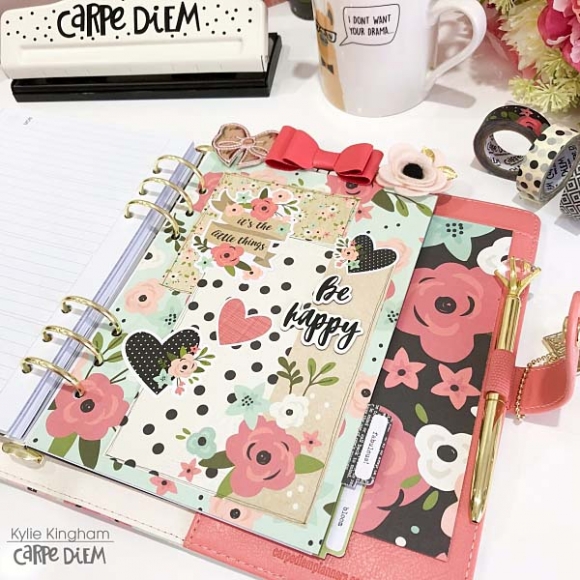
Whilst using the same collection each divider is completely different-

I added some fun phrase words to each tab sticker from the 6 x 4 Sticker sheets.This will allow me to reuse my dashboards again and again as an added feature to my future planning.

I think my last divider is my favourite……

I hope you give creating your own dividers and dashboards a try, they add a lovely element to your planner.

Thanks for checking out my latest project today!

Until next time,

Kylie. xo

Supplies

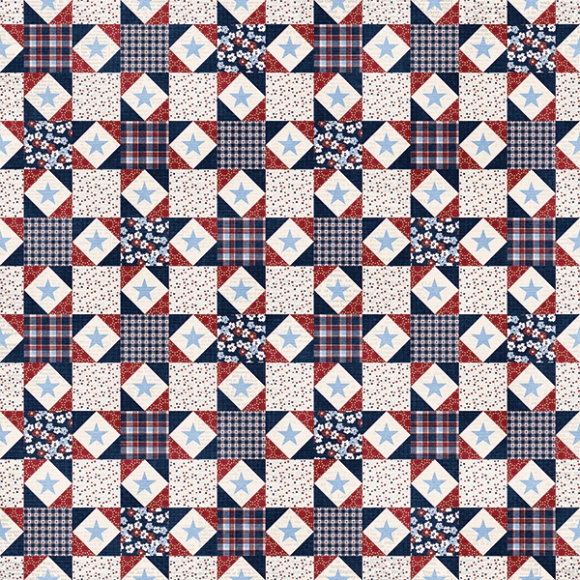
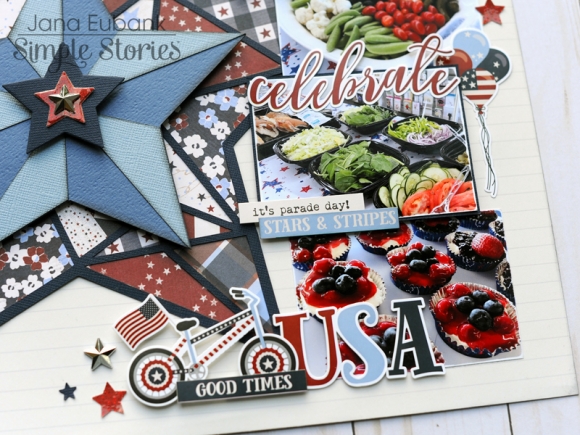
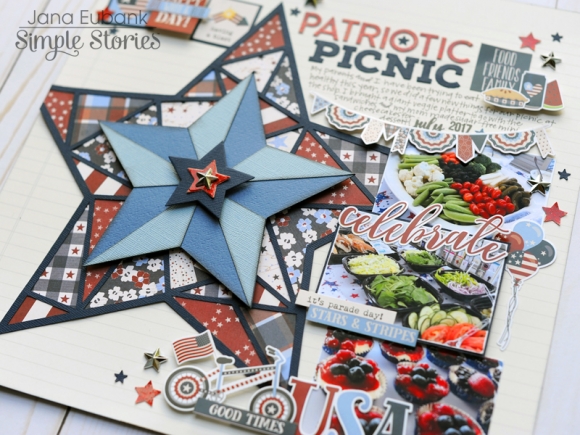
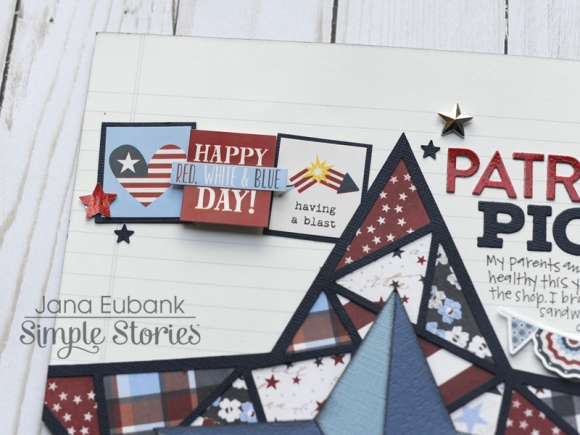
Hello, everyone! Jana Eubank here today with a layout using the Hometown USA collection. I was inspired by the quilt-like pattern of the All American paper to create a large pieced star on my page.

Take a look at my page below!

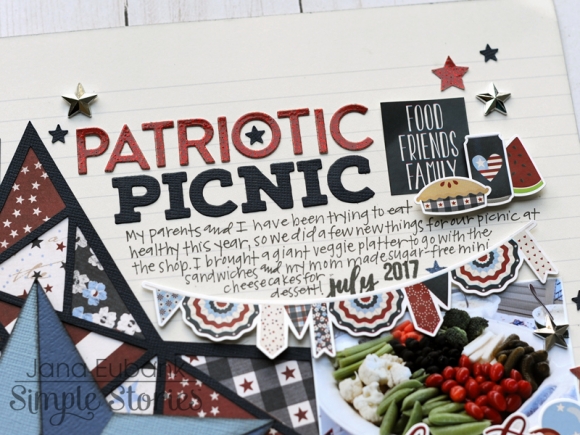
I cut the geometric star with my Silhoeutte Cameo machine and then backed each section with various patterned papers. I even utilized the 3x4 and 4x6 cut apart cards of the Elements paper. Next, I created another star from two shades of blue cardstock to layer on top, then decorated the center of this star with two more stars cut from navy cardstock and red glitter cardstock. 

I used a few dies from my stash to die cut my title from navy and red glitter cardstock. I love the picnic elements included on thie 6x12 Sticker sheet because they were perfect to emphasize the topic of my page ... our family's patriotic picnic! 

The new "It's a Date" stamps are perfect for adding the date to your scrapbook pages, like I did here.

I placed my photos on top of one another to the right of the star and then accented them with more of the adorable stickers from the 6x12 Sticker Sheet. I especially love the bike and those festive balloons!

The page was feeling visually heavy on the right side, so to balance it out I mimicked the three photos by lining up three of the square stickers from the sticker sheet in the top left corner of the page. I matted a couple of them with navy cardstock to tie them in with the navy cardstock of the large star.

Celebrating the Fourth of July is one of my favorite things about summer! I love getting together with family, laughing, watching parades, and eating good food. How do you celebrate the holiday? Have you scrapbooked it? If not, be sure to take photos of your favorite things about your celebration and make a page to document your traditions. You will be so glad that you did!

Supplies

Summer Fun in my Traveler’s Notebook

Happy Summer, Planner Friends! Rachel here, and I am sharing my Summer set-up using the Hello Summer Collection in my Traveler’s Notebook. I’m more of a fall and winter girl myself, but this collection has me all excited about that summertime life. A traveler’s notebook is perfect for the summer months. I find myself having less scheduled activities and, instead, wanting more room for lists and journaling. With a month long trip coming up in July, this planner is perfect for documenting all the things while I am away from home. I mean, it is a traveler’s notebook, after all!

Whenever I set up a new planner, I like to start with the pockets. For this setup, I used the chipboard stickers from the collection. To keep them in place, I peeled off a portion of the backing and adhere them inside the pockets. Later, I added in some of the scraps from the paper I used on my notebook covers with a few of the bits and pieces. I have a clear pvc pocket in my notebook that I decorated like a dashboard with a trimmed down 12x12 paper and a card from the 4x6 elements paper.

Do you have an extra notebook with a cover that doesn’t match your planner set-up? Cover it up! I pulled out a Carpe Diem Insert from my stash and covered the front and back cover with my favorite paper from this collection. I used washi to reinforce the spine and another 4x6 element sheet with combo stickers to decorate the cover. Since I will use this insert all summer, I don’t mind having a summer themed cover. If you don’t want a permanently decorated insert, you can always make an insert cover that folds around the insert, like a book jacket! 

The June Simple Stories Printable  is so cute and matched perfect with the Hello Summer Collection! I used this adorable summer graphic to cover the inside of my insert. On the other page, I have the monthly overview from the printable adhered to one of the notebook pages.

I love that the printable comes with a dated monthly calendar that I can stick right into my insert. I decorated the calendar pages with some of the 4x6 stickers and washi. My monthly page is typically pretty empty until the end of the month. I like to go back and fill in highlights when the month is over for memory keeping.

See that? That’s right! We are going to Spain! We will be staying in a Mediterranean beach town, so this sticker seemed pretty applicable!

This insert comes with lined pages, which is perfect for making your own weekly planner pages. I “eyeballed” the daily columns and used the 4x6 Photo crop to draw my lines. Remember that paper I used on the cover? I used scraps of the paper along the bottom of the page to create a faux washi effect.

Do you have something on your planner pages you want to remain private? Or, do you just want more room to decorate? Try making a flip up! For mine, I used paper from the 6x8 paper pad and adhered just the top of the paper to the insert and decorated with a box stickers and a word strip.

The following week, I decided to change up the weekly layout a little bit by having the vertical daily columns go half-way down the page. This allowed me to create a section for lists and some end of the week journaling.

For the month of June, I challenged myself to decorate using mostly the 4x6 sticker pack. Y’all, there are so many stickers on those sheets that even after a month of weekly decorating, I still have stickers left over! I also used a few stickers from the Planner Basics and the Calendar Stickers Tablets. I honestly cannot get enough of the sticker tablets. I can always find a sticker in these tablets to match whatever Simple Stories Collection I am working with.

As I mentioned before, my goal was to stick (haha) to these sticker sheets for my weekly spreads. To make sure I always had them on hand, I performed a little “planner hack” by trimming down a 4x6 pocket page and turning it on its side for sticker storage in my planner. I am not an avid pocket page scrapbooker (I’m learning! ) but I do love using pocket pages for all sorts of things in my planners. Don’t be afraid of the planner hack. Make your supplies work for you!

I hope you enjoyed a look inside my summer planner set-up. I will post more completed pages from this planner throughout the summer on my Instagram, so be sure to check it out!

Supplies

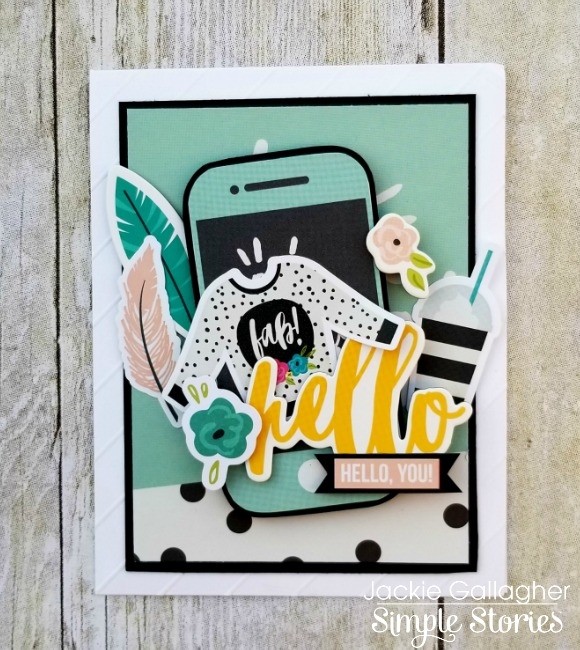
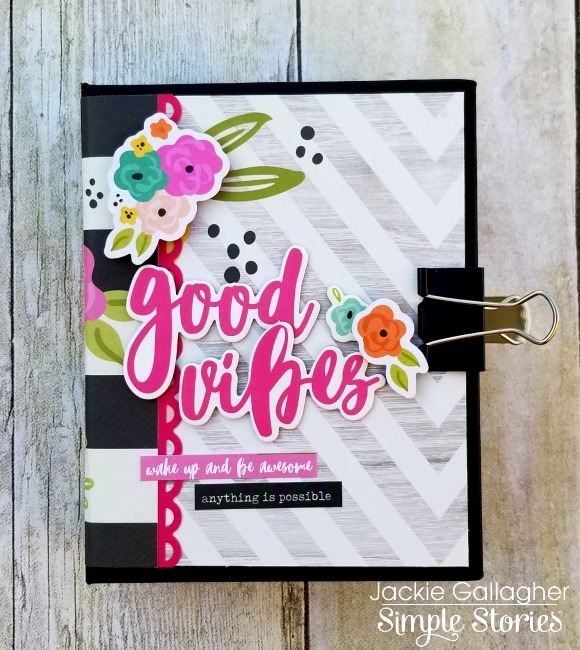
Hello everyone!!  Jackie G here today!!  I am beyond excited to share a fun card and mini album I created for “someone special”!!  I used the fabulous Good Vibes collection to create both these projects.  I just love this collection so much!!  The colors are so fun and vibrant.  I also love the images…coffee, cellphones, fashion and lots more!!  It’s all so amazing!!  So, let’s get started…
This card was really easy to put together.  I let the stickers and bits & pieces from the collection do all the work for me.  To create the diagonal embossed lines on my white card base, I got out my scoreboard and scored at every half inch.  It was very easy and gave my card some “extra” dimension.

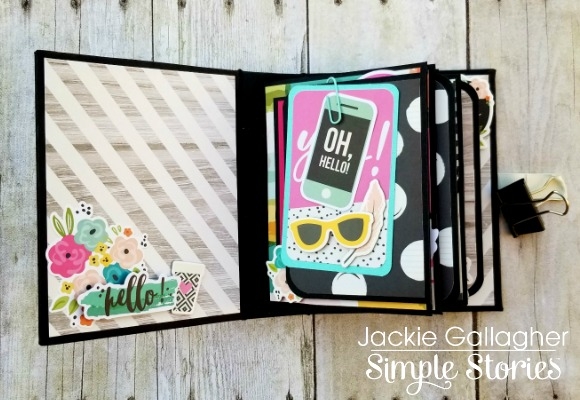
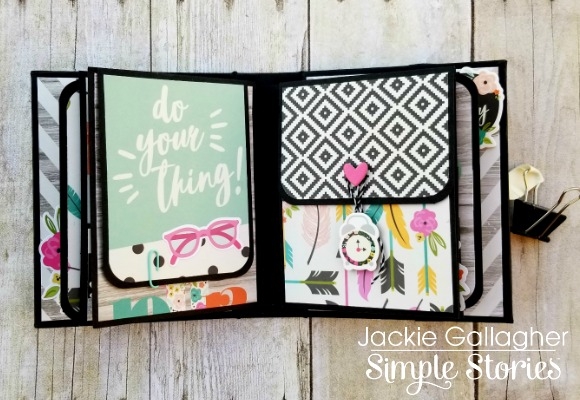
I absolutely love how this mini album turned out!!  Chevron is one of my favorite designs so I knew I wanted to use that paper for my cover.  I loved it so much I ended up using it for the inside cover too!!  To keep my album closed I used a simple binding clip attached to some ribbon.  I tend to scrap chunky so am always needing a sturdy closure.

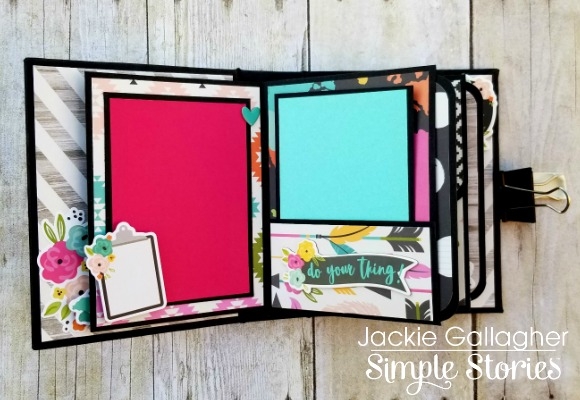
To create the mini album pages I used a tutorial from Ginger over at My Sister’s Scrapper.  You can find her video tutorial HERE.  You get a lot of real estate for only using one sheet of paper!! 

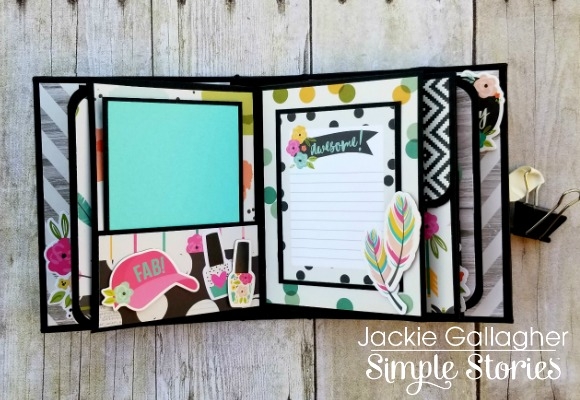
Speaking about real estate, there are lots of pockets, flip-outs and even an accordion pocket to store all those special moments!!  If you would like to see a full walk-through of this mini album and all of the interactive elements head on over to my YouTube channel.

Supplies

Pages