March 2015 Blog Posts

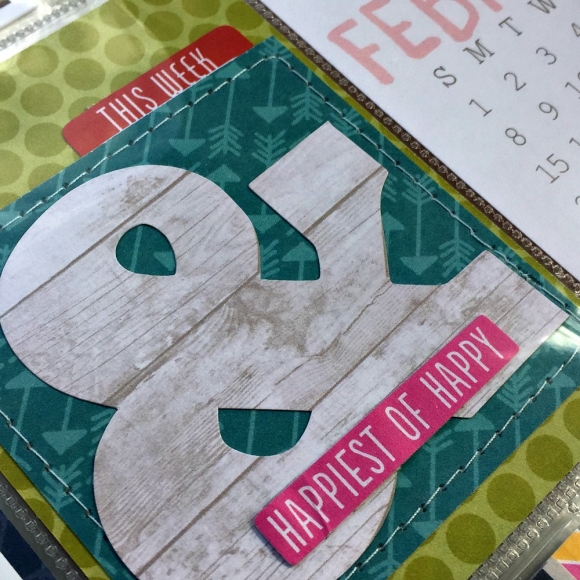
Hello all!  It's Sara here again to show off some of the new digital goods that have hit the digital store!  I have once again embraced the pocket scrapbooking and chosen one of the new SN@P! Sets - I chose to work with the digital Everyday SN@P! Set, and I put it to use on a plain old regular week in my life.  
 
 
This is my third year pocket scrapbooking.  I started using paper products and my whole first year I did with physical product.  My second year, I approached with a more hybrid style - taking digital products and printing them and assembling the little "mini layouts" in each pocket.  This year, I have decided to try my hand at digital pocket scrapbooking.  I have been scrapping traditional 12x12 size digital pages for about eight years now, and it definitely feels more natural to me.  I loved playing with paper but I honestly felt a little lost.  
 
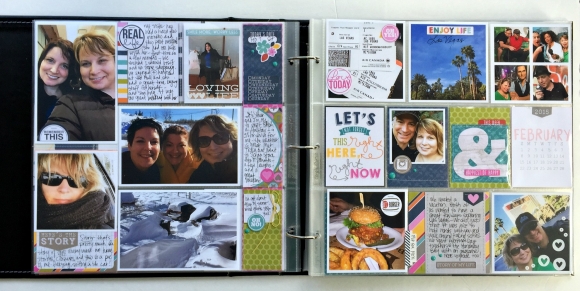
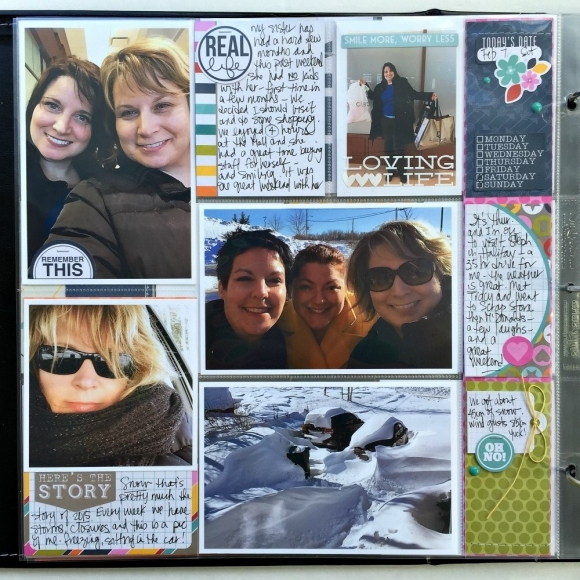
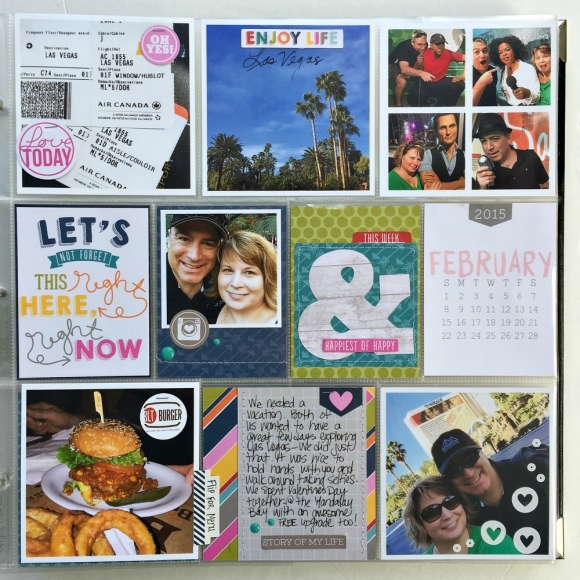
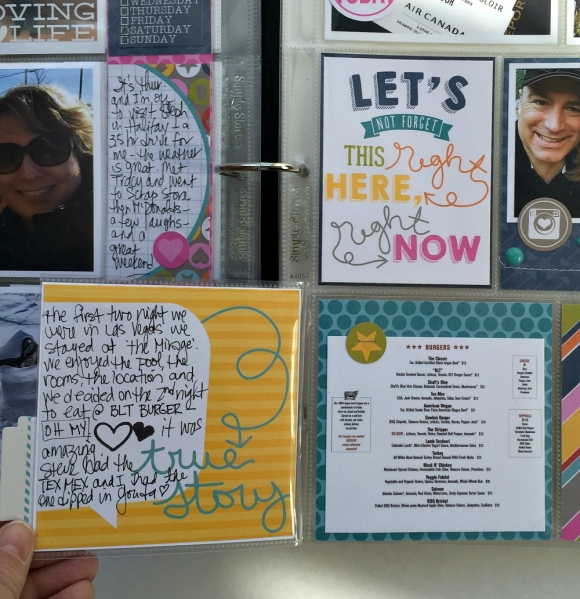
Strangely enough, even within my comfort zone of digital scrapbooking, I have somehow already fallen way behind on my pocket album for this year.  For whatever reason, I just haven't been grabbing my camera as often or even snapping quick shots with my phone.  The 2 pages that I created to document week 3 of this year, I had barely any photos, despite the fact that it included a weekend getaway!  Luckily, this project is about much more than the photos to me, and I have done a fairly good job keeping track of the stories.  The Everyday SN@P Set worked perfectly for this - it was very colorful and with cards and sayings that were general enough to mark a regular week in the life.  I haven't felt super inspired by doing pocket pages so far this year, but having such a huge selection of colors and cards got me moving in the right direction and I am pleased with how my pages turned out!
 
 
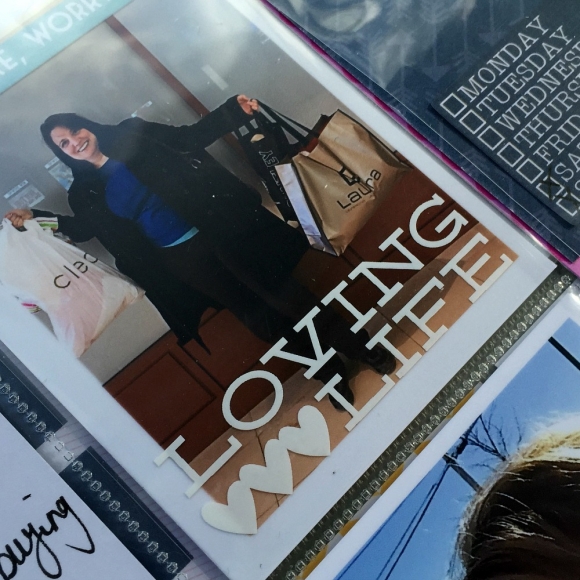
I love to document all of our moments - trivial and important and this week definitely proves that.  I've got everything here from cancelling the diaper subscription (my youngest is finally done with them!) to my latest game addiction - Trivia Crack.  
 
 
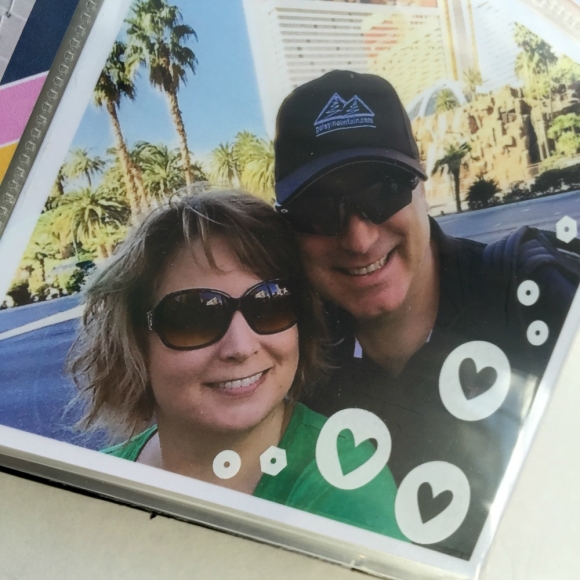
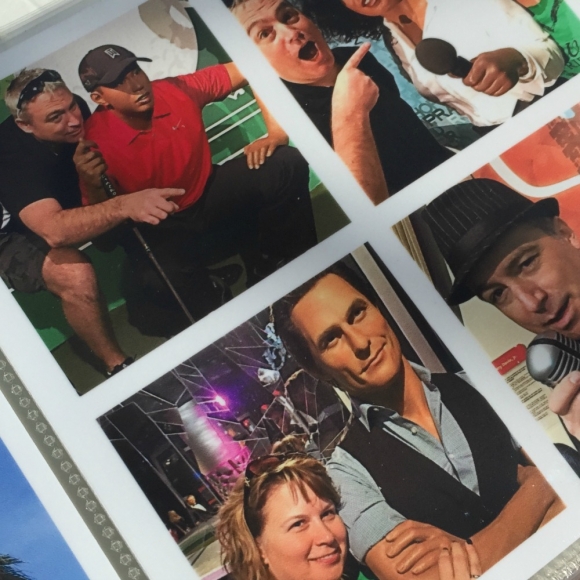
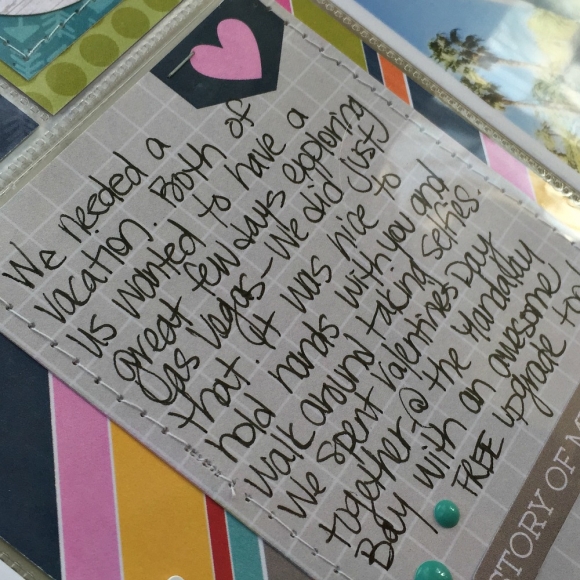
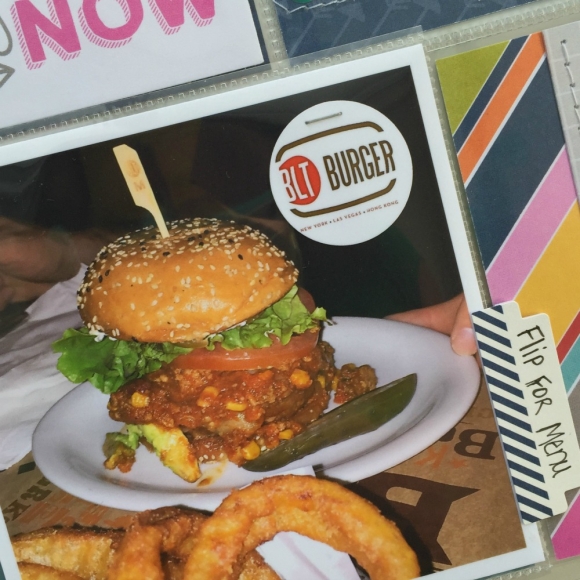
I didn't take many pictures of our weekend hotel stay - I didn't even bring my big camera with me - but I did snap a few with my phone and when I coupled those with the stories I wanted to tell, it filled the page right up!
 
I am excited to get back in the swing of pocket scrapbooking (and maybe even get caught up eventually!).  
 
Have a great day!
Hi everyone! Rebecca Keppel here!  I'm here today to showcase the many facets of the beautiful I AM collection. In my house every family member has albums dedicated solely to them. Then there are family albums that feature photos and stories of multiple people. My kids have amassed MANY albums to themselves. Sadly, my husband and I each only have a couple of albums between us. But with the I AM collection I am beginning to fill up my album! The I AM collection can be very deep and introspective and let you document your most core beliefs and feelings. But it can also be playful. I found that you can use it to make very simple layouts as well as much more complex ones as well. Here is a simple layout.
 
 
Although I used many different pieces from the collection including Clips, patterned paper, stickers, Chipboard Frames, Enamel Dots, and more, it is a relatively simple layout featuring one thing that I am...a soccer mom :)
 
 
I love how the typed stickers fit in so well with my typed journaling. The 'going to be heard sticker' was the perfect touch since my oldest recently told me "not to cheer" lol!
 
 
The chipboard frames are fun for mini photos of course, but my favorite use for them is to house journaling or embellishments.
 
On the flip side, here is a more complicated layout showcasing many things that I am right now...
 
 
This collection makes it so simple to tell your story, to let you define yourself in your layouts and to pass on to future generations little snippets of who you were.


Each of my small circular photos represents one piece of me and the photo is explained by a sticker title like, I am...healthy.


I love the bits of gold foil in this collection and the combination of dimension and texture available with the different embellishments like the chipboard and Bradz.


I hope many of you will also start to fill your own albums using this amazing collection! 


Supplies

Hello Friends! 

It's Kristine with you today and I am here to share a pocket page spread featuring the NEW Fresh SN@P! Pack; it should be available in your Local Scrapbook Store soon!

After a very long winter and a few more weeks of patiently watching the snow melt, I decided to brighten up my February monthly spread by adding tons of bright colors! This Fresh SN@P! Pack is awesome!  Love all those bright pink, yellow, green and blue colors - it really brightens a layout!

I am still creating my album with monthly pages, I honestly don't know how long this will last but I've cut down on photos quite a bit and doing a monthly spread is easier and less time consuming but I am missing the extras, such as movies watched, weather, favorite tunes etc.  So as much as i love the monthly spread, I think i need to add more!

I mixed up my pocket page inserts once again. I do enjoy the variety and less repetition in my album.

The month of February was packed with a shopping trip with my sister, a visit with my best friend Stephanie, a trip to Las Vegas and a major snow storm on the east coast.  My months aren't usually this ' entertaining ' but it makes a spread look pretty cool ! ;-)

I've mentioned before that I enjoy creating my own journal cards. I did for this spread as well. I used a 3x4" card, a square 3x3" and the die cut ampersand (& symbol ). I did some sewing and added more die cuts!  Super cute right?  So easy! Don't be afraid to add your own details to a spread -  it makes it that much more special!

This month I also added some Photo Overlays from the I AM Collection. These are fabulous to add extras on photos. Here is one that I added to my sister's shopping photo called " LOVING LIFE"

This next photo of hubby and I has the bubble hearts included on the Photo Overlay.  This adds great little details for pictures!

Something else I'd like to show you is the multiple photos option on a 4x4" or even 4x6" photo. I do did quite often when I want to add multiple pictures but don't necessarily have the space in my pocket pages. I use www.PicMonkey.com to create a collage and it works great!  On a Side note isn't Matthew McConaughey adorable!

I often hear people say "I hate my handwriting".  That's unfortunate!   It's part of you and who you are. It's a great memory keeping tool for all your family members that will take the time to enjoy your albums.  If everything is typed - how will they know your handwriting?  Something I miss today is my grandmother's handwritten notes in birthday cards, or recipes. I remember her writing a small To Do list or even grocery list.. I'd love to have those today!  So please, use your own handwriting - even if YOU don't like it... someone else will!

I added a Photo Flip to my page this month. Hubby and I ate at this amazing restaurant in Las Vegas. It was called BLT Burger and we both had the most AWESOME burger.. seriously! I wanted to add a photo of my hubby's TEXMEX Burger but also the menu. I couldn't bring the menu with us, but I did go online and print one up in small format so I could add it to my spread. I added journaling on one side and part of the menu on the other side.

I hope you enjoyed my post today and I hope you enjoy creating with your favorite Simple Stories products!


Supplies

Click here to download the Say Cheese II SN@PBOOKING Album Guide!

Supplies

Hello everyone,  it’s so wonderful to be back with you again!  Chantalle here and I’m hoping to inspire you to create with the new and incredibly fun SN@P! Packs! There are six different sets to choose from, with something to suit every style of scrapping, from retro hues, to fabulously fresh and luxurious gold foil. You are sure to love them as much as I do!
 
My first page is entitled ‘You & Me’ and features my parents on their wedding day, many moons ago!  The Gold SN@P! Pack with it’s beautiful gold foil touches and love inspired sentiments lended themselves perfectly to the theme and black & white image. 
 
 
I have used a grid design (based on a sketch I saw online) The super sweet 2x2 squares line up nicely, with the addition of an altered one, which I have turned into a mini pocket. I have used my Silhouette Cameo to cut the title ’You & Me’. This file is available in the Silhouette Store. I have used embroidery floss and hand stitched a running stitch into the title for a bit of texture and some detail.
 
 
I created my little pocket by cutting out the top part of the printed envelope located on one of the black-based 2x2 cards (shown above) I then mounted this cut piece onto a piece of spare white cardstock, which was the same width at the 2x2 but a teeny bit taller in height, to create a flap which I can open and close. As you can see, I machine stitched the top black part to the bottom piece of plain white cardstock so I got maximum space inside the pocket. If I had used double sided tape, I would’ve lost valuable space or run the risk of the small photo sticking to the edges of the glue. Wet glue would be a good alternative if you don’t like stitching. Make sure it’s completely dry before adding anything to your pocket. You can keep your mini envelope pocket closed with a small peg or paperclip.
 
 
Part of my journalling has been adhered onto a decorative clip, which I then slid over my photo. 
 
 
A great thing about the SN@P! Packs is that they come with lots of different sized SN@P! cards, as well as some die cuts! I have used some of them to embellish some of the 2x2 cards. Try mount gold on gold with some foam tape or add enamel dots over a polka dot print.


My next page is all about the day I found out I would be joining the Simple Stories Design Team. For me, it was a dream come true!!  I’ve used the ‘Fresh’ SN@P! Pack for this page.
 
 
Again, using the various sized cards in the pack, I have formed a base for my layers. By using the long strips down the left hand side of my page, I can continue hints of the darker shades in my colour palette. For this layered 3X4 card (shown below), I have cut up the postage stamp print 3x4 card and placed them over a zigzag pattern card. I have machine stitched the cut ’stamps’ to secure them down. I like to use top stitch thread, which is nice and bold. Then, I cut the ‘Happy, Happy, Happy’ printed card into three bits and raised the words onto bits of foam tape. I’ve left the bits of thread on for a relaxed finish.
 
 
So many of the sentiments on the cards in this pack express how I felt on the day perfectly! Can’t-believe-what-I’m-reading sheer elation! Cluster the die cuts you find in the pack with fun Bradz and wood veneer.
 
 
I have also created a simple pocket out of a section cut from a 12x12 sheet of Color Vibe Bolds ’Navy’. Inside, I have placed a bright pink 3x4 Sn@p card from the collection as well as the email I received at the time, which I have printed off and folded up. Add interest by punching little shapes, like this small circle on my pocket.


My final page has a retro vibe, thanks to the ‘Epic’ SN@P! Pack. This little pack is bursting with fun. I especially liked the vintage retro elements, like the cassette tape! My Sister and I are rocking the corduroy dungaree look!
 
 
Two 4x6 Sn@p cards form the base, with lots of smaller elements layered over the top. The wood veneer speech bubble has been backed with a bit of orange print from one of the 3x3 cards in the pack. The printed star on the die cut tag (behind the photo) has been punched with a small star hand punch to echo the star shape.
 
 
I love backing up the ‘big idea’ on my pages with lots of smaller bits of supporting text. Expression stickers are a wonderful way to add a bit more chatter to your projects.
 
 
Make your wood veneer go further by snipping larger pieces in half with some sturdy scissors. I get to use the other half of this awesome view finder on another project!


Thank you so much for stopping by today!

I will often find selfies on my phone taken by my daughter (as I'm sure many of you can relate to).  Oh how I would love to print them all off and show the world how crazy she is! (but alas, I may be in her bad books for some time if I did so).  So, I chose a few that I wanted to scrapbook and came up with this layout using the I AM... collection. She is one amazing kid and I love that she likes to be different than everyone.  
 
 
I used a few of the 3x4 journal boxes and cut up the word strips to use on my page because they fit perfectly. 
 
 
 I am so excited about the wood veneer that Simple Stories has come out with too. They add the perfect dimension and texture to a project.
 
 
In keeping with the dimension aspect I used some chipboard 'feathers' and added some foam dots to adhere a few stickers.


This past year has been busy with sports for our kids and I must admit that I didn't take my camera with me to the games.  Not because I didn't want to take pictures but more so because I just loved watching him play so much that I didn't want to be distracted by taking good photos.  I did, however, snap a few pics with my phone. They're not the greatest quality but they capture his determination and effort that he always put in to his playing.  I started with the Epic SN@P! Pack and added some extra embellishments from a few different collections.
 
 
I used my Silhouette to cut out the 'fabulous' and 'awesome' words from Simple Stories at the Silhouette online store -  the words are available here
 
 
I love the Photo Stickers because they add a bit of text and a punch of black colour to my layout.
 
I then printed my journaling onto a 6x4 journal card to keep things neat and streamlined.
 
 
I love adding texture (as I mentioned earlier) and did so by adding some foam dots to some of the die cut pieces.
 
 
I also used some brads for added interest along with a wood veneer arrow.


Thanks for stopping by today!
Hello again, Simple Fans :)
 
Candi here today and I am super excited to share some more bits n pieces from inside my Life Documented Planner.
 
In last months blog post I was unsure as to what my plan was going to be with my pocket pages...keep them with my planner inserts or keep them separate...?!  I finally decided to keep them all together :)
 
Here is my January (see pic below) = my month on two pages, daily inserts for the whole month and my first 3 weeks of pocket pages.  I still need to add week 4 and 5 pocket pages, but I can say that I am pleased with this so much.  I believe I have room for 1/4 of the year in one binder (4 binders total when it's all said and done)!  I am not only creating pocket pages, but also adding extra memorabilia throughout my days in between my planner pages.  
 
 
Just wait until I explain EVERYTHING that I have inside my week 10!!!  (warning...yes, this week will be super chunky, but I don't mind...love me a chunky planner!)  This is a shot when you open up my planner, using the bookmark, to my current week...


Week 10 in action!  For the dates I stamped out a few and for the others, I used some number stickers.  I also used some of the designer washi paper tape, several of the calendar stickers, word strip and label stickers...


I wanted a place to house my receipts for the month so I took one vertical 4x6 pocket page and slipped in the "March" 4x6 card from the 2015 Card Set (I added some embellishments to the "March" card)...then tucked my receipts behind it.


After I created the receipt pocket...I thought to myself that the Calendar Stickers would all fit snug inside and would be great to have in place each week since those are my most used stickers in my planner.  They are right there at my finger tips!  I will move this pocket from week to week!


Last week I was updating my Life Documented Planning Inserts and thought why not insert a little "Day in the Life", Ali Edwards style!!!  I chose Thursday, March 5th and just used my cell phone to snap pics throughout my day!  I printed off about 10 pics and embellished them with lots of SS goodies and tucked them inside the pocket pages.  I used a 3x4 card from the Week in Review Cards, added some stickers and stamped the date!  Finished it off by using a mini binder clip to clip the card to all 5 pocket pages...I just LOVE how this turned out!!!  


I was invited to an open house on Friday the 13th so I punched a few holes in the postcard and added that right in front of my week 11...


Besides using the pouch for my extra memorabilia, I am also storing some inside one of the pocket inserts until it's time to go into my pocket pages...
 
 
These FREE printables are fantastic...I need to reprint mine off on some heavier cardstock so they will be more sturdier inside my planner.  If you have not checked them out, click HERE for the direct link to the Project Downloads then scroll through and locate "Life Documented FREE Printables - January" and "Life Documented FREE Printables - February"!!!  Later this month March will be available!!!  


I hope you enjoyed this month's blog post...and cross your fingers for me that I can fit 3 months in one binder {wink}
 
Have a great week and I will see you in April!!


Supplies

Click here to shop from the new Silhouette designs.

Click here to shop from the new digital collections.

Pages