Hi everyone, it's Audrey, here today with a couple of sweet fall cards made with the adorable Pumpkin Spice collection.  Fall is such a happy time of year, and that's just what this collection is, too.... happy! Love the bright colors mixed with rustic tones of woodgrain and gingham. So great for fall themed scrapbooking layouts, but also really perfect for cards.
 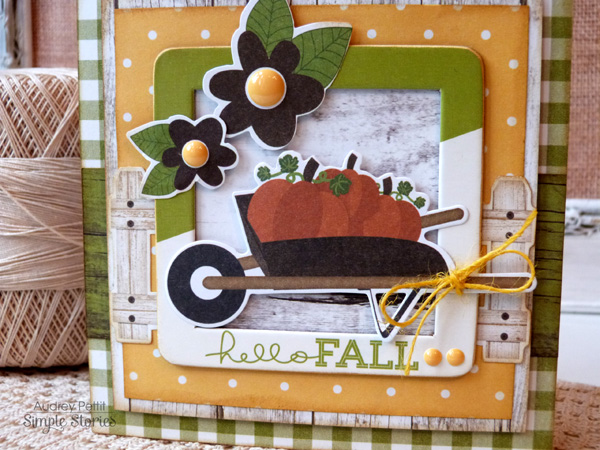 On my first card, I took advantage of one of the chipboard frames to act as both the sentiment and the grounding framework for my focal point. Such an easy way to create a card design in no time at all. I simply backed the frame with one of the SN@P journaling cards, and then added a variety of die cuts to build a fun fall scene.
 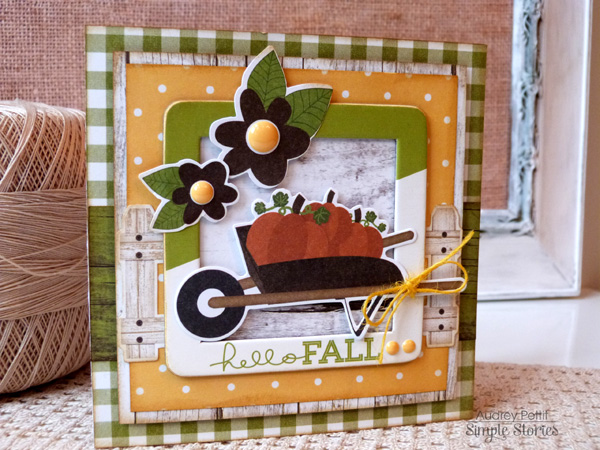 The die cut fence behind the frame really adds to the fall scene here and helps create the illusion of depth and space. The piece wasn't originally large enough to span the width of my card, but since it was place behind another element, I could easily snip it in half to extend the size. That's a great tip for making embellishments work for you.
  For my second card, I also took advantage of some pre-made embellishments to create my focal point... this time, an adorable harvest pumpkin on one of the 3x4 SN@P journaling cards. The sentiment, from one of the Journaling Cards Element sheets, was a super easy find, too.
 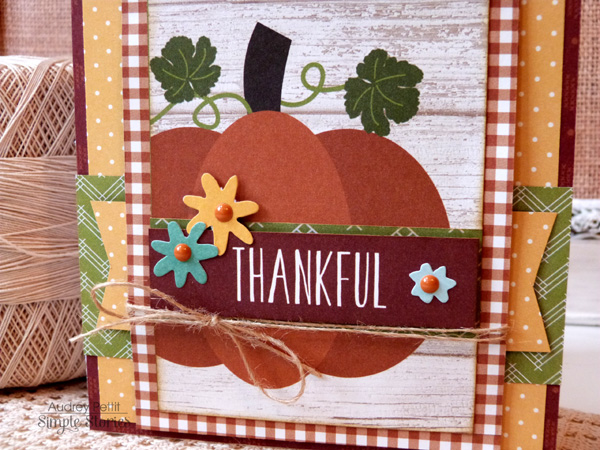 I love to add layers to a one-dimensional element to create a bit of movement and depth. Here a few die cut flowers, enamel dots, and a rustic twine bow really dress up my otherwise flat journaling card. Foam adhesive behind some of the layers adds some great dimension, too.
 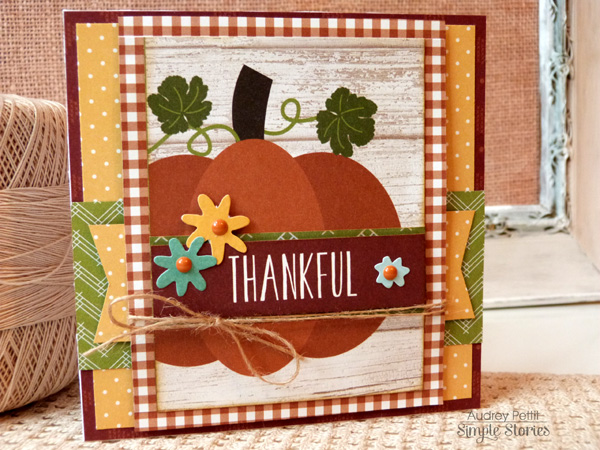 Happy Fall, everyone! I hope you enjoy!
October 2015 Blog Posts

Supplies

Supplies


Supplies
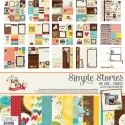
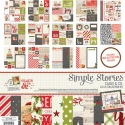
And by Happy Holidays, I mean Happy Halloween, Happy Thanksgiving and Merry Christmas! October through December is my favorite time of the year, and I love creating Fall and Christmas layouts. And Simple Stories has you covered with some great collections for the upcoming holidays...Pumpkin Spice, We Are Family and Claus & Co. Today, I'm sharing layouts using the Pumpkin Spice collection (with a bit of We Are Family mixed in) and the Claus & Co. collection.
Let's start out with the layout using the Pumpkin Spice collection (might as well stick with chronological order!!). I had a lot of fun with this layout. I thought it would be fun to cut a large pumpkin shape and then back it with an Ombre look, using patterned papers from the Pumpkin Spice collection

After I cut the pumpkin shape from White card stock, I traced the shape onto a second sheet of White card stock. Then I cut strips of patterned paper and made sure they were placed outside of the pumpkin shape traced outline. Before placing the die cut pumpkin paper over the second piece of card stock, I machine stitched through each of the paper strips

Then I adhered the die cut pumpkin paper over the background card stock piece. I decided to mix in hand-stitching with the machine stitching, so I stitched around the outside edge of the pumpkin with a mix of embroidery floss.

Once I finished the hand-stitching, I started going through the Pumpkin Spice Chipboard, Bits pack and Sticker Sheet, to add coordinating embellishments to match the color of the patterned paper strips. I also wanted to add some embellishing around the outside edge of the pumpkin, so I added a mix of embellishments, as well as Enamel Dots.
This look can be created with lots of different shapes and collections! Hearts, stars, a large letter, etc. would work great to create this same effect on your layout!
On my second layout, I used the gorgeous Claus & Co. collection. I took this photo of my hubby and the kids last year on Christmas Eve, as they were checking out the Santa tracker. I loved that it was a candid shot, with no one making faces, crying or hitting brother or sister! HA! It was one of those photos I wanted to save for just the right collection, and Claus & Co. fit the bill!
![]()
I knew I wanted to use the frames from this collection in a prominent way on my layout. So I started by mixing three patterned papers in the background, and then added a mix of the Chipboard Frames to the right hand side of the layout.
![]()
I placed the frames on the layout, and moved them around several times, to get just the right placement. When I had them where I wanted them, I went ahead and adhered each one. The frames made perfect spots to add embellishments from the Claus & Co. collection. I added a mix of Chipboard, Stickers, Bradz and Wood Veneers to each of the frames to give the layout dimension and texture.
![]()
I finished the layout, by adding my title on the left hand side of the page, to balance out the design. It also created a visual triangle on my layout, that helps to guide your eye around the page.
So whether you are scrapping photos from Christmases past, looking forward to creating new layouts for this season, or prepping your December Daily, the Claus & Co. collection is perfect for documenting all of your holiday memories!!

Supplies
No doubt about it, we love fall here in the Midwest!!
That being said, when your daughter is 16 and constantly on the go, your 'traditions' change a bit. No more pumpkin patches or apple orchard visits, no more dressing for Halloween. What she does still love though is our annual 'photo shoot' at the local metroparks to celebrate the return of sweater weather and crisp sunny days. I snapped this pic last year during our walk and other than the long sleeved sweater, it didn't feel like your 'traditional fall' photo...so I snagged the opportunity to feature colors other than brown/orange/yellow. :)

Sometimes when you love a photo, you have to just let it stand out. I kept the colors around the photo pretty simple, and stayed away from what most may consider the common palette for autumn photos. It fit my photo (and our twist on fall around here), but it's also to liven things up a bit!! When things start to feel 'stale' (like using the same colors for photos this time of year might), I typically look for a change.

As always, I adored the little phrase stickers + die cuts in this collection...Simple Stories has such a knack for including little details! So much so that I often find myself wanting to use more than I have room for, so this time I used them within my journaling to incorporate as many as I liked. The phrases did all of the work for me: I opted for a rainbow color scheme when choosing them (notice they go from red to blue, top to bottom), and they acted as my jump start for my own journaling. I placed the stickers + die cuts along the right edge of the page and added my journaling lines in between...all I needed to do was fill in the blanks!

Along the left edge of the photo, I layered more die cuts + stickers...using the ampersand and 'grateful' sticker for my title. Those leaves are probably the only thing that kind of screams 'autumn' on this page, and I love that it isn't quite so obvious. I'm all for thinking outside of the box to make something work for me in a different way, rather than feeling stuck in a rut. ;)
Don't be discouraged if your family isn't hanging out at all of the familiar fall places that they used to...just opt to roll with it and use your items in a way that fits!!

Supplies

Click here to download your free copy! To access other free downloads, visit the Project Downloads page!


Hi all! It's Chantalle with the 2nd of 3 projects I'm sharing on the blog today :)


