November 2015 Blog Posts

Hello Planner Addicts!!!  Candi here today to show you how I set up my Robin's Egg Carpe Diem Planner!!!  I am still doing things here and there inside my planner, but I feel that this set up is working for me so far!  SS really kicked it out of the ballpark with this new Collection!!!  I am already thinking I need another color so I can change out my planner from time to time :)
 
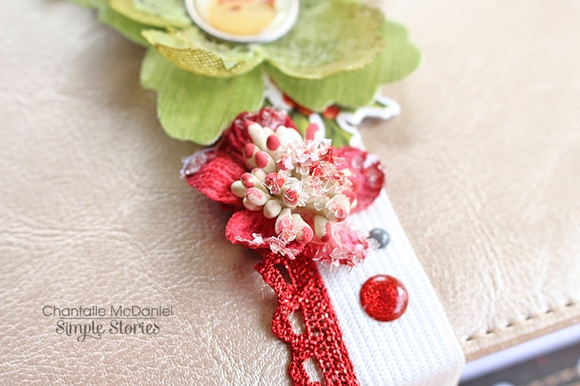
I lovvvvvve the pockets inside this planner...so many slots to tuck in fun clips, washi and pics!  Makes me happy to see all of those goodies peeking out!
 
 
Behind my dashboard I added a Pocket Insert.  Inside the pocket I have several Carpe Diem Stickers and I attached a photo with a Magnetic Page Marker  :)


I am using the Basic Dividers to get myself organized inside!  There are 6 Dividers and each tab reads:  Information, Calendar, Menus, To Do, Notes and This & That.  The Basic Dividers come with 108 clear label stickers, which is GREAT!  I love how colorful the Dividers are...you can leave them just as they are or you can add embellishments to them!  I am still in the process of adding photos and embellishments to mine...the process of making your planner "your own" is so much fun!!!


Inside my Information Divider I have my "intro" page, contacts and a list of birthdays & anniversaries!  


For my Calendar Divider I am only storing October, November and Decembers Weekly Inserts.  My plan is, at the end of November, I will remove the whole month of October and add in the whole month of January.  Basically only having 3 months in my planner at one time.  My thoughts are if I have the whole year inside my planner and all of the "extras", it might get to be too much because I love adding extra photos here and there along with some memorabilia!
 
Below you will find my monthly view of October, decorated and competed with my important to-dos along with a weekly spread.


Another great feature about this planner is that nothing is dated...you can start whenever you would like!  I think it is fun to sit down and add the Number Stickers to the monthly spread and add some random Carpe Diem Stickers!  Below you will see how I decorated my November Divider with a Dashboard Insert and a few Stickers!  Plus you will find my November monthly all set to go and ready to plan...!  (I spy a little Pumpkin Spice goodness on my monthly view!!!)


I love how each month there is a "re-cap" sheet to fill out!  This is where I store my Sticky Notes Bookmark  :)


Here is the start of my Weekly Inserts for November...I set aside 5 minutes and stamp out each date in my Weekly Inserts with a roller stamp and a basic black ink pad! 


Loving the Basic Inserts!  I am always meal planning and the Menu Inserts are helping me out so much!  Right now I am using one side for each month...   


At the back of my planner, I have included the Plastic Storage Pouch to store some of my Bits & Pieces!  Those die cut shapes are fun to add to your planner pages :)  You could also store some extra Stickers andWashi Paper Tape too! I also added a Metal Charm to the zipper pull on the pouch!
 
 
I am so excited to see how you all set up your Carpe Diem Planner when it arrives!  You must share lots of photos on your social media accounts and make sure to use the following hashtags:  #CarpeDiemPlanner #SimpleStories #SnapPlanner.  Would love to see your planners in action!!!  
 
Have a great weekend ahead and...Happy Planning :)
It's Mindi here with you today. I am going to be sharing some holiday pocket pages using the wonderful Claus & Co. collection. 
 
 
Last December the kids and I hosted a Gingerbread building and decorating party at our house. We invited some friends and neighbors. It was something that the kids are now asking to do again this holiday season. 
 
These christmas lights are among my favorite thing in the collection. I played around with the string of lights and one of the chipboard frames. It worked out great to slide them up through and then on top of the frame for a fun look and finished it off with some embellishments. I used this as a title/filler card. 
 
 
I have always been a fan of using big photos in my pocket pages. It adds a different look and sometimes photos need to be enlarged ! I used a photo that I took of one of the kids's gingerbread houses and made it stretch over three pockets. In the bottom corner I added some journaling onto one of the labels I cut out from one of the 4x4 journaling cards. One other thing that I wanted to do was to add names or at least initials of who's house was who's. Except that one of the kids pretty much demolished her house before I could take a decent photo of it ! Oh well, at least I got two of them. 


Here are some close ups. 


I added a journaling card with some details that I wanted to remember. I love that there is a number sign included in with the letter stickers. It allowed me to make a hashtag as part of my journaling title. I also love the brads, they are both cute and self adhesive. No more making holes. 
 
 
Let's move on to the second page. 
 
 
Filler cards are so fun. They are some of my favorite things to do, they allow me to be creative with papers, embellishments, stickers, ect. I added one here. I wanted to add a gingerbread house somewhere. I found one online and printed printed it out onto some vellum. This card seemed like it was made to add one of the larger chipboard frames on top of it. Underneath the frame I added some strips of washi tape and some embellishments. 
 
 
Here are a few close ups 


I am so happy to have these photos and memories preserved using the Claus & Co. collection. It has gotten me very excited for the upcoming holiday season. Thanks so much for visiting today ! 

Supplies

Howdy!  Layle here with you today.  Welcome to the final day of our Simple Stories & Petaloo Product Swap! 

Both design teams have swapped products and will be sharing on our blogs all week long.  Join us for some great inspiration as well as a chance to win a prize package from both Petaloo & Simple Stories! 

Today design team member Chantalle McDaniel is back with her 2nd project - a fabulous holiday monogram 
______________________________

Hello everyone! Chantalle back with you today to share another project using Claus & Co. and beautiful Petaloo blooms. 
 
This next project was inspired by a toilet paper roll wreath I saw on Pinterest. I thought it would be fun to create a monogrammed ‘M’ for our family name, to hang on the door this season.
 
A combination of Petaloo flowers, Claus & Co. Bits & Pieces and wood veneer finish it off beautifully.
 
 
I’ve used the same principal as the toilet paper roll example and applied it to my own mix of papers.
 
* To start, I trimmed up a couple pieces of Claus & Co. patterned paper to 125mm (w) x 100mm (h). 
 
* I then cut the rectangle into strips. These were 20mm (w) by 100mm (h). I ended up with about 50 strips. The nice thing about this technique is that it’s super easy to measure up extra strips if you need to add more to the final design.
 
* I folded the strips in half and glued the flat ends together, right near the edge with just a thin strip of glue. (I used Helmar 450, which is my favourite liquid adhesive.) Note: Be careful not to squash the folder paper flat when you fold it. You want to keep that nice, gentle curve.
 
* When I had folded and glued all the strips, I arranged them into the shape I was after. I then set about gluing each piece to the other (a careful process) with hot glue. (I used hot glue because it was a fast, strong bond, but you could use the adhesive of your choice.)
 
The final result wasn’t as perfect as when I had initially laid it out in preparation, as I had to move each piece as I went, but like I mentioned above, it is very easy to quickly cut, fold and glue in extra pieces to make up gaps in the design.
 
 
Custom blooms, using a mix of Ivory and Green Moss textured layers with a icicle Claus & Co wood veneer, little Suga Berry clusters in Peach and sweet Suga Red minis in Burgundy look good enough to eat! The Claus & Co. die cuts add just the right amount of cheer. I had been hoarding the reindeer for just the right project ;)
 
 
Piercing a little hole on either side on the top of the ‘M and threading a twinkling bit of red glitter twine from a pack of Petaloo assorted trim was the final finishing touch. It was now ready to hang! I hope this project has inspired you to make a start on your Christmas decor. It doesn’t take much time to put together something pretty and unique. If you would like to catch more of that what I get up to, you can pop into my blog (www.copasetique.blogspot.com.au) Happy crafting!
______________________

Now for even more fun!!  Enter via the Rafflecopter widget below and we'll draw one lucky winner on Sunday to win a Claus & Co collection pack & Petaloo flowers!  

a Rafflecopter giveaway

After you enter, head on over to the Petaloo blog to see what their team has created.  Make sure to enter there as well - they're giving away a fun prize as well!   

Want to follow Petaloo and keep up with all of their great projects & products?  Here you go!

Website

Facebook

Instagram: petaloointernational

Blog

Thanks for joining us this past week!!  


Supplies

Howdy!  Layle here with you today.  Welcome to the final day of our Simple Stories & Petaloo Product Swap! 

Both design teams have swapped products and will be sharing on our blogs all week long.  Join us for some great inspiration as well as a chance to win a prize package from both Petaloo & Simple Stories! 

Today design team member Chantalle McDaniel joins us with a fabulous creation for her Carpe Diem planner!  
______________________________

Hello everyone! Chantalle back with you today to share a couple of projects using Claus & Co. and beautiful Petaloo blooms. We have all seen the stunning new Carpe Diem planners which are set to hit retailers momentarily (yippee!) I absolutely adore my platinum one. The understated chic holds such bold fun within! To mark the upcoming festive season, I thought it would be fun to create a custom bellyband to give my planner a bit of Christmas cheer, without ruining the beautiful split leather finish. This is how it turned out…
 
 
To start, I measured a length of elastic (20mm width) to fit around my planner. Selecting the pretty Petaloo assorted trim in Glitz Red, I used my sewing machine to stitch it along the left edge of the elastic. I used red thread so you don’t see the stitching. Tip: To give it more stretch, I would suggest tugging on the elastic slightly as you sew, so when it’s finished, it has more ‘give’. Mine turned out a tiny bit rigid. Once the trim was stitched in, I sewed the elastic together to form the band shape.
 
 
This is what it looked like before I embellished it:
 
 
All the embellishments were applied using a hot glue gun. (I’m sure I lost fingerprint or two in the process! haha.) For the larger green flower I’ve used Petaloo Mixed Textured Layers in ‘Moss Green’ and the smaller white one is also Mixed Textures but in ‘Ivory’. The petals have a subtle curve to them already, which is really nice. I wanted to accentuate this height, so I adhered them with the curve facing upwards. I dabbed a blob of hot glue in the centre and pushed down using the back of a stylus to get them to set with the extra height.
 
 
I really loved working with the leaves and berries from the Suga Red Clusters. They were great to tuck behind larger blooms. Once I had created my custom flowers and chosen the rest of my embellishments, I went about arranging them on the elastic. Before I glued anything down,  I grabbed a sheet of baking paper and folded it over a couple of times and then tucked it under the elastic. I could then go about adhering my embellishments without damaging my beautiful planner. 
 
 
A brad makes a sweet floral centre…
 
 
I’ve chosen Claus & Co. chipboard stickers as they are more hardwearing.
 
 
I love how the band turned out! I can definitely see myself creating more to suit other seasons and holidays.
 
 
______________________

Now for even more fun!!  Enter via the Rafflecopter widget below and we'll draw one lucky winner on Sunday to win a Claus & Co collection pack & Petaloo flowers!  

a Rafflecopter giveaway

After you enter, head on over to the Petaloo blog to see what their team has created.  Make sure to enter there as well - they're giving away a fun prize as well!   

Want to follow Petaloo and keep up with all of their great projects & products?  Here you go!

Website

Facebook

Instagram: petaloointernational

Blog

Join us again later today for one more inspiring project from Chantalle!


Howdy!  Layle here with you today.  Welcome to day 5 of our Simple Stories & Petaloo Product Swap! 

Both design teams have swapped products and will be sharing on our blogs all week long.  Join us for some great inspiration as well as a chance to win a prize package from both Petaloo & Simple Stories! 

Today design team member Allison Davis joins us with a Claus & Co. pocket page spread along with her monthly sketch! 
______________________________

Hi everyone! Allison here with a layout using the Claus & Co. collection and some beautiful products from Petaloo. I also have another sketch to share that mixes up the traditional scrapbooking style with the SN@P! Pocket Pages.
 
 
You can download the full sketch with measurements and placements here.


The left side of the sketch is designed in a traditional scrapbooking style while the right side uses photos and cards together with the SN@P! Pocket Page, Design 9.
 
Here is my layout based on the sketch:
 
 
We always have several traditions that take part in our home on Christmas Eve. Most of them are intended to keep our boys busy because they are usually bursting at the seams with excitement for opening presents on Christmas morning. Maybe it was the sugar from the cookies we made (and ate) but they seemed to be a little more excited than usual. I didn’t think we were ever going to get them to settle down and go to bed. I took up the opportunity to take some pictures of them in their cute, matching “Ninja-bread Men” pajamas and tried to capture their excitement before we sent them off to bed. 
 
 
When I first saw the Claus & Co. collection I couldn’t wait to play around with the circles on the I Believe piece of patterned paper. I decided to use them to shape a big Christmas tree to use on the left page. I also used some of the Petaloo Fancy Trims along the bottom of the tree.
 
 
I used the larger circles to create the main shape of the tree and then used the circle stickers, Bradz, and enamel dots to fill in some of the spaces between the large circles. Then I added some hand stitching to a few of the circles.
 
 
Word/phrase stickers are always one of my favorite go-to embellishments to add to my layouts. I love how Simple Stories collections always have a bunch to choose from! 
 
 
For the top of the tree, instead of using a star, I used the Petaloo Textured Elements burlap poinsettias. 
 
 
For the title I mixed together several different alphabet stickers from the Claus & Co. collection. I had a hard time choosing between the white and green small block letters so I just used them both, mixed together!
 
 
On the right page I used photos, a 3 x 4” card, two 6 x 4” cards, and a 12 x 4” piece with the SN@P! Pocket Page, Design 9. This Pocket Page is one of my favorites because of the big 12 x 4” pocket!
 
 
I love the 12 x 4” “Believe in the magic of Christmas” strip! I used the open space on the left side of it for two photos.
 
 
On the right side I added my journaling. 
 
 
I used some of the Petaloo Fancy Trims as garland on the tree on the card and added some Bradz and enamel dots for ornaments. 
 
 
I added the Petaloo berry clusters to the scallop on the card and then added some hand stitching to the edges.
 
 
I added some work stickers to the 3 x 4” photo and the Dec 24 card.
 
I hope you enjoy using the new sketch! 
____________________________

Now for even more fun!!  Enter via the Rafflecopter widget below and we'll draw one lucky winner on Sunday to win a Claus & Co collection pack & Petaloo flowers!  

a Rafflecopter giveaway

After you enter, head on over to the Petaloo blog to see what their team has created.  Make sure to enter there as well - they're giving away a fun prize as well!   

Want to follow Petaloo and keep up with all of their great projects & products?  Here you go!

Website

Facebook

Instagram: petaloointernational

Blog

Join us again here tomorrow for more inspiring projects!


Supplies

Howdy!  Layle here with you today.  Welcome to day 4 of our Simple Stories & Petaloo Product Swap! 

Both design teams have swapped products and will be sharing on our blogs all week long.  Join us for some great inspiration as well as a chance to win a prize package from both Petaloo & Simple Stories! 

Today design team member Amy Coose joins us with a Claus & Co. December Daily album -
______________________________

Hey everyone, Amy here to share the beginnings of my December Daily album with you.  I was so excited to participate in the product swap with Petaloo, and the items they sent went perfectly with the fabulous Claus & Co. line that I'm using for my album.
 
Before I share, I will say that I've never completed a December Daily before. I start them, but just can't seem to get 'em done. Hoping to change that with this fabulous album.  The Holiday Snap binder made this project well, a snap!  Here's the start of my December Daily 2015.
 
 
I kept it pretty simple on the album cover, because I didn't want to take the chance of stuff constantly falling off.
 
 
Here are some of my inside pages so far.  Seriously, get ready for photo overload.
 
This is the cover page.
 
 
I included a calendar page from the SN@P! Pages so I could jot down activities and other info for our busy month.
 
 
Here are some inside pages.


I'm loving how it's turning out so far.  Here are some peeks at some other pages.


I can't wait to get it finished, y'all hold me to it, OK?  You can check out my blog during December to see how my December Daily pans out. Wish me luck.
____________________________

Now for even more fun!!  Enter via the Rafflecopter widget below and we'll draw one lucky winner on Sunday to win a Claus & Co collection pack & Petaloo flowers!  

a Rafflecopter giveaway

After you enter, head on over to the Petaloo blog to see what their team has created.  Make sure to enter there as well - they're giving away a fun prize as well!   

Want to follow Petaloo and keep up with all of their great projects & products?  Here you go!

Website

Facebook

Instagram: petaloointernational

Blog

Join us again here tomorrow for more inspiring projects!


Supplies

Howdy!  Layle here with you today.  Welcome to day 3 of our Simple Stories & Petaloo Product Swap! 

Both design teams have swapped products and will be sharing on our blogs all week long.  Join us for some great inspiration as well as a chance to win a prize package from both Petaloo & Simple Stories! 

Today design team member Wendy Antenucci joins us with two Claus & Co. holiday layouts -
______________________________

Hi, Wendy here today to share some inspiration using the Claus & Co collection.  This collection went so well with the Petaloo products we were given to work with, the flowers added just the right touch of elegance to my pages.
 
 
On my page, Disney Magic, I wanted to create a page that showcased all the Christmas magic found at Disney.  To fit all of my pictures on the page, I stuck with a horizontal approach with some overlapping for interest.  I chose a 4x6 card that had a pointsettia on it to match my florals that I wanted to add to the page.
 
 
I created an embellishment cluster full of floral goodies and chipboard to anchor my pictures to the page and to form a visual triangle with the poinsettias on the corners of the papers.
 
 
I completed the page with another embellishment cluster, again forming a visual triangle with my title and some fun holiday pieces.
 
 
A few stickers and some journaling completed this page.


On my next page, Ho Ho Ho, I used a cut file from the Cut Shoppe to create a backdrop of Christmas trees to showcase our tree.  I love to grab the 4x6 cards and my pictures and form what I call a "photo block" which is the basis of my layout.  Instantly you have a layout that now just needs some finishing touches.  To really make the darker pictures stand out I matted my group on the Charcoal Star paper.
 
 
I began adding some Bits & Pieces, a frame, and floral building my first embellishment cluster which will also form a visual triangle when I am finished.
 
 
My next cluster, was a large attention getting cluster full of my favorite Petaloo florals.  This large cluster also became my title area and gave me room to write my journaling.
 
 
My last cluster was another smaller floral bunch with the addition of the string of lights which went with my theme of decorating the tree.  A few stickers and my page was finished.
 
Thank you for joining me today, for more inspiration you can find another layout using the Petaloo flowers and Claus & Co. on my blog.
____________________________

Now for even more fun!!  Enter via the Rafflecopter widget below and we'll draw one lucky winner on Sunday to win a Claus & Co collection pack & Petaloo flowers!  

a Rafflecopter giveaway

After you enter, head on over to the Petaloo blog to see what their team has created.  Make sure to enter there as well - they're giving away a fun prize as well!   

Want to follow Petaloo and keep up with all of their great projects & products?  Here you go!

Website

Facebook

Instagram: petaloointernational

Blog

Join us again here tomorrow for more inspiring projects!


Supplies

Howdy!  Layle here with you today.  Welcome to day 2 of our Simple Stories & Petaloo Product Swap! 

Both design teams have swapped products and will be sharing on our blogs all week long.  Join us for some great inspiration as well as a chance to win a prize package from both Petaloo & Simple Stories! 

Today design team member Audrey Pettit joins us with two Claus & Co. holiday cards -
______________________________

Hi everyone, it's Audrey! And today I have a couple of Christmas cards to share with you, made with our adorable Claus & Co. collection along with beautiful flowers and trims from our friends at Petaloo. AudreyPettit Claus&Co MerryOneCard I absolutely fell in love with the adorable old-timey truck die cut from the Bits & Pieces kit, and wanted to make it the focal point for my first card. So I created a background from SN@P journaling cards, and then popped the truck right onto the center using a bit of foam adhesive for dimension. I really love using the SN@P cards as patterned paper on my card designs. Of course they perfectly coordinate with the rest of the line, and they offer even more pattern choices for patterned paper lovers, like me. AudreyPettit Claus&Co MerryOneCard2 I raised the top paper piece on foam adhesive for some extra depth and interest, and added a scalloped cardstock border sticker along the bottom edge. Then I created a "road" for my truck using two trims from Petaloo's Shades of Green Fancy Trim pack. AudreyPettit Claus&Co MerryOneCard3 A couple of enamel dots make instant dimensional headlights. And a die cut Bits & Pieces banner is a quick and easy sentiment. And finally, I added a twine bow along with a flower and leaves from Petaloo's Tea-stained Darjeeling Petites pack. AudreyPettit Claus&Co SeasonofLoveCard My second card is a cute 4.25" square that once again features pretty Bits & Pieces die cuts against a SN@P Journaling Card background. AudreyPettit Claus&Co SeasonofLoveCard2 A pair of die cut holiday stockings are so fun hanging from a line... this time cream pom pom trim from Petaloo's Taupe Fancy Trims kit. I raised the stocking on foam adhesive for a bit of depth, and popped a few die cut stars all around. So quick and easy. AudreyPettit Claus&Co SeasonofLoveCard3 A sentiment, again, from the Bits & Pieces die cut pack, and snowflakes to top the stockings from the die cuts, too. And finally, a Petaloo Mini Red Poinsettia to top it all off. Enjoy! Supplies: Simple Stories Claus & Co. Collection
______________________________

Now for even more fun!!  Enter via the Rafflecopter widget below and we'll draw one lucky winner on Sunday to win a Claus & Co collection pack & Petaloo flowers!  

a Rafflecopter giveaway

After you enter, head on over to the Petaloo blog to see what their team has created.  Make sure to enter there as well - they're giving away a fun prize as well!   

Want to follow Petaloo and keep up with all of their great projects & products?  Here you go!

Website

Facebook

Instagram: petaloointernational

Blog

Join us again here tomorrow for more inspiring projects!


Pages