June 2016 Blog Posts

Hi everyone! It's Jennifer and I'm happy to share two layouts I created with the new Sunshine and Happiness collection!  We are just beginning our summer here in Central Illinois which means lots of outside activities and pool time!  My kiddos love the water so I have lots of photos of them enjoying the warm weather! Sunshine and Happiness is perfect for all of your summertime projects with its bright colors and coordinating embellishments!

For my first layout, "Hello Sunshine", I used many of the fun die cuts from the Bits and Pieces pack! I love all of the little flowers as well as summer theme sentiments such as my title! I started with white card stock and yellow spray ink and a chevron mask!.  

I also included pieces from the 6x12 Chipboard sheet as well as Bradz and Enamel Dots.  

_______________

For my second layout, "Oh Happy Day", I again started with white card stock as well as a circle cut file background. I used a circle hand punch to add different patterns to the center of each circle. I used foam tape to pop up a few smaller circle as well as add stickers and Bradz.  

For my title, I used one of the many great Simple Story cut files from the Silhouette Shop! This one is one of my favorites and called appropriately "Oh Happy Day" (file #89426).  I used the beautiful and bright yellow from the Shine Bright pattern.  

​Again, I used lots of layers including this adorable mason jar and tag from the Bits and Pieces pack. I used some orange and white bakers twine from my stash as well as used some additional pieces from the Fundamentals Cardstock Sticker sheet. 

​Thank you for stopping by today! I hope you will check out the collection in its entirety by clicking here! Have a wonderful day!

Supplies

Hi it's me Violet! This week I decided to chill with my Gnomies by using the Bloom & Grow collection kit in my Aqua Carpe Diem planner. I started off by making five tabbed dividers. Two of them regular and !three folders. The stickers worked best for the tabs.

What I really love about the paper is that it is double sided, therefore, it's awesome for making pocket folder dividers. They hold so many planner goodies and the journaling card elements and stickers fit perfectly in the pockets. I couldn't resist adding the "to gnome is to love me" journaling card to my planner. It makes me smile & giggle every time I see it. I used several of the stickers and enamel dots to embellish the dividers.

I used the A5 Basic Inserts for the current week of planning. The first picture I took was before the pen.  I absolutely love using these, it makes it so easy to plan. How adorable and functional are the 4x6 Stickers? They definitely make a picture perfect weekly planner  spread.

Thank you to everyone who took time once again to stop by the blog. Bloom & Grow is definitely one of my favorite kits. I struggled with what I wanted to create and made so many items. I wish I could fit it all on this post, but seriously you all would be here all day. Till next time.

Supplies

Hi everyone! Leah here again, showing you how I’ve decorated my planner for summer using the Sunshine and Happiness scrapbook collection. I’ll be showing you how I’ve revamped my pockets with a new summertime look, how I’ve created another memory-keeping dashboard, and how I’ve made my own double-sided pocket insert.

If you’ve read any of my previous blog posts, you are probably very aware of my love for decorating planner pockets! I change up the décor in the front pockets of my planner at least once a month because it’s such an easy way to revamp my planner and keep it feeling new and exciting. This month, I’ve made my pockets summer-ready using the Sunshine and Happiness collection!

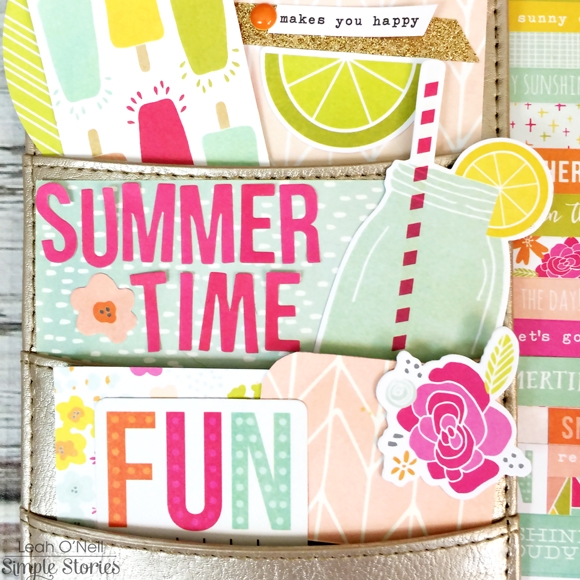
When I first start the process of decorating my pockets, I ALWAYS start with the SN@P! Pack for whatever collection I am working with. The journal cards and little square pieces fit in the pockets perfectly. I try to mix and match the colors I use so that no element is the same size or color as the one next to it. I find that this contrast allows each element to stand out. I also add variety to the shapes of the cards by using different paper punches. For example, I used a 3inch circle punch, a tag punch, and a rounded corner punch to create some of the pieces you see here. I also left some of the cards as squares and rectangles. After I laid the cards out in the pockets how I wanted them, then I added the extra decoration. I wait until the cards are in the pockets so I can better judge the placement of the embellishments. I used several die cuts from the Bits and Pieces pack – there are so many fun florals and that Mason jar lemonade and fruit slice die cut are just too cute for words! I secure everything in the pockets using a Scotch Tape Glider loaded with repositionable tape so I can easily remove everything later. 

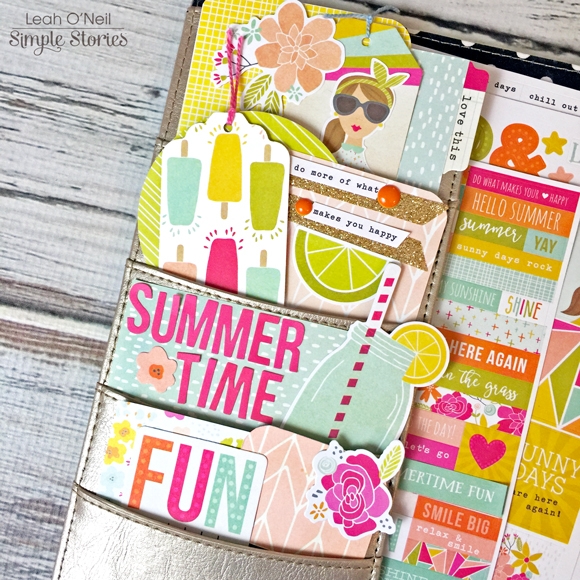
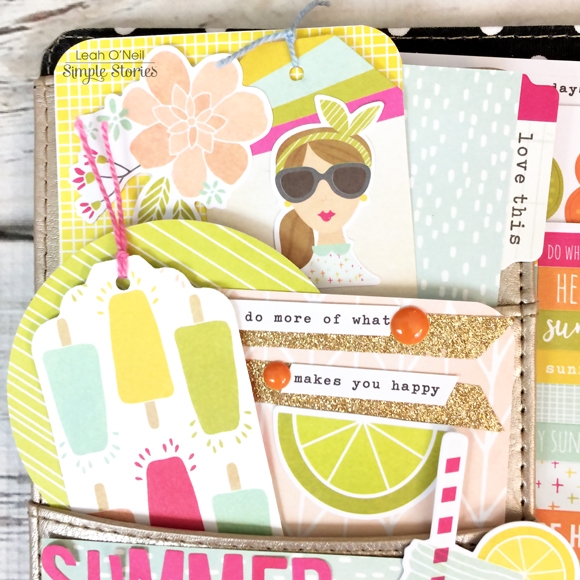
I used several stickers from this pack of 4x6 sticker sheets. There are so many different types of stickers in this pack! I used the hot pink alphabet stickers to spell out “Summer Time,” though I had to improvise and use an upside down “W” for the third “M.” I used the word strip stickers, which I dressed up with some gold glitter washi tape and enamel dots. 

I also used one of my favorite stickers from another sticker sheet in the pack, the girl with sunglasses, and a floral die cut to dress up a tag from the Bits and Pieces pack.

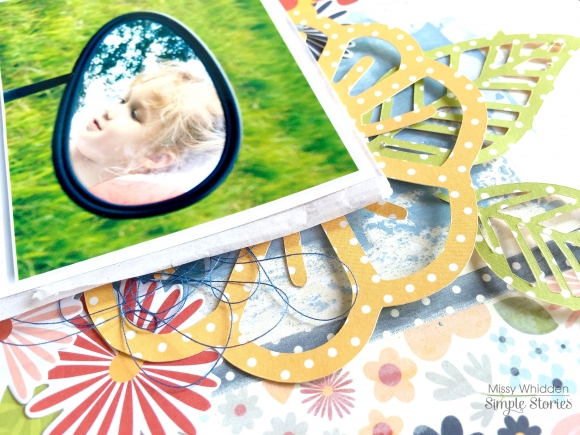
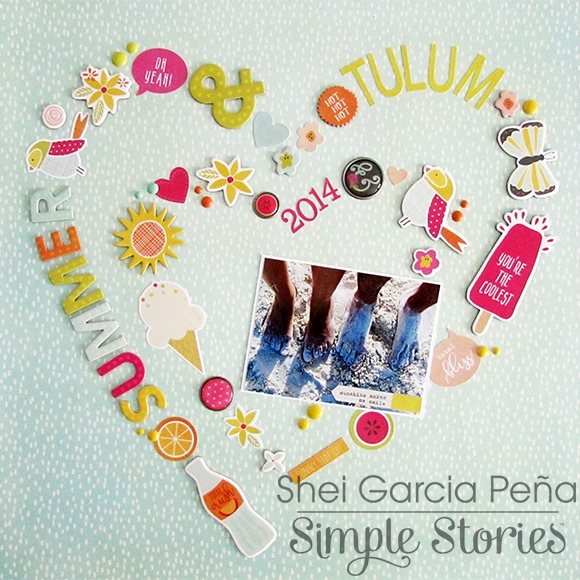
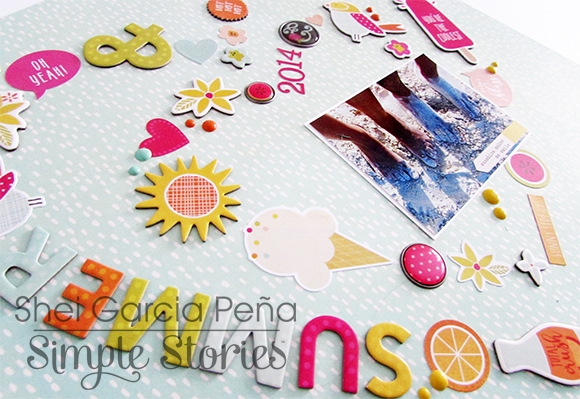
For my dashboard, I made another scrapbook layout for my planner similar to what I made back in April. Some people like to carry photos of their families in their wallet, I like to add them to my planner to make me smile every day and remind me to be grateful for the people I love most! Featured in this layout are my darling niece and nephew, the flower girl and ring bearer from my wedding. Here they are peeking through the pier down at the ocean…and in another photo, making silly faces when they were told to smile! I could not wait to print these photos and use them in a layout! Because I like to use the small square pieces from the SN@P! Pack to layer behind photos, I like to resize my photos for planner layouts to be 2x2”.  One of the photos was not square so I resized it to be 2x3”. These smaller photos fit better onto the limited space available on a planner dashboard.

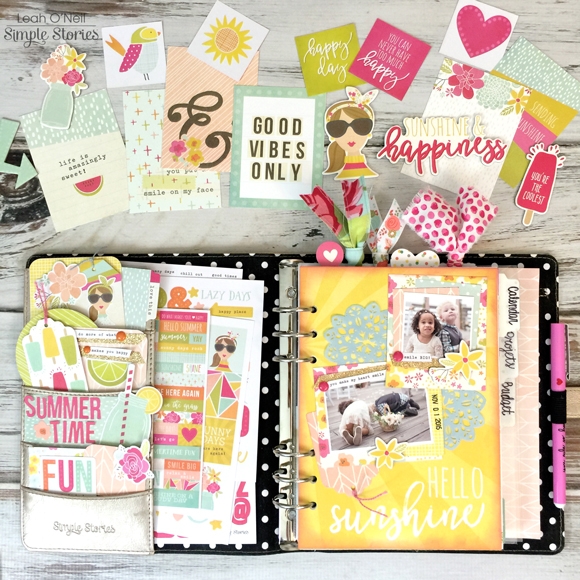
I used the “Shine Bright” 12x12 paper from the Sunshine and Happiness collection to create the dashboard. If you would like to see more about how I create dashboards and dividers, check out this blog post. I used the bold yellow side of the paper as the base for this layout – I love the “Hello Sunshine” sentiment so much! The flip side of this paper has a beautiful, delicate floral pattern. I had some leftover scraps from the paper after I trimmed it down and the floral pattern made a lovely frame for the photos. 

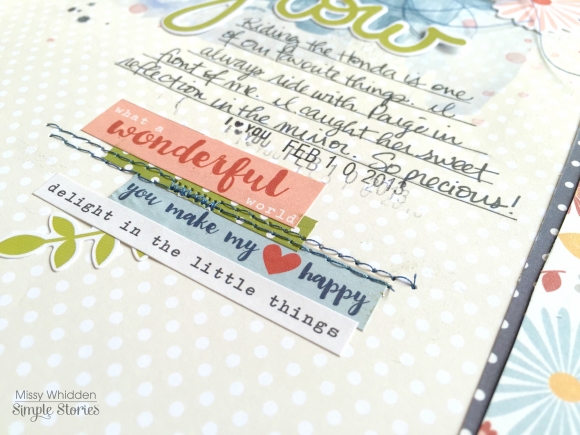
I added a couple of the SN@P! Pack square cards behind the photos to add a little more dimension to the layering and make the photos pop off the page. I used a couple of chipboard flowers as embellishments and no surprise here, more gold glitter washi tape and word strip stickers with enamel dots (always)!

Before gluing everything down, I tucked a couple of light blue paper doilies under the floral paper. This finishing touch provided some contrast against the bold yellow background, helping to draw the eye towards the focal point of the layout – the photos.

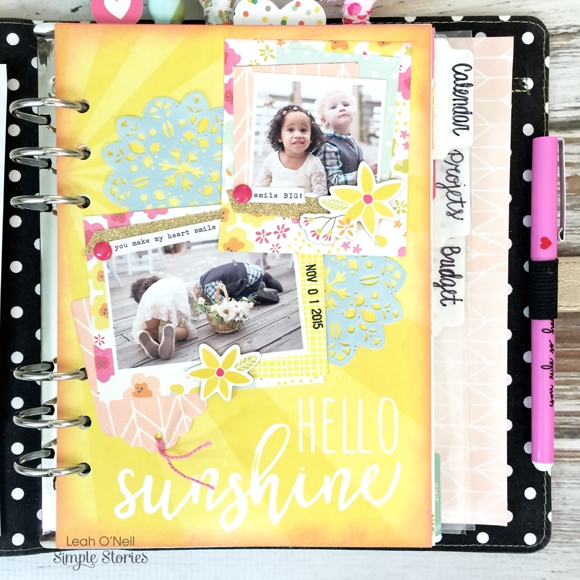
Last but certainly not least, the bright yellow paper really needed some contrast on the edges to frame the layout, so I inked the edges with a pink chalk ink. I love how this project turned out! You know the best part about making scrapbook layouts for your Carpe Diem planner? The holes line up to fit into the Simple Stories 6x8 SN@P! binders, so you can transfer the layouts there later to form a 6x8 scrapbook!

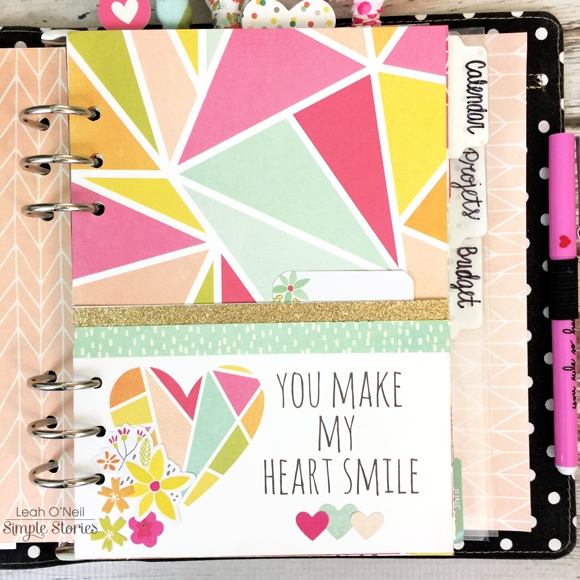
Next up, I will be showing you how I made a double-sided pocket insert using the Sunshine and Happiness collection! 

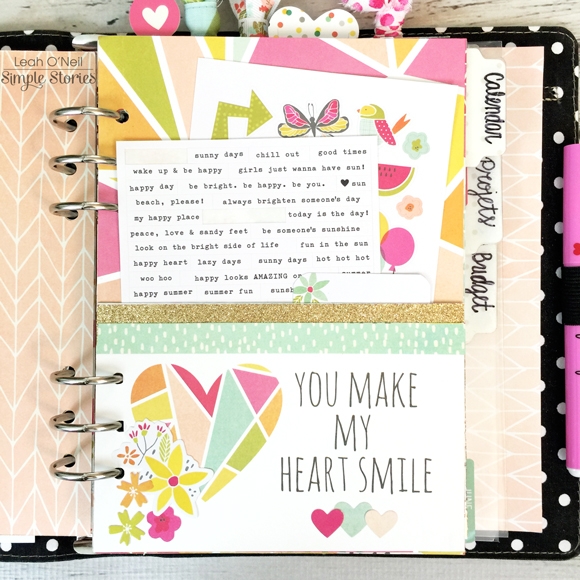
I cut down another 12x12 paper to fit my planner, which ends up being 6 inches wide. The 4x6 cards from the 12x12 Elements sheet, as well as the largest SN@P! Pack cards (also 4x6), fit perfectly on the page to make a pocket.

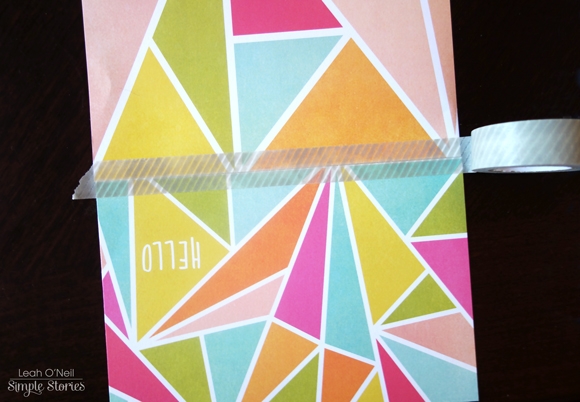
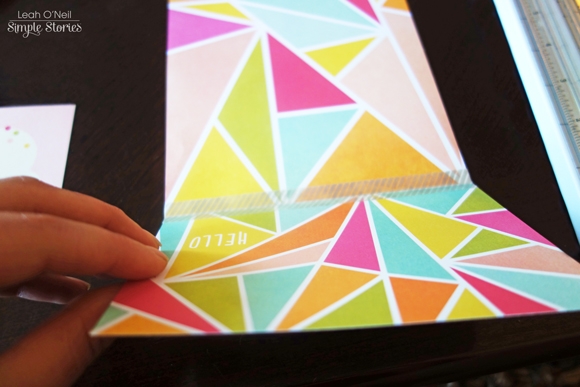
To create the pocket, I lay the 4x6 card with the side I want to show, face down against the bottom edge of the page I’m attaching the pocket to. I use a piece of washi tape (or scotch tape) to attach the two pieces and then if you fold the card up to lay on top of the page, you will see the pocket forming.

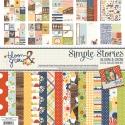
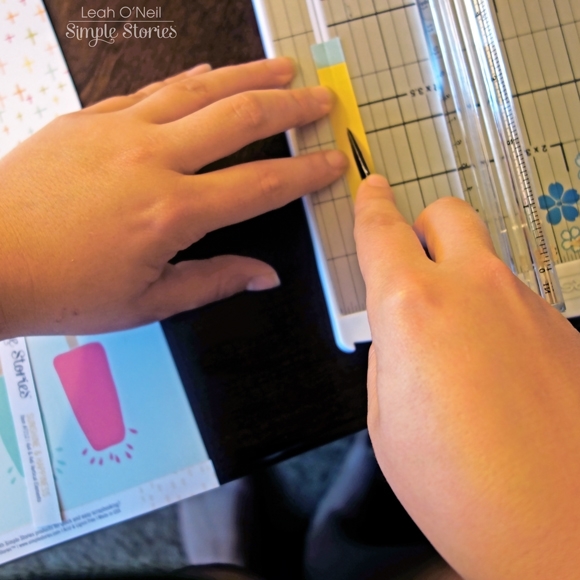
To attach the sides of the pocket, I used the little edge I trimmed off the 12x12 paper at the beginning (you know the part with the Simple Stories logo and collection name – no scrap goes unused in my house!). I cut it down to two 4 inch strips, used the track on my cutting board and a pair of scissors to crease the center of each strip and then folded them in half along the crease.

I then added glue to one edge of each strip and glued them down to the inside edges of the pocket. 

I added more glue to the other half of each strip and folded the pocket up to lay against the page and pressed it down firmly. I followed this same process on the reverse side of the insert to create another pocket using a different 4x6 element card. 

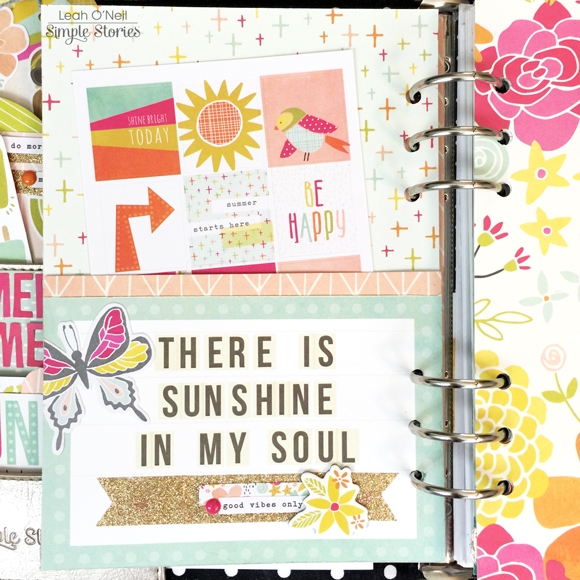
I embellished each pocket using strips of paper and washi tape along the top, die cuts from the Bits and Pieces Pack, word strip stickers, enamel dots and a chipboard sticker. I then marked the holes for the planner rings and used my Crop-A-Dile to punch them out.

I hope you have just as much fun decorating your planner for the summer season as I did! I also hope you find this pocket tutorial helpful. If you have any questions, please do not hesitate to ask here in the comments or over on my social media (Instagram or Facebook). I am happy to help! Also, if you make a pocket insert, tag me on Instagram @sunny.leah, I would love to see what you create! And come show us your creativity in the new Creative Planning Facebook group that my friends and I started just for YOU, our fellow crafty Planners!

With love,

Supplies

Hey there, friends!  Missy here, and today I have two new layouts to share.  I used the new Sunshine & Happiness collection for my first one.   Summer pool pictures are my favorite ones to scrap, so I dove right into this gorgeous collection for these photos of my little girl.  I decided to use a fun cut & fold cut file from The Cut Shoppe on this layout, and I backed the circles with various patterned papers and even a few of the Snap pack cards.  I wanted to have lots of bright colors scattered all around the page, and this collection makes it easy to do.  I used lots of coordinating watercolors to jazz up the background behind the circles, and I love how that makes the paper colors pop even more.  How often do you use cut files on your layouts?

Here you can see the cut file, the watercolors and some of the gorgeous papers up close.  I fussy cut this flower so it would go beyond the edges of the circle.  I added a few of the phrase stickers and machine stitched through each line of circles.  I created my title and ran this pretty Tangerine Stripe paper through my Cameo.  I added an extra pop of blue behind it with some tangled thread.

I added a simple line of journaling here.  I couldn’t resist using this adorable little bird.  He looked perfect standing on this circle.  I love that this collection is also perfect for Spring photos as well.  It isn’t just limited to Summer;  there are some very versatile pieces in this line.

I added in this cute balloon sticker and a few more smaller ones here.  I love how the blue watercolor makes everything pop and stand out. 

I fussy cut this sun from a 3x4 card and angled it so the rays would come outside the circle.  I love how it turned out!  The added yellows and pinks mixed in with the blue in the photo really look nice together here.  I love mixing color all around the page.

_______________

I used the beautiful Bloom & Grow collection for my next layout.  It’s perfect for outdoor photos, and I love how it showcases this cute photo of my daughter’s reflection in our 4-wheeler’s mirror.  All the green in the photo coordinates so nicely with the papers and embellishments.  I started with a neutral patterned paper from the Color Vibe Lights pack to have a light background.  I used some white gesso, acrylic paint and spray inks to create the blue mixed media look, and I also used a few inks to add some messy splatters.  Since my daughter is looking down to the left in the photo, I wanted it placed in the upper right area.  I pulled lots of flowers & leaves from the Bits & Pieces pack and a few stickers. I used a floral & leaf cut file from The Cut Shoppe and created a few big yellow flowers and green leaves.  I placed them all around and under the photo and also created a cluster on the left.

These die cuts I used for my title actually inspired this layout.  I had the title before I even began, and I wanted to use that big floral ampersand in between the words.  I love how it looks, and the mix of colors reminds me of nature and being outside.  You can see all the die cuts and stickers layered under the photo as well as some tangled thread.

Layering is such a great technique, especially when there are flowers and leaves.  They made it so easy to create layers here, and I wish I had more of them!  The cute phrase stickers are the perfect little accents for just about anywhere on your layout.

This is something I love to do…instead of just cutting a square of the yellow paper here to use as a layer behind my photo, I cut a big flower out of it on my Cameo and used it as a layer that way.  It just gives it more interest while still adding the color and the layer.  Plus it goes with the theme of what the page is about.

Simple Stories always includes a ton of little stickers like this in all their collections.  They are perfect for just about anything, but I love to layer them like this.  Sometimes they have just the right sentiment on them and can make great additions to your journaling.

Supplies

Hi there! It’s Shei on the blog today. I’m so happy to be back sharing two layouts.  Let’s get started!

For my first layout I used the colorful Sunshine & Hapiness collection. I really like this line ‘cause it’s very happy and energy. This is the perfect collection for document our summer memories.

I chose “Shine Bright” paper as my background. I folded the paper into a corner, so you can see the b-side “Shine Bright” paper (it’s so beautiful!) and the “Berry Stripe” paper as background. 

Then I glued my picture. I glued it with a white frame ‘cause it stands out the pic. This photo is from last summer. I love summer and lazy summer days. And this day was a very lazy day, hahaha! 

Next came my favorite part: the embellishing!  For that, I used some stickers from Fundamentals Cardstock Stickers like flowers, hearts and the tag and some words and phrases from Expressions Cardstock Stickers. I combined that with some chipboard pieces like the pink swimsuit, the colorful ballons or the funny watermelon. Also, my title “Sunshine & Hapiness” is from chipboard stickers too.

I also added one of my favorite Simple Stories’ embellishment, the self-adhesive Bradz (I love them!!) and some colorful enamel dots.

_______________

The next layout I’m sharing with you today was again created with the happy and fun Sunshine & Happiness collection. I started this page drawing two hearts on the B-side “Happy Day” paper.

I glued my picture on these hearts with a white frame. Then, I used different elements for the embellishing and for my tittle. 

I combine some elements from Fundamentals Cardstock Stickers like flowers, the watermelon, hearts, the bird or the orange, and some pieces from Chipboard like the popsicle, the sun, the butterfly or the lime “&”. I glued them on the line I drawed before, creating two hearts with the embellishments. 

Thank you so much for taking the time to read my post! I hope you enjoyed my layouts! See you next month!

Never stop smiling! Kisses!!

Supplies

Hi Everyone! This is Jennie and I need to tell you all about my new obsession, the 4x6 Sn@p Binder! It’s the perfect size for occasions where I have too many photos for my regular pocket pages album but not as many for a 6x8 Sn@p Binder. It is super easy to put together! It comes with 12 4x6 Pocket Pages in different styles and 8 journal pages.

For the cover I used the Bits and Pieces and the die cuts from the Sn@p Pack from the Sunshine & Happiness Collection.

That fun number 7 in the shaker pocket is from the Pocket Pieces from the Let’s Party Collection. I added Bradz glued back to back and I did the same with word stickers from the 4x6 Stickers

The album comes with 2 3x4 Pocket Pages and I used that to add a little extra fun to my album! Behind you can see the Party Invitation.

Behind the invitation I glued a photo and added the stickers from the 4x6 Stickers and Enamel Dots. On the right I used one of the journal pages to glue on the 4x6 photos and added a little bit of patterned paper on the side. To write Rules I used the Expressions Stickers

I used the alphas that come in the 4x6 Stickers Pack but I also used the Sn@p Sticker Letters from the Color Vibe Bright Set. I could’ve used a 4x4 Pocket Page but I really wanted to add something extra fun so I used this one and I used one of the 2x2 pockets extra. The 2x2 squares are from the Sn@p Pack from the Sunshine & Happiness Collection.

I always glue together similar shapes of die cuts so I can put them in shaker pockets and I don’t see a blank in the back. 

I can’t help to embellish and since in the collages I can’t add too much I just added Bradz at the center.

The Carpe Diem Word Label Stickers are a staple in my projects, they are small and always fit great in my projects. I added Fundamental Cardstock Stickers to these photos.

I added patterned paper on the grids pages that come in the pack to make them sturdier and to match the exact size. They are great for journaling but I didn’t do too much journaling on this  album. 

I hope you enjoyed this mini as much as I enjoyed making it! Make sure you watch the video to see the whole thing in action!

SaveSave

SaveSave

Supplies

Howdy folks, it's Layle here with you today!  

Creative team member Mary-Ann Maldonado has created a darling mini album kit for The Button Farm, so let's take a peek & Let’s Celebrate along with them!  

This vivid gem was created on a cheerful 5 x 5 mini chipboard album featuring our Let’s Party collection. 

You must see the combination of chipboard, die cuts, enamel dots,  and even how she recycles a little trash to use in her album!  

What a perfect birthday gift for a friend or a keepsake of your child, regardless of age!  How about our Let's Party collection used to document a 70th birthday party? 

You'll find more information about the kit here at The Button Farm :)

Hello everyone, Marcia here! I am so excited to share a couple awesome Simple Stories layouts today using the new Bloom & Grow collection. I think I have a new favorite collection!! It combines my love of gardening with my love for paper. I just love those little gnomes to pieces. 

For my first layout "Bloom & Grow", I wanted to use a chicken wire background digital cut file and fill in the negative space with a variety of pattern papers. The prints are small enough on the 12x12 Bloom & Grow paper to make this possible. You could also use the 6x6 paper pad. This is a perfect way to use up scraps when you are nearing the end of playing with your papers. I added some stitching too for a little more texture.


At the top of the page I used one of the 4x12 page elements. I love that Bloom & Grow graphic! I thought it would make a great title too. I gave it a little dimension by placing a chipboard sticker over the "&".
 
 
One of the those fabulous chipboard gnomes embellishes my photo. Those pink enamel dots work so well to give him a nose and make him look more life-like. There are the cuties little sayings as well. I couldn't resist the "chillin' with my gnomies".
 
 
More garden elements are clustered near the bottom of my layout along with another gnome. Isn't he is so adorable?
 
 
For my second layout "Be Happy", I decided to layer my pattern papers along with some die cut doilies to give my layout a country look. The woodgrain background paper adds a rustic feel and really shows off the delicate doily.
 
 
This adorable little bird and birdhouse make a nice cluster over the doily in the upper right. I couldn't resist adding a little jute bow here too,
 
 
The Simple Stories Bits & Pieces are fabulous for tucking under photos too. They are layered here with some Stickers, Chipboard, Enamel Dots, and oh so pretty Bradz.
 

I like distressing the edges of my papers slightly by rolling corners, or bending and tearing the edges. It helps to add dimension so your layout doesn't look so flat.


Thanks for stopping by today. Watch for both of the new Bloom & Grow and Sunshine & Happiness Simple Stories collections at your local scrapbook store. You will absolutely LOVE them!

SaveSave

Supplies

Pages