August 2016 Blog Posts

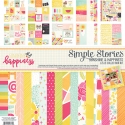
Hello Simple Stories fans and thank you for joining me on the blog today. Chantalle with you to share some pages which I have had on my desk for a while, which were being shifted around with not much else happening. You can see from the image below, that they were in need of some TLC, lol. They were both created for a class which I was teaching earlier in the year. I wanted to show my students just how versatile one of my very favourite products can be. SN@P! Packs are an essential part of my Simple Stories creative process. Packed with value, they can be used as is or stretched, boosting patterned paper or by fussy cutting elements etc. I just love them!
 
I couldn’t get hold of enough of the Life in Color packs at the time, so I created another page (using the same principles) with a Happy SN@P! Pack instead. The pages were both nice, but I thought they lacked a bit of extra detail, so I have tweaked them both and am now really happy with them!
 
 
Fixer-Upper #1
 
As you can see, I have kept a lot of the original elements, but by adding some brighter pops, it has really lifted the page! This is reinforced by being mounted onto some fabulous Sn@p Basics woodgrain paper, which has brought the white to life.
 
 
I pulled off the circular element and added these script stickers from a sheet of Sunshine & Happiness Fundamentals. I’ve disguised a section where I tore the paper slightly, by adding a small yellow 2x2 inch card from the Sunshine & Happiness Sn@p Pack.
 
 
To make the ‘#’ part of my title coordinate better, I have added a bit of detail with a white gel pen. 
 
 
Journalling straight onto a 4x4 Sn@p card... I think my DS is going through ‘the change’! hehe
 
 
Even though I have used lots of feminine elements, I think the page still retains a bit of masculine charm. Those little butterflies were cut from a 4x6 card (Happy Sn@p Pack) and given a coat of Glossy Accents.


The bottom left corner has had a little makeover, with the addition of some 2x2 cards (Sunshine & Happiness) spelling out the word ‘Hello’. I haven’t removed the existing cards below. I quite like the bit of colour peeking out from underneath. Having this large word on the left balances out the elements in the top right area, drawing the eye along a diagonal from bottom left to top right.
 
 
_________________________
 
 
Fixer-Upper #2
 
This next page is a self-reflective one. I didn’t add a picture to it in the beginning because I strongly dislike photos of myself… Enter the gloriously funny Snapchat filters! I printed this one off, cropping all the ‘seriousness’ out.
 
Again, I’ve kept a lot of the original elements, just building up some layers here and there.  I started with adding some Life in Color Chipboard Frames to some of the 2x2 cards. They add both interest and subtle depth.


I’ve also kept the title the same, but have opted to snip off the word ‘life’ from the black strips (cut from a 4x6 Life in Color Sn@p card) and add it back, in the form of a Life in Color wood veneer shape. I really like how this changes the dynamics of the title and draws the eye in.
 
 
A bit lower down, below the title, you’ll notice I have added lots of little details like mini wood veneer and enamel dots.
 
 
Behind the photos on both pages, I have created a little pocket by stitching two 4x6 Sn@p cards together. I created a bit of hidden journalling using a strip of paper and a tag punch. This tucks very nicely into my pocket.
 
 
Here you can see how I decorated the journalling tag before I added some typed text.
 
 
Thank you again for popping in today. Don’t be afraid to change up a project that just doesn’t sit perfectly with you. The results are well worth it!
 
Happy Crafting!


Hello friends! Leah here with you today to show you how I’ve been getting creative in my planner this month. I have really been enjoying the Posh collection! The colors are so lovely and the pretty florals and fun icons make this collection so versatile that I just can’t seem to get enough of it!

In the front section of my planner, I still have the “Notes/To Do” section where I have been writing down my monthly task lists. I love to decorate these pages! I get to start with a completely blank slate which gives me the freedom to really have fun and get creative.

On this page, I sprayed Heidi Swapp Sweet Mint Color Shine onto a sheet of plastic and pressed the paint onto the paper to create a background for some layered embellishments. I used scrap paper to frame the “you got this” card from the Posh Dashboards and Pocket Cards. I love how the black and white stripes separate the colorful card from the colorful paint in the background. It really makes the card pop off the page!

I added gold glitter washi tape along the bottom of the card, as well as a dotted washi tape from The Reset Girl collection. The gold clip die cut is from the Posh Bits and Pieces pack. I tied some pink string into a bow for some more interest and used The Reset Girl roller stamp to stamp the stitched design onto the card.

I used some more of the dotted washi and a floral washi tape from The Reset Girl collection at the top of the page. The gold page clip and the “goals” stamp are also from The Reset Girl collection. I love how well some of the elements from the Posh and The Reset Girl collections coordinate! The die cuts are from the Posh Bits and Pieces and the gold doily is from my stash.

For final details, I added little heart stickers from the Posh Planner Basics sticker pack and I doodled a scalloped design along the edge of the page.

On the left side of the two-page layout, I wrote out my task list for August.

I used some more Heidi Swapp Sweet Mint Color Shine in the top corner. I then layered several Posh embellishments: washi, a word strip sticker, a mini monthly calendar sticker, and a couple of page flags.

At the bottom of the page is another cluster of embellishments. The yellow tab and jar of flowers are both die cuts from the Posh Bits and Pieces. To tie this page in with the other page, I brought in the other half of the gold doily and another heart sticker. I also added a scrap of the black and white paper I used to back the “you got this” pocket card and I doodled the same scalloped design along the edge of the page.

The next step in my planning process each month is to decorate my monthly layout. When writing out plans on the monthly spread, I usually only write down scheduled events/tasks/appointments I need to plan around when doing my weekly planning. Since I do not write out detailed plans here, I have a little more room to decorate… yay!

On this layout, I used lots of Posh Bits and Pieces and lots of stickers. The Insta Quote stickers are the square ones that fit perfectly into the boxes. All the little heart and flag stickers are from the Posh Basics Sticker pack.

I am smitten with this little cluster right here! The Reset Girl washi tapes, and the feather and ampersand die cuts, and the pink hearts and floral flag…it all just feels so whimsical! Especially with the “where the wild things are” sentiment on the word strip sticker!

The right side of the page is a lot of fun too, with lots more Bits and Pieces and Insta Quote stickers! I love the die cut balloons that I laminated and turned into a paper clip! I thought it would make such a cute clip to reuse throughout the year for planner layouts that include special occasions, such as birthdays and anniversaries.

One of my favorite parts of this entire layout is the large flower die cut in the top right corner; it's from The Reset Girl Bits and Pieces. I had to resist the urge to hoard this one! However, since this month marked 5 years since I started dating my husband, August felt special enough to get such a "special” die cut. I'm so happy I used it!

 I am still using the Vertical Appointment inserts and I really like them. I love having the option to be structured with my days or to be more relaxed with scheduling. On less busy days, I just ignore the times.

The beautiful floral washi tape along the ring holes is from the Posh line. The Weekly Stickers work so well in the columns of these inserts! Some of them have cute inspiring messages on them, but there are also sheets of blank boxes that you can write your own notes in.

The adorable bird and heart are from the Bits and Pieces pack. I added a word strip sticker to the heart and backed it with mint washi tape from The Reset Girl line.

On the right side of the week, I used more box stickers as well as some header stickers from the same Weekly Stickers pack.

The little tag was super easy to make! I used a tag punch to cut out the tag and then I put one of the weekly sticker boxes on it and lined the edges with gold glitter washi tape. I punched a hole and added some pink string and wrote a motivational message. I love how it turned out!

The real star of this layout is the banner that spans across the middle of both pages. This was also very easy to make using the set of Posh page flags. I only needed one page flag of each pattern. I cut the flags in half and then trimmed the cut pieces to be flag shaped too, so I got two shorter flags out of each full page flag. I arranged the banner across both pages how I liked it and then glued the flags down. I used a glue pen to create a thin line of glue across the top of the flags so I could add the pink string. I then tied two pink bows with the same string and glued them down on each end of the banner.

As always, I am truly loving my creative time with my Carpe Diem planner. I feel like I am finally regaining some traction after the whirlwind that this summer has been. Over the summer, I have often felt too busy to spend time decorating my planner, but I am always so glad when I make that creative time a priority. It makes such a difference in helping my creative soul feel fulfilled, which in turn helps me stay energized and motivated with the less exciting, but necessary responsibilities of day-to-day life. I hope you all are taking a little time to get creative or to do whatever it is that refuels you. What do you do to re-energize and stay motivated? Be sure to write it down in your planner and prioritize it. Always remember, that time is just as critical as all of your other responsibilities. We all know what it feels like to run on fumes, but no one can keep going on an empty tank.

Until next time friends, take care and have a great week! I hope to see you all over on Instagram and/or Facebook!

With love, Leah

Hey there friends!  Vicki here with a little summer and a little fall fun!  
 
I wanted to share a class project I created using the Sunshine & Happiness Collection along with a layout using the brand new Hello Fall Collection!  Both of these lines make my heart happy for one BIG reason…the color combinations!!!  Sunshine & Happiness is magic with that hot pink, aqua, yellow and orange fabulousness and then you have Hello Fall with that BLUE!  And the orange, deep red and woodgrain loveliness!!!  
 
Come on, let’s take a look…
 
First up the Sunshine & Happiness 6x8 SN@P! album I created for a workshop…
 
 
I used the SN@P! Pack and some of the goodies from the collection.  Mustard Seed Distress Ink worked perfectly with this line.  I used it on the edges of the book.
 
 
Lots of interactive goodness with some gated flaps!
 
 
File folder pages for the win!!!
 
 
And a few more flaps.  Love how this one turned out.
 
_______________________________________
 
Now for a the Hello Fall instalment…
 
 
I love this Celebrate fall 12 x 12 paper with the huge leaf on it!!!  I thought this would be a good one to share as some may struggle with a way to use it.
 
 
I opted to add a little paint in a rough, dry brush technique in the woodgrain openings of the leaf.  I like how it draws in the focal point of the leaf.  I then added my journaling to the white outline.
 
I love the Decorative Clips!!  The designs are so fun!!!
 
 
I layered some of the Combo Cardstock stickers in the corner.  Love the fox!
 
 
Finally…added my go to embelli…Enamel Dots.
 
So that’s it for me!!!  Thanks for stopping by.  Make time to make today!!


Supplies

Hello everyone ! It's Mindi here with you today. I am so excited to be sharing a pocket page spread that I made using the fabulous Posh collection. 
 
 
This particular spread holds our week 22 of this year. I typically scrap weekly, which can sometimes be challenging with the wide variety of colors that can be in the photos. I went ahead and chose a title card that had multiple colors in it. It sort of set the tone for the rest of the spread. Plus, aren't the hearts simply adorable ! I kept the title card fairly simple as I usually do. Starting with a few vellum hearts that I punched out and then added them underneath my two sets of embellishment clusters. 
 
 
Typically I like to add lots of journaling to my spreads. This left side is very journal heavy as I had lots of stories to document from this week. I love to use the cards that have very little pre embellishments on them to customize and to tell longer stories like I did with this first card. I knew that I had to use these cute pencils that comes in the Bits & Pieces pack somewhere. I used it as a sort of separator for my journaling talking about school being out for the summer. The other cards like the second one here is perfect to house a smaller story and also to add a photo as well. 
 
 
My oldest daughter has been really into this book series called Warrior Cats. Being the very creative girl that she is, she came up with the idea to paint her Littlest Pet Shop cats to resemble all the characters in her book series. She spent weeks painting them all, one by one. I love to use the white space in my photos for some for journaling or embellishing. I did just that and added some embellishments to the bottom. 
 
 
Here is some more journaling on the smaller cards. I added a few simple embellishments to the first card as to not get too crazy busy. Cause you all I love my embellishments, there are too many fun things to play with and use. The second card talks about my daughters cats. I used the letter stickers to abbreviate Littlest Pet Shops and added a word sticker to the bottom. Can I just say that I had to fight the urge to not put one on everything. They are among my current favorite things to embellish with. So simple and fun. 
 
 
Let's move onto the right side. This side of my spread is mostly full of photos. Lots of swimming, and celebrating National Donut Day. I added some of the word strips to the photo on the left. The middle of the photo seemed like the perfect spot to add them. 
 
 
Isn't it true that we all love washi tape. It is so versatile and colorful. I wanted to add some of the washi tape from the collection in the middle of the these three words. But it was to big in the beginning. I cut it in half and it turned out perfect. I love how it adds a little touch of the navy color. Don't be afraid to cut up the washi tape, and even the journaling cards to fit your needs. 
 
 
It turns out that during this week I took a bunch of swimming photos. I decided to crop a few down to make a small collage for this bottom card. I also liked that this card had a label sticker to tie in with the other side's smaller card. Once I had my photos onto the card I added a strip of washi tape and started layering things on top. 
 
 
This donut card was the perfect addition to this week. I added National Donut Day to the top corner with a clear sticker and an arrow to finish it off. It seemed to need something else so I ended up adding the date to the bottom corner to balance it out. The June word was cut out of one of the 2x2 cards that come in the SN@P pack. With this last card I want to point out that I added some washi tape on a diagonal to add some color. 
 
 
That wraps up Week 22 using the very versatile Posh collection. Thanks so much for coming to the blog today. I hope I have shared some inspiration to help you to scrap your every day memories. 

Hi everyone!  Theresa here, sharing a peek into my planner setup for August!  I moved into the new Persimmon Carpe Diem planner from The Reset Girl line!  

I love that the planners from this line have the clear pocket in the front inside cover.  The 3x4 pocket cards fit perfectly, I added a family photo to mine. I also added some fun embellishments, sticky notes and clips to the  smaller pockets and the Doc-It Journal to the larger pocket.

I created a new simple dashboard by cutting down one of my favorite patterned papers from The Reset Girl scrapbook line and adding some planner girl stickers!

I started using the Doc-It Journal to document some of my summer activities!

Recently, I've been adding clear photo pockets to my journals.  For this next layout I added a 4x6 SN@P Pocket Page.

I covered the punched holes with a strip of washi tape.

I then used a strong double sided adhesive to attach it right into my journaling page and added more washi.

This not only let's me add more photos and embellishments to a layout, but it's also a fun interactive element inside my journal.

Wow! I am so impressed. Violet, here on the blog today to share my new Carpe Diem Planners. The gold rings and charms take my breath away, there is a simple elagance to the new planners that I love. I couldn't choose which to share, thus, why I have to share all three in a fun creative planning layout.

First up is the Pink Ballerina by The Reset Girl. I used the new Carpe Diem scrapbook collection to make a new dashboard. I stuffed my pockets with Bits and Pieces, Metal Clips, decorative clips, and journaling cards. I even laminated the sticky notes and inserted them into the pocket. The Pinks and Orange and mint greens look so gorgeous in the planner.

Secondly, is the new Ivory Carpe Diem planner. When I open it, the quote "Choose to Shine" is the first thing I see, and how beautiful, that it is all in Gold. I chose to decorate this planner with the Posh collection line. The yellow, pink and Navy are a perfect combination. 

Secondly, is the new Ivory Carpe Diem planner. When I open it, the quote "Choose to Shine" is the first thing I see, and how beautiful, that it is all in Gold. I chose to decorate this planner with the Posh collection line. The yellow, pink and Navy are a perfect combination. 

Third, is the new Robin's Egg Carpe Diem planner. One of the changes that I was so impressed with, was the whole planner being one solid color. I used all the same pieces to embellish all my planners. Another element that took me by surprise, is all the gold that is included in the journaling Card Elements and Paper products. This just adds just a bit more class to my planners and makes me one happy planner girl. 

As I was taking my photos for the blog, I knew I wanted to take a photo of all the new paperclips that are now part of the new collection lines. I've said many times how much I love paperclips and you'll even see some I made. These truly make all the difference when planning. 

 
Thank you all once again for stopping by the blog and taking the time to read and view my post. I really appreciate it. I hope I have inspired some of you to get your creative juices flowing and create something new. The new Posh and The Reset Girl Collections make it so easy.

SaveSave

Supplies

Hey there!  Missy back with you today, and I have two fun and festive layouts to share.  I used the Let’s Party collection for this one, and it was perfect for documenting this photo from my 40th birthday back in February.  The colors are so vibrant, and the embellishments made it so easy to create this fun design.  I wanted to excentuate the 40 since that’s a milestone birthday.  I cut it really large on the HB2U patterned paper and then used a lot of the 6x6 Paper Pad papers to back it.  I cut them into strips and adhered them diagonally.  I used some white gesso to smudge over a lot of that area so I could add some watercolors.  I used the packaging technique to get most of that color on.  Once it was all dry, I machine stitched around the numbers for added detail and texture.  I fussy cut “Big Deal” from the Hip Hip Hooray paper, and it made the best title.  I have to say my favorite thing about this collection is all the fun banners!  I used several on this page.

Here’s a close up of the fussy cut letters.  I love stitching through titles…mainly to make sure they don’t move, but also for added interest.  I used a few papers behind my photo as well as one of the larger chipboard frames.  Sometimes it’s fun to use the frames as a layer instead of an actual frame.  I love the dimension this created.

Here’s another smaller frame I used as a layering piece.  I chose this one because of the bright yellow.  I added some tangled thread, a few clear stickers and that amazing HAPPY sticker banner.  I love the curve of it, and it makes it so festive!  Banners make everything so fun.  You can also see where I smudged the gesso.  It gives everything a bit of a faded look without completely blending it away.

I used lots of die cuts from the Bits & Pieces pack here.  I love these little flags, and I added pop dots under them to create some depth.  I did the same with the Birthday die cut.  Those faux glitter stars were the perfect embellishment for this part of the layout.

More banners!  These are from the Bits & Pieces and Snap Pack.  I added cute Enamel Dots to the ends so it looks like they’re attached to something.  You can see the machine stitching up close here as well.  I added another glitter star die cut and a Brad on top of the photo.  This was so fun to put together!

__________________________________

For my next layout, I combined the Let’s Party collection with Sunshine & Happiness.  It was lots of fun to mix and match these two super bright collections.  I wanted to show that you can use Let’s Party for photos other than birthdays.  These photos of my youngest daughter are some of my favorite.  They totally show her personality.  She is constantly making funny faces, and when I try and take her picture, she tries to get as close to the camera as possible.  So extra close-ups are what I wind up with…haha!  That’s just her.  I always say she’s the life of the party, so I created this fun “party” layout about her silly self.  I knew I had to use those fun party cows!  How fun are they?!  That gave me the idea for Party Animal as my title.  Again, I was inspired by all the fun banners, so I decided to make my own using a circle punch and lots of patterned papers.  I punched circles and the cut them in half.  I arranged four lines of banners and then stitched through them.  I think the key to making them look a little more realistic is to overlap them.  I did some watercolor work on the background again using Shimmerz.  I didn’t want to go overboard with it because of all the extra bright colors going on.

I combined a chipboard cow with a fussy cut cow. My favorite!  Such a fun (and unexpected) embellishment!  And I like that they’re facing her, like they’re looking at her.  I used some of the alpha stickers for this part of the title and added a few die cuts around the cows and on top of the photo.

Squeal!!  A chipboard rainbow word banner!  I HAD to use this, and I love how it layered so nicely in my circle banners!  So perfect!  And it’s glittery.  It doesn’t get any more festive than that!  I’m swooning over all these colors!  I made sure the watercolor was very light and airy so it wouldn’t compete with the other colors.

More banners down here!  I used two banner stickers from the Expressions Cardstock Sticker sheet and one of the Chipboard ones.  My journaling fit very nicely right under them.  And yes, my daughter has a mouthful of chewed up Cheerios here…haha.

I had to work in a sunshine somewhere on this page since that’s what a lot of people call her.  I fussy cut this one from one of the 4x6 Sticker sheets and used it as a die cut.  I added lots of tangled thread and a fun brad.  I love all the layering going on, and how her silly face just emerges from the banners.

SaveSave

SaveSave

Supplies

Good morning friends. Brenda Smith here with you today and I am really excited to show you a little extra project I've been working on in my planner. 

Have you seen the Doc-It Journals that coordinate with The Reset Girl and the Posh planners? They are a Traveler's Notebook size and one of my absolute favorite things about them is how thick the paper is! I stamped and painted and had no bleed through on the other side.

Little Summer Joy is a project that I've seen several participating in on Instagram. I knew that I wanted to join and a lot of people were doing the Traveler's Notebook format this year but I've never done one. However, as soon as I saw this Doc-It Journal that coordinates with The Reset Girl line, I knew I'd found my album. (If you'd like to find out more about this particular project, please visit the Little Paper Projects blog)

Doing this notebook pushed me out of my comfort zone and got me away from my beloved typewriter a little bit. I love the idea of including handwritten journaling in my documenting projects. 

The Reset Girl SN@P! Pack makes it easy to get some color and pattern into your albums. I hand-stitched around the J for June to give it a little bit of depth. 

I tried not to overthink the process too much. I printed photos at various sizes and picked journaling cards to type or handwrite our stories on. Whenever I would get stuck and not know where to go next with my design. I'd just start moving things around the page until something looked good and then I glued it down. No second, third, fourth-guessing myself like I usually do. 

I relied pretty heavily on my stamp stash, including one of my favorite new roller stamps for the Reset Girl line. My daughter graduated from Kinder in June so I made to sure to document her friends and teacher. 

Little Summer Joy celebrates the small moments, and while this moment was a bit of a failed experiement, my heart was full watching my three working together to accomplish a goal. I used a label punch from my stash and the 6x6 pad to create the background of the left page. For the full-sized photo, I used Photoshop to resize to 8.25" by 5" and the printed and rounded the corners. 

In case you were wondering, you can sew in your Doc-It Journals! It required a little bit of pre-planning on my part because I had to place this page on the backside of a page that I would be covering up with patterned paper so that the stitching on the back didn't show through to the other side. Again, I used some punches and the 6x6 pad to make the shapes for the background. 

I trimmed some patterned paper and a 4x6 horizontal card down to cover the left side. I filled in a pie chart in Silhouette Studio with my photos and then cut them out. I used the number stickers from the Posh collection to mark the photos and then used stamps from my stash to write the coordinating journaling. 

I wanted to challenge myself to get a plastic page protector inside my Doc-It Journal. I wasn't sure it was going to work but I decided to try to stitch one into the middle seam. My hands were shaking the entire time I was machine-stitching because I was terrified I was going to mess everything up, but it went smoothly! 

 
I simply stitched directly into the middle seam, carefully making sure not to stitch through the page on the left or the right. 
 
 
And here's the other side and the beginning of July. I'm so excited to continue on with this project in my Doc-It Journals. 

Pages