April 2018 Blog Posts

Wedding photos are one of my favorite memories to scrapbook because they are a reminder of the love and joy of that day!   Always & Forever is a timeless collection full of class and beauty without being over the top!  The bonus is that it can be used for other similar events such as proms, dances, or anniversaries!  I  chose this favorite photo of my daughter when she was a flower girl for our niece's wedding. The photographer caught her spinning in her pretty dress before the ceremony like many little girls love to do!

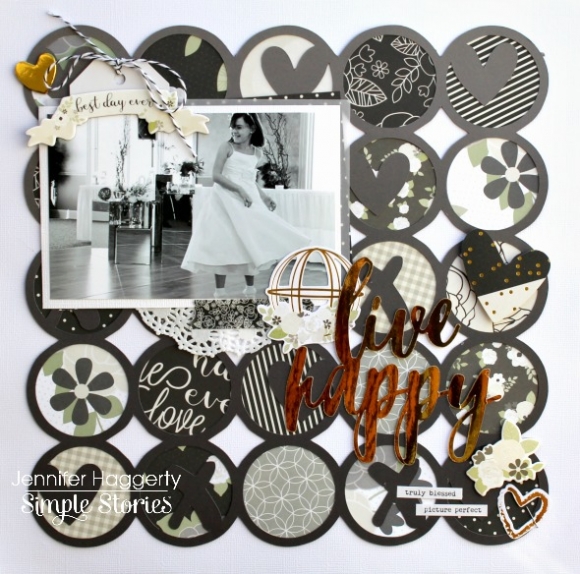
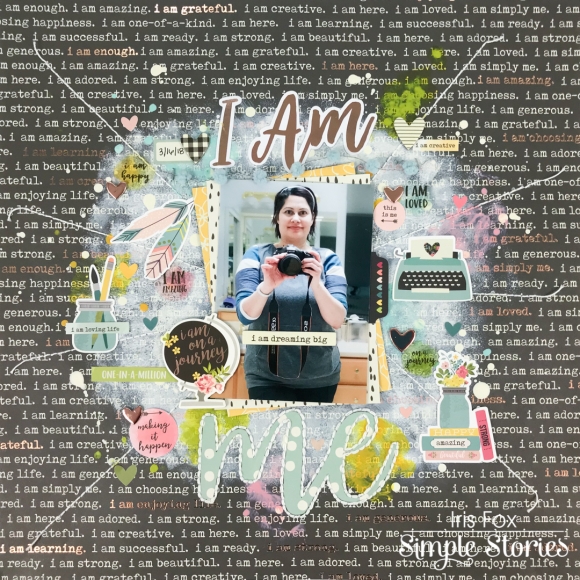
​I  began with a grey/black ombre sheet of cardstock from Bazzill for my background cut file (Circle Heart Mask from Paper Issues). I  wanted to incorporate as many of the beautiful patterns as I  could so I  used my circle hand punch to place papers behind each circle on the die cut.  For my title, I  used the "Live Happy" cut file (#227456) from Simple Stories found in the Silhouette Shop and cut from gold foil cardstock.  I  thought it would go perfect with the gold foil accents found on the embellishments! 

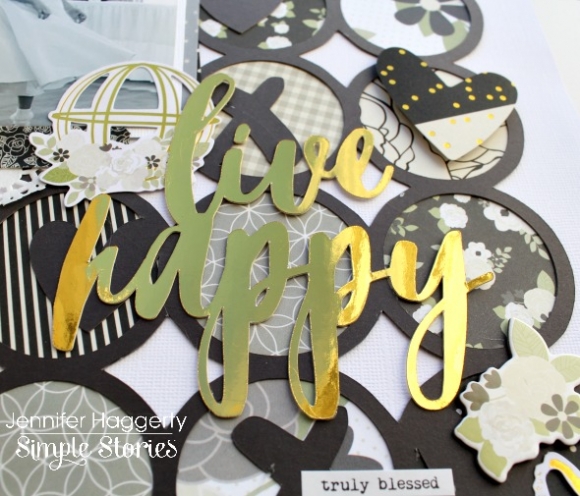
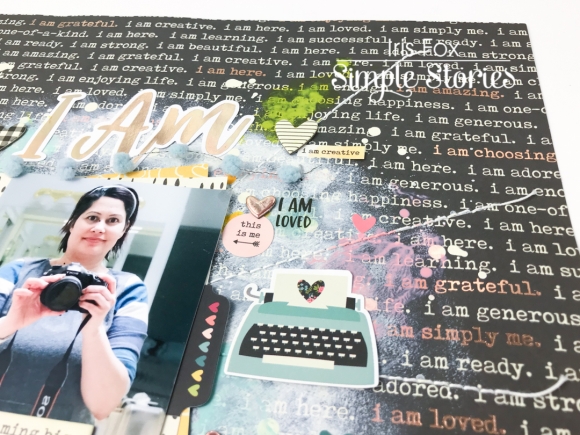
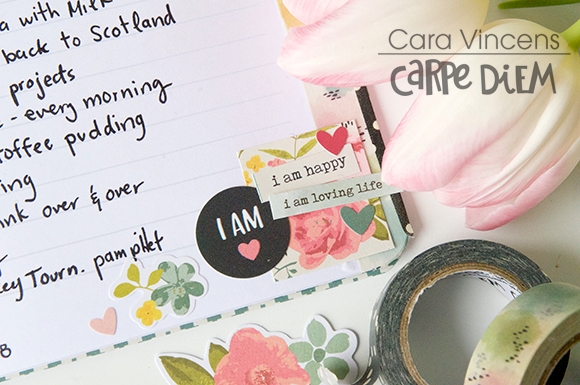
I  added small embellishments from the Bits and Pieces pack as well as the 6x12 Chipboard on a few of my circles to accent. I    also love these sentiment stickers found in the 4x6 Sticker Sheets!  I  use them on all of my projects! 

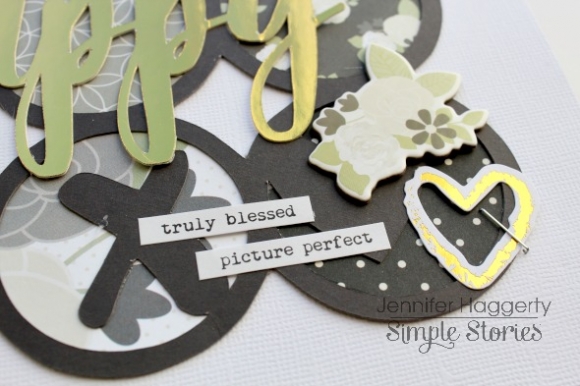
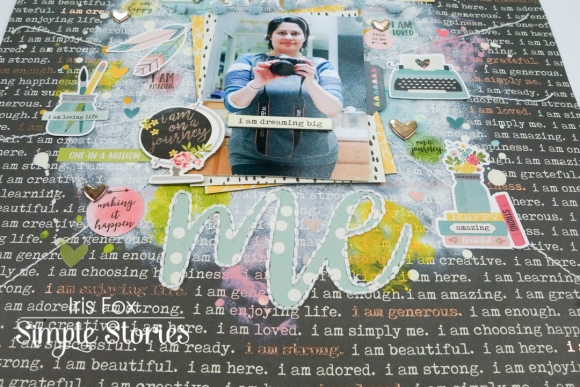
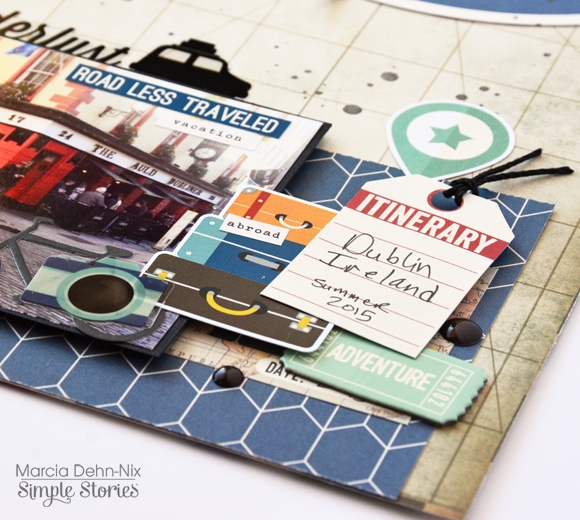
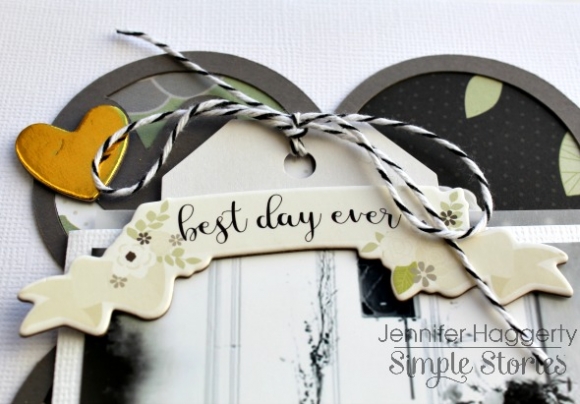
​I  also love to tuck items like this cute tag under my photos! The Bits and Pieces packs always have a few coordinating tags just for accent or to journal!  You can also see the gorgeous "best day ever" chipboard "banner as well as gold foil chipboard heart! 

Thank you for stopping by today! Check out this collection by going to the products page! And don't forget to look at all of the fun new releases! Have a great day!

Supplies

It’s Odessa with a cute 4x6 album I’ve put together with some photos from a recent weekend road trip with my family using the Simple Stories Bliss Collection! Even thought it’s still pretty snowy, I picked Bliss because of it’s light spring-y feel for our spring break road trip to Minneapolis. I kept things simple with lots of all sorts of stickers - words, phrases, chipboard and more! Bliss has lots of super usable phrases and icons that were easy to match up with pictures.

I love the plain chipboard cover of the 4x6 SN@P! binders! I went with a teal spine and decorated it with some cut down cardstock in a nice wood grain and added some of the Bits & Pieces and stickers to personalize it.

The first page of the album is my favourite! The left pocket is more cut down cardstock. I love the handy photo crops so I can see exactly what I am cutting and get it the right size. I used some of the Basics alpha stickers and embellished with some stickers from the Bliss 4x6 sticker pack to make a title. On the right I used an iced coffee cup with an illustration of Minnesota, again cut with the photo crops with a cute heart from the chipboard stickers. See through elements are so fun to add to mini albums!

Throughout the album I used coffee sleeves or cups cut down as dividers for each day. For the sleeves, I cut down cardstock to the same size and glued it to the back so I could add some journalling.

The cardstock in the Bliss collection is really really pretty so I let it shine on this spread, cut down to 4x4 with a simple chipboard sticker on it. I added some more stickers to the photos on the spread for an easy but cute layout.

Throughout the mini album I used lots of the Basics alpha stickers as a focal point and word strips to capture how I felt about this pictures. Here I also used one of the 3x4 elements to fill up my pockets and quiet down a busy spread.

This is my second favourite spread in the album. A cute picture from our trip that goes really well with Bliss on one side and one of my favourite quotes of the trip from my younger son using the Basics alpha stickers again.

Here I used one of the photo flips. When we go on trips I collect bits and pieces of ephemera to go with my pictures and this cut out from a fast food tray liner was perfect in the photo flip above our lunch picture. I just folded down the sticky edge of the photo flip and attached it  to the back of the page protector.

When we go on trips, I always pick up some film for my instant camera for my older son. He loves taking pictures with it and I love seeing things from his point of view! I added his favourite ones to a 3x4 photo booklet and slid the back of it into one of the page protector pockets for a quick flip book. It was the perfect way to add in his pictures.

I had so much fun making this mini album. There are so many fun sizes of page protectors and accessories that it’s easy to add all of my pictures and things into an album.

Supplies

Hello friends. María here showing a new month to edit bullet journal.  I know, it's still early to think in May, but I could not wait to use the I Am ... collection.  Also, May is my birthday month. I hope to inspire you and if you wish you can visit my instagram to see my weekly.
 
 
This is the insert I use to edit my future log. The 6 x 8 paper pad helped me decorate, I ripped the paper and combined with the clear stickers. I love how it looks!
 
 
For the interior cover I made a pocket, the designs of this collection are so beautiful that I found it difficult to decide which one to use. I cut out some rectangles of decorated paper to write the month.
 
 
I have decorated the collections of this month with strips of decorated paper, ripped paper, washi tape and clear stickers, which I love. I also used some 4 x 6 stickers to complete my gratitude log, I think they are perfect for this.
 
 
I have decorated my monthly in the same way, but I added some motivating phrases for the clear stickers. I'm sure it helps me meet my goals.
 
 
Finally my weekly. I use two, the first is to organize my work beforehand. The second is to take notes and to do lists.

Supplies

Hello friends.  Iris here with a layout using the I Am collection. Have you ever fallen head over heels in love with a piece of patterned paper?  When I first got the this collection in my hands, I squealed in delight with each piece I took out of the box.  But when I saw the typewriter text print with rose gold foiling of the Focusing on the Good paper, I gasped! I knew immediately I couldn't cut it up.  I had to use it as a complete background.

To help all the elements stand out against the dark background, I started with off-white acrylic paint that I dabbed on lightly with a makeup sponge so that it remained translucent enough for the background words to show through.  I thinned some of the paint down with water and used a round paint brush to splatter big droplets. Inspired by the water color circle sentiments in the Clear Sticker pack, I also watered down acrylic paint in aqua, pink, green, and yellow shades, and used the packaging technique to create some splotches. Then I stitched a few lines radiating out from the center.  

Now my base was ready to add all the elements to. I cut the yellow flower and black and cream papers from the 6x8 pad to layer behind my photo.  I'm really loving the scale of the patterns in those pads!  I was going for a mostly symmetric design radiating from the center, so I divided my title above and below the photo.  I used the lovely rose gold foiled "I Am" from the Bits & Pieces pack. The "Me" was cut with my Cameo from the b-side of the 4x6 cut-apart sheet using one of my favorite fonts called Miss Elizabeth. (downloaded from the Silhouette store)  I hand stitched around it to make it pop and to personalize it even more because stitching is one of my things. 

I had so much fun picking the icons and words that really resonate with me and arranging them in a swirling cloud around the photo.  My brain is always swirling with stuff, so I feel this design captures my personality really well.  I used something from every pack in this collection. The "making it happen" was a square from the 4x6 Stickers, but I punched it out with a 1" circle punch so that it could match the others.  

To fill in some of the gaps and create a bit of clustering, I sprinkled lots of hearts around.  I can't decide if the rose gold are my favorite, or the buffalo plaid and striped ones.  I love them all!  One final bit of whimsical touch is a string of pom-poms from my stash I've had at least 8 years.  Great to finally use it and I like how it underscores "I Am".

The I Am collection is so beautiful and inspiring, I'm absolutely smitten with it!  It's full of soft colors, accents of black and glorious rose gold, and tons of affirming sentiments, making it the perfect collection for documenting ourselves.

Supplies

It’s Cara today from the Carpe Diem team and I love making my own traveller’s notebook inserts! Usually I use plain, lined or dotted paper for my pages. This time, I was inspired by the free ‘I Am’ printables to use those as the pages. 

Using Photoshop, I trimmed each page, made them into a PDF and then printed them as a booklet in Adobe Reader. This worked for the most part, only there’s a white border around the edges of the pages. My printer won’t let me print the pages of a booklet all the way to the edges of the paper. I’ll have to try a different technique next time.

I used the I Am… collection to match the printables and I started with the ‘Staying Positive’ paper as the cover and stitched down the middle of the whole lot before folding it all in half and trimming the pages to size. 

Since spring is still too shy to poke her nose out here in Luxembourg, I thought I’d try and coax her out with some flowers and butterflies. So after layering washi, paper and a sticker for a border, I added a floral tag and stickers and topped it all off with a chipboard butterfly.

I love to add pockets to the inside of my inserts. These are great for tucking away spare Project Life cards, stickers, receipts and memorabilia. I added some cards cut from one of the cut apart sheets. 

Pockets are easy to make, just take a strip of paper the height of your pocket and about 2 inches wider than the size needed and accordion fold each side down to size. Stick down the two sides and the bottom, being careful not to glue the folded bits together, and voila!

More butterflies are added here to further invite spring! One sticker and 4 die cuts. The die cuts are only adhered down the middle and I bent the wings up to make it look like they’ll take flight at any minute. A few more stickers and die cuts and the pocket is complete.

The ‘I Am…’ page is my favourite from the printables. I love capturing the everyday moments of life. They are what make life rich and wonderful and I love looking back over pages like this to see what I had been up to at that time in my life. Life seems to move slowly, but really it does change quite quickly, so these little records become priceless peeks into our own story.

I added a layered washi border to cover up the white border left by my printer and then layered some stickers to finish it off. What are you loving? liking? doing? etc…

Supplies

I absolutely love this travel line Travel Notes by Simple Stories. The colors are so cute and go with everything!!! 

I created this cute page layout and left the pictures off so you could imagine your own cute photos on this page..... it could go with a cruise, road trip, hiking just about anything!!! 

 I also made these cute wood blocks to put on one of my shelfs to decorate for the summer next to a fun vacation picture. 

Supplies

Hello friends.It’s Kylie with you all today sharing how I have set up my Grape, Carpe Diem Planner for April. I have the boxed A5 Grape planner and I have teamed it with the new ‘Bliss’ collection by Simple Stories. Being boxed, my planner already had a gorgeous selection of dividers and stickers come with it in the Bliss theme. So to combine all of this, really creates some lovely additions to my planner.

The delicate pastels of the Bliss collection really stand out in my Grape planner. I had a lovely time creating extra dashboards, using the A5 divider templates. I love having my planner pockets full and store a lot of my stickers and die cuts in them.

I created an extra pocket at the back of my first divider. Perfect for storing more stickers and receipts etc, in. Here you can also see one of the dividers my planner came with, complete with gold foil acetate overlay. Love it!

Here is a look at my monthly view pages. I love adding extra details and have made some flowers from a punch as well as some leaves. I’ve layered different papers for the extra colour.

I have used the banner date stickers from the Date Stickers Tablet. I love all the different colour selections to choose from. These fitted nicely as did the printed box stickers, from the Bliss Sticker Tablet.

I loved the banner stickers from the Bliss Sticker Tablet and have used them in my weekly pages. I love how orderly it makes my planning appear, being in point form.

With all these gorgeous die cuts and papers in the collection, I just can’t resist adding lots of tags and tip ins to my pages also.

I have also been using some Alpha dies to punch my own lettering from the patterned paper. I love the contrast it gives my pages.

Another dashboard I have created. It sits in between some of my weekly pages for colour.

I have also created a page mark using some of the 3 x 4 elements paper as a background. I’ve also fussy cut some of the beautiful blooms from the ‘Be the Good’ paper and centred them with some pearls I had in my stash.

Another element I loved adding were some Butterfly paperclips. I fussy cut some of the Butterfly’s from the ‘Enjoy the Ride’ paper, and sandwiched a paperclip in between. These were actually quite addictive to make!

I hope you have enjoyed seeing my April planning today and it inspires you a little with your own.

Until next time,

Supplies

Hello Simple Stories fans!

Marcia here today with a fun layout created with the awesome Travel Notes collection. This collection is perfect for documenting your wanderlust adventures. A couple years ago, my daughter was fortunate enough to spend a summer backpacking across Europe with a friend. They started their adventure in Dublin Ireland. These photos were some of the first ones she sent to me.

I created a cluster of embellishments in the lower right corner of my layout with the Itinerary tag to document the location. You can see stickers, chipboard elements, and some of the Bits & Pieces die cuts all deliciously layered on top of each other.

I used a digital cut file for my title cutting Adventure twice, the second time from the map pattern paper. I popped it up with some foam tape and added some fun clear stickers, phrase stickers, and more chipboard.

The compass point was fussy cut from pattern paper. I love how it looks with my title layered over the top.

A smaller cluster of embellishments is located in the lower left. I used phrase stickers on top of my photos and added the wanderlust and car from the clear stickers pack.

I love how this turned out. I know that the Travel Notes collection will be perfect for documenting your adventures too. Thanks so much for stopping by today!

Supplies

Pages