June 2018 Blog Posts

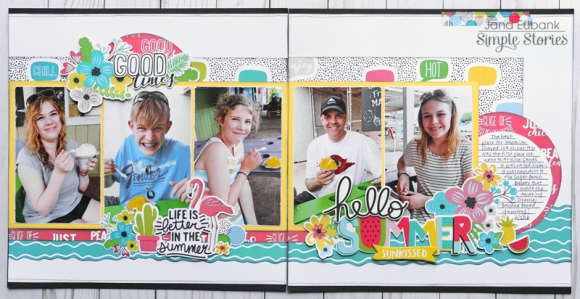
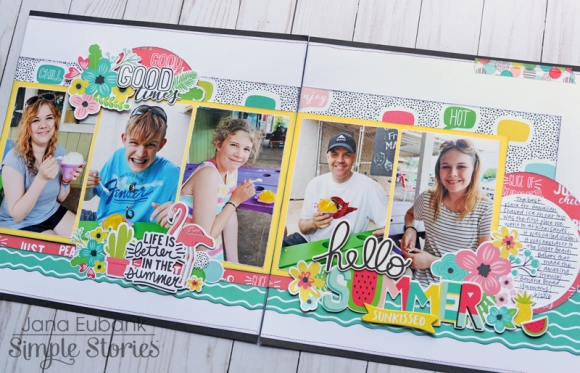
Hello everyone!  Iris here with a layout about one of those common summer activities when you have little kids - swim lessons.  I had a series of photos of my daughter braving her very first dive into the deep end that I've been waiting for the perfect papers. I've found those in the Hello Summer collection.  

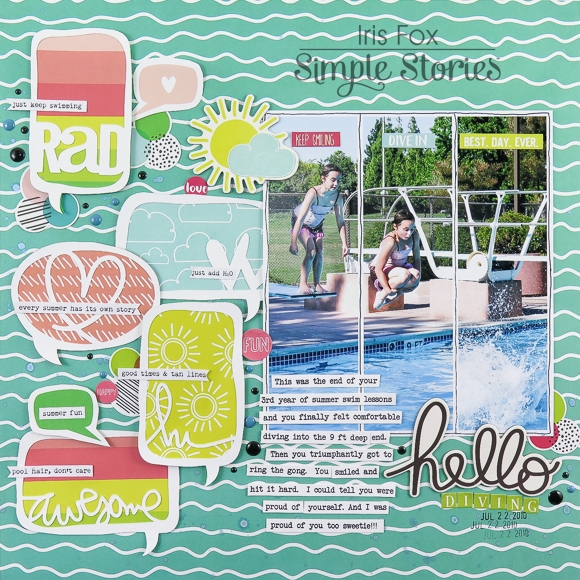
To start things off, I printed my photos as a collage of three columns and hand-outlined them for a whimsical, comic strip feel. I topped each column with word strips from the Combo Stickers. The wave pattern of Oh Happy Day makes a great background for pool pictures.

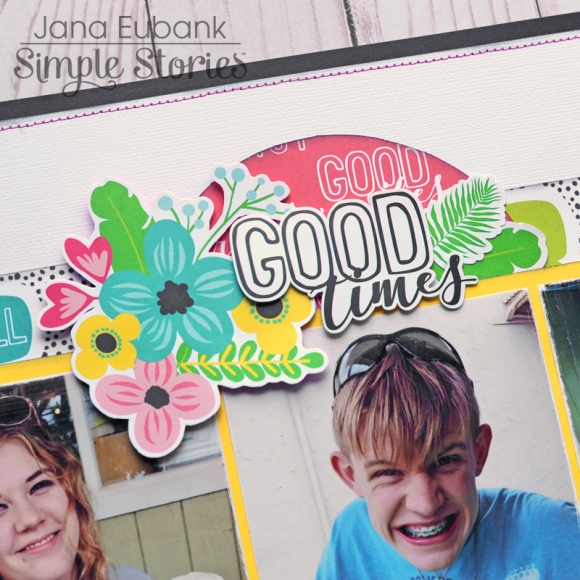
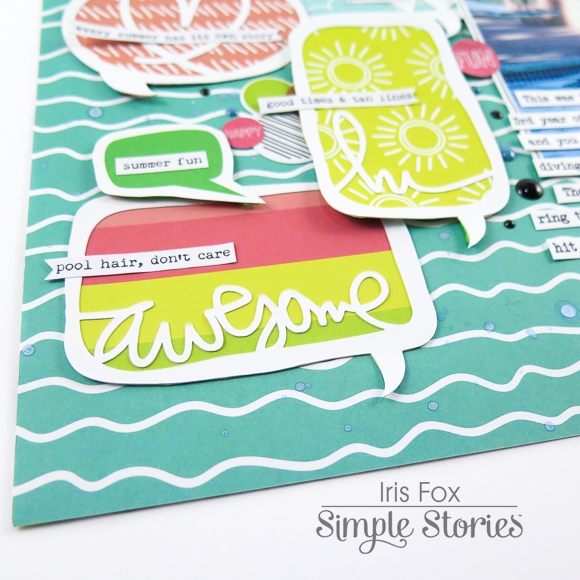
Large photo collages stand alone quite nicely without many layers, but I wanted to use a variety of the bright, cheery papers.  Inspired by the speech bubbles in the collection, I cut some large ones with encouraging words and hearts from the Silhouette store (Karla Dudley) and backed them with several of the papers. (Life is GoodCatching Rays, and 3x4 Journaling Card Elements)  I loved many of the sayings in this collection, so I added some from the word strips in the 4x6 Stickers pack onto the cut-outs.  Choosing the black and white ones to go on top of all those colorful papers kept it from looking too busy. 

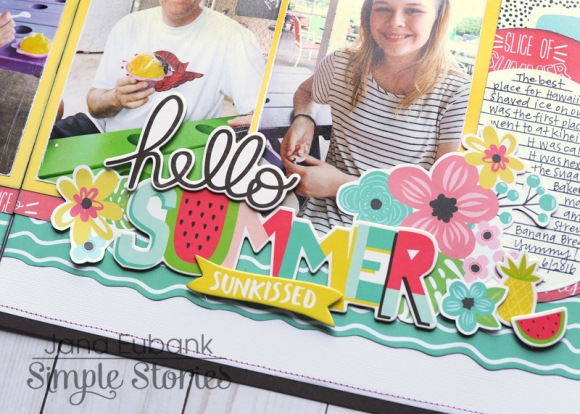
I'm a big fan of the trend to pair "hello" with everything. It serves as an invitation for the good stuff that follows it. Like summer, right?! I used the large "hello" from the 6x12 chipboard set for my title, adding small tile alphas from my stash for "diving".  The left-hand side of this design is packed with die-cuts and colorful papers; the oversized black and white word catches the eye to bring it across the page.

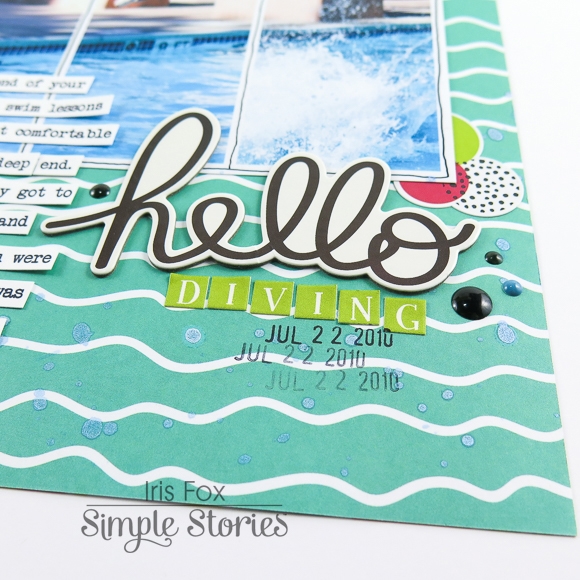
This layout is about the fun, but the story of this summer milestone for my daughter was important to me.  I printed my journaling in bold black on white strips, darker and larger to distinguish them from the word strips on the left.  The journaling bridges the gap between the embellishments and the title. 

I layered smaller fussy-cut speech bubbles and circle stickers along the column of speech bubbles. Ink splatters (Heidi Swapp Color Shine in Ocean) and a sprinkling of black and blue enamel dots contrast from the other colors and serve to bring in the blue from the photo and black from the title up to the rest of the layout.  All the circular embellishments are reminiscent of spraying water droplets. 

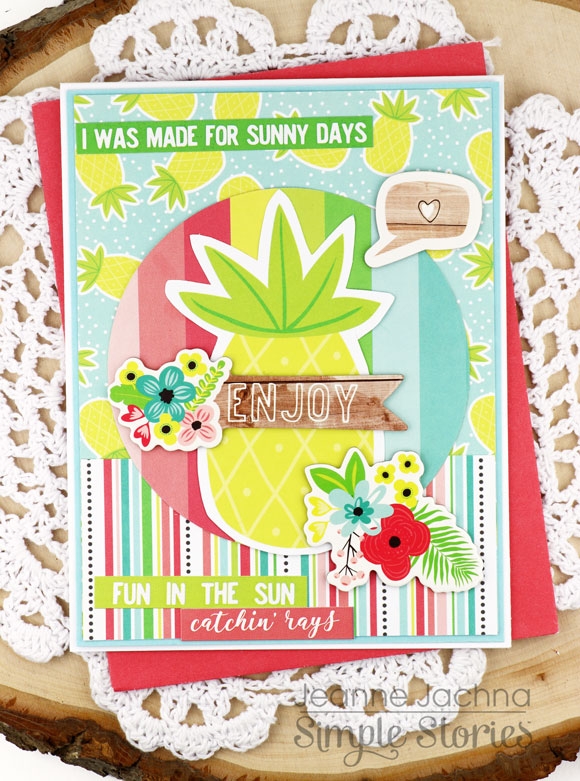
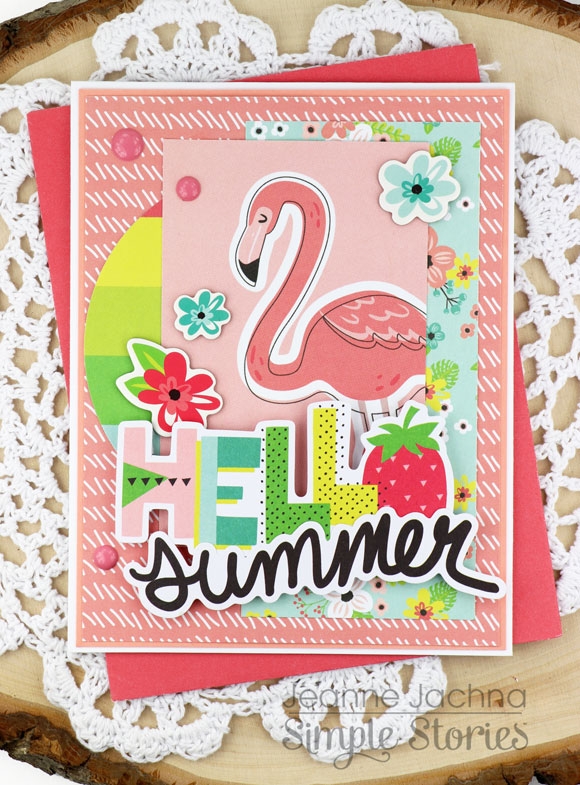
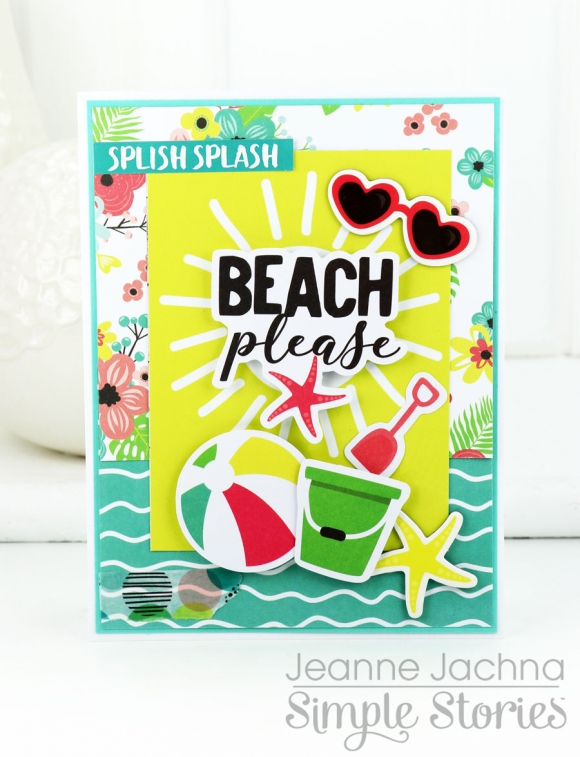
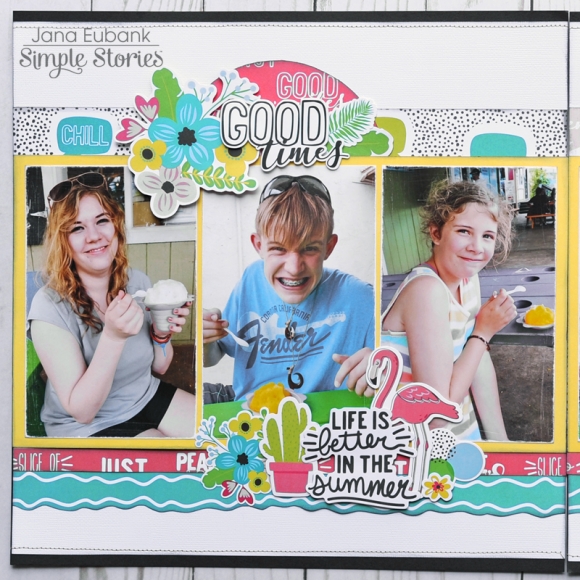
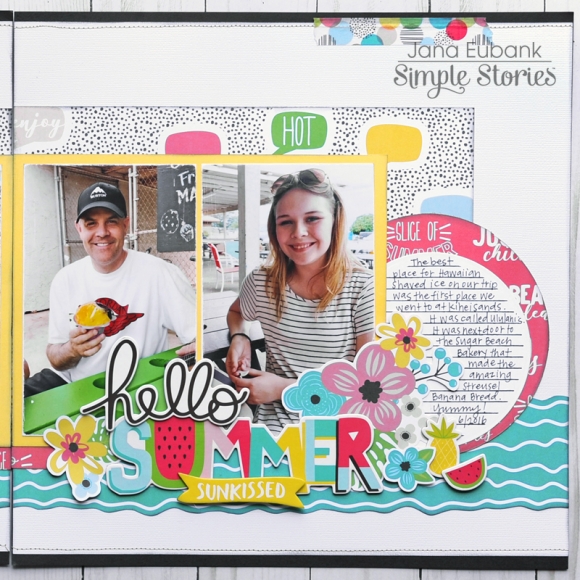
Well, school is out, summer is officially here, and Simple Stories has a fabulous collection full of juicy color, fun icons, and great words for all our summer scrapping! 

Supplies

Marcia here today with an adorable Oh, Baby layout for you. Come on, admit it ... we all take tons of photos of babies! They grow so fast over a short period of time and we want to remember every moment. What better way to document those photos then with the Oh, Baby collection. With it's gender neutral tones it's perfect for baby boys as well as baby girls. I couldn't resist scrapping this photo of my cute little nephew...

I printed my photo in a sepia tone to coordinate with the brown tones in the papers. Because I absolutely loved every piece of pattern paper in this collection, I wanted to use as much of it as possible on this layout. I did that by cutting banner strips and arranging them along the top of my layout. Then I matted my photo with some blue pattern paper and used foam adhesive to give it some dimension. So many cute little adorable animals and other baby die cuts and stickers make embellishments choices a breeze.

At the bottom of my layout I arranged stickers, die cuts, and a fabulous chipboard title.

Thanks so much for stopping by. Be sure to check out the adorable Oh, Baby collection ...  and did you know there is also an Oh, Baby Expecting and an Oh, Baby Adoption too!

Supplies

Hey Creative Friends! 

Florence here again! I just returned from New York and couldn't wait to document some of it. This is Adventure #9/32 of my adventure goals that I started since turning 32. Feel free to check out my first blog post I go over the insert I created. I feel like traveling is such an amazing way to tell your story. You are able to create experiences, some planned, while others are spontaneous. I love the unplanned moments as they make some of the sweeties memories. 

Day Two of NYC- it was a rainy and gloomy day. My friend Jamie and I had tickets to do a cruise of the NYC harbor. It was the only free day her and I had together, and I figured, let's still go. It started with me going to my favorite dumpling spot in China Town, and I accidentally took the express train into Brooklyn. I know rookie move. 

Even though the weather wasn't on our side, don't let water rain on your parade. Literally lol. Normally I would be the person to say no let's do something else. But I was able to learn about NYC history and see iconic buildings and structures.

We then decided to go to go to a few stationery stores. I LOVE stationery stores! They have the cutest things, and sometimes you can get lucky and score some local trinkets. First stop was walking distance from the Harbor called Browne Stone Stationers. If you're ever in the NYC area I highly suggest going!! We found so much NYC goodies. There's something about a stationery store that just makes me happy inside. One- because they're so very rare, and two- my love for stickers and stationery started at a really really young age (3 years old). Next stop was Casey Rubber Stamps. If you love rubber stamps, this is a MUST!! Lastly we went to Pink Olive. Which was such a cute shop.

I am truly thankful for the planner community and love all of the friends I have made because of it. I suggest if you can save up to attend an event local or afar- to check it out. You truly never know when you'll meet your next best friend :) Thanks for taking the time to read a part of my story. Until the next adventure!!

Supplies

Were you just born for a beautiful Summer day?  If you dream of the sun in your face and your toes in the sand then you’ll love the new Simple Stories Hello Summer Collection!  These cards are a sunny hello but would also be amazing invites to a backyard bbq or pool party!

The collection features bright colors and pretty tropical prints!  Of course there’s loads of embellishments too!  The Bits and Pieces die cuts and 6x12 Chipboard Sticker sheet  are perfectly coordinated and ready to work with. There’s even coordinating Washi tape!

The Collection kit includes sheets of journaling cards in different sizes perfect for documenting or using as a focal points on cards like mine.  A sticker sheet is also included in the collection kit - it's got lots of images and sentiment strips! 

 I adhered the die cut Bits and Pieces with adhesive foam tape to add some dimension.    I love the florals and fruit - it's so fresh and fun!   The thick chipboard stickers don’t need any special attention – they’re total eye candy!

It looks like it’s going to be a beautiful day! Go ahead and spread some sunshine!

Supplies

Hi everyone, it is Kelly here today with a new blogpost about my personal planner setup. I use this planner as my personal health planner. With all the fun, bright colors and all the positive quotes and sayings, the Good Vibes collection is perfect to use for this goal.

I decorated the pockets with some bits and pieces and stuffed a sticker sheet from the personal sticker tablet in the side pocket.

For this setup I used the Good vibes personal planner inserts and besides monthly inserts, this set also comes with an acetate dashboard with the quote ‘Carpe Diem’ in gold foil on it.

I cut a piece of vellum at the correct size using the personal divider templates and sticked on a small planner decal with the quote: Live Love Plan! These decals are not only perfect for the outside of you planner, but you can also use them on acetate or vellum dashboards.

I used the mini monthly calendar stickers to create a ‘half year at a glance page’ to have easy reference of the dates for the upcoming months. I decorated the page with some quote stickers from the 12x12 Combo sticker sheet.

The ‘This month’ spreads I mainly decorated with the 12x12 Combo sticker sheet of the Good vibes collection and added some distress ink in the colors that match in the back.

For the monthly spreads I used some more distress ink for a background and added the small circle number stickers for the dates. I hope this setup inspired you to use this collection in your own projects. Have a nice day!

Supplies

Hello, friends! Jana Eubank here. Summer is all about beating the heat with cool treats and the Hello Summer is the perfect way to record those fun moments with those sticky sweets. My family's favorite summer treat is Hawaiian shaved ice, and today's page features my family enjoying their favorite flavors after doing a little swimming.

I built three embellishment clusters on this page. To make the page cohesive, I made sure each cluster contained similar colors and elements. In this case, the common denominator in all three clusters are flowers and black and white phrases.

Across the bottom of both pages I used a wide strip of the Oh Happy Day paper with it's wave pattern. Instead of cutting the strips straight across with my paper trimmer, I used my scissors to follow along the wavy lines of the pattern.

I used several chipboard elements for my title and the decorations around my title. I used different thicknesses of foam squares to give these pieces different levels, making it more interesting to look at.

Have you scrapbooked your favorite sticky, summer treat?!

Supplies

My family and I do a lot of camping in the summer and this year I wanted to collect all of our camping trips in one (or maybe two) 6x8 albums. I started with the Robin’s Egg Blue Designer binder because its so pretty, a stack of photos from our first camping trip of the year and the Good Vibes collection! It’s not quite summer here yet and our camping trip was a bit more glamping than camping so Good Vibes had just the right vibe for a weekend of fun, adventure and ice cream.

I decided that each camping trip needs a good title page. For this one I went simple. I just used some of the papers from the Good Vibes 6x8 page, mounted the photo on a smaller piece with torn edges and added some simple stickers. I really like how it turned out. I also used one of the tabs from the planner tabs sticker tablet. 

On the other side of my title page I just slid in one of the cute ready to go pages from the 6x8 page. I am so glad that there are two of every page in the paper pad or I would have so much trouble deciding between the patterned sizes or one of the super cute pages with phrases on them.

I used one of the smaller 4x6 vertical page protectors (these are my new pocket page bff!) to add in a vertical picture with some fun stickers on it. The smaller protectors are a great way to add vertical or square photos in and add some dimension to an album.

I usually use a boring combination of pocket pages with 3x4 and 4x6 photos, but I had a lot of photos that would look good square so I added in some of the Insta Pocket Pages to get those square pictures in. I really like how the 2x8 space on the side of this protector gives me some space for cute paper. I never get to use all the cute paper I want in a pocket page album!

There is a great sheet of 4x4 elements in the Good Vibes collection and using the Insta Pocket Pages makes it easy to use them. On the other side of this spread I used a lot of the SN@P! Basics alpha stickers - I really like them for emphasizing text. They come in some great neutral colours and I use them a ton.

The Good Vibes pink script chipboard sticker was a perfect fit in the 2x8 Insta Pocket Page slot. The weekend was all about good vibes so I got that in there for a simple yet fun embellishment.

Simple Stories collections make it so easy to put together a layout and Good Vies is no exception! I used a couple of the 3x4 elements (love those colour combos) along with some of the stickers both from the 4x6 sticker pack and the cardstock combo stickers and it was done! So easy! The colours and sentiments all go together. It’s fantastic.

Here I used another one of the 4x6 vertical pocket pages. I just love those 2x2 slots. I didn’t have any 2x2 photos but they are a perfect fit for a lot of the stickers and bits and pieces. I added in a little journalling spot with one of my favourite pictures. On the other side I used some more of the 3x4 elements along with some stickers. I can never get enough of the phrase stickers that come in the sticker packs.

This page is packed with colour and pattern. I used another one of the Insta Pocket Pages and filled up the 2x2 slots with more of my favourite chipboard stickers and bits and pieces from the Good Vibes collection. I used more of the 4x4 and 3x4 elements on this page, I am pretty sure I used up almost the whole page of both working on these pages. Good Vibes might be one of my favourite collections yet - it’s full of great patterns, some of my favourite colours, cute icons like emojis, coffee cups, cameras, hearts and more and super usable phrases.


Supplies

Hello! María again to present the new design of my bullet journal for this summer. I really wanted to use this collection! Summer is here and we have to celebrate it as it deserves.

Here I show my "future log" that I do in a separate notebook. So I can write down all my future plans like my sister's birthday. And the notebook that I will use this month with a flamingo cover, on my YouTube channel you can see how I made it.

Inside the notebook I made this colorful cover using 6x8 papers from the collection, stickers and bits & pieces, and added with lettering the month.

This is my collection of "gratitude" where I point out short phrases to remember day by day. The washi helps me decorate, it is indispensable for me.

The "habit tracker" is my favorite, I set goals that I want to achieve every day like going for a walk, which is something that is hard for me. I decided to tear paper, I liked it so much when I used it in May that I wanted to do it again.

The menu section I use each month, so I can see if I eat healthy. Although I added a small tracker to point out the ice cream we eat, it's the best thing about summer, ice cream!

Is someone more addicted to netflix? I love watching series and documentaries! I have decorated with washi tape and I have left a space to write down the favorite songs.

My classic month view does not change, but it's perfect for me and I can plan my publications. I have done lettering with fine-tip pens and decorated with stickers and washi from the collection.

The previous month I changed the how the week was seen, but this time I went back to the columns. It's more clear to me, I've only changed dividing in two so that I have morning and afternoon schedules. I will decorate it with the stickers from the collection they are perfect.

Supplies

Pages