June 2020 Blog Posts

Hello friends! It’s Jen today with a fun layout using the totally awesome Bro & Co. collection.

A little-known fact about our house is that my husband has a collection of vintage arcades that he has restored. What was supposed to stay in the shop has now taken over our family room, which looks like Chuck E. Cheese. A couple of weeks ago he found a driving game, which has quickly become a favorite with our kids (and me).

If you have boys (or men) in your life, Bro & Co. is perfect for documenting all aspects of their lives . . . especially when they are reliving their childhoods. LOL!

When the guys were getting the arcade set up and making sure it works, I snapped these photos. Because the pictures are really busy, I decided to use the So Rad! Patterned paper. To begin, I cut the stripes from an identical piece of paper and distressed the edges. Next, I used the coordinating stamps on each stripe before machine stitching them in place and folding each edge upward.

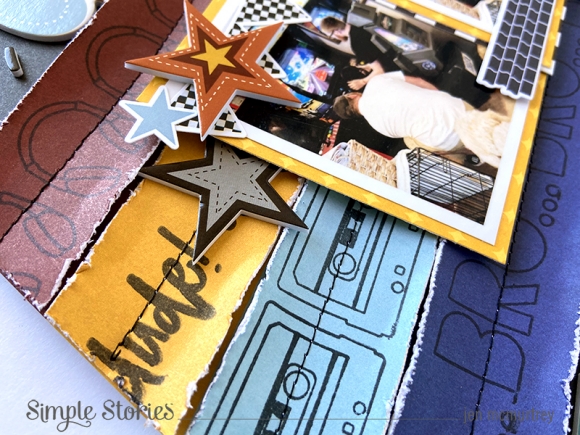
Next, I backed each of the three photos and adhered them with foam squares before adding embellishments.

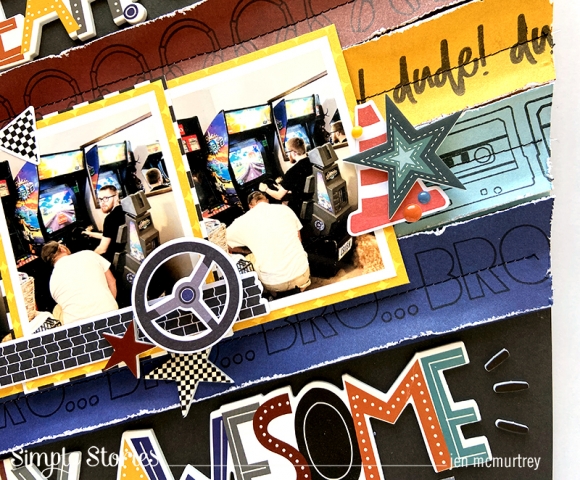
The title was next, which I place above and below the photos.

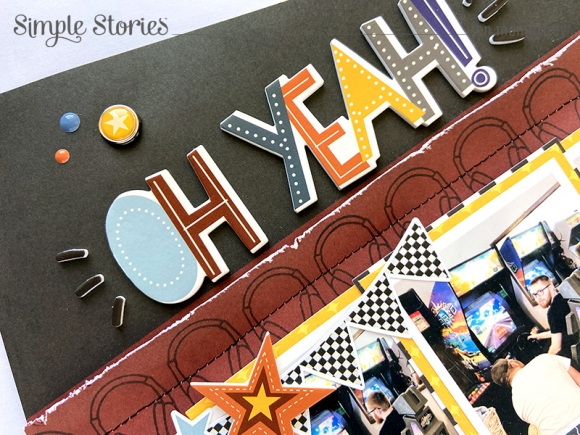
To keep with the flow of the stripes, I placed everything on an angle throughout.

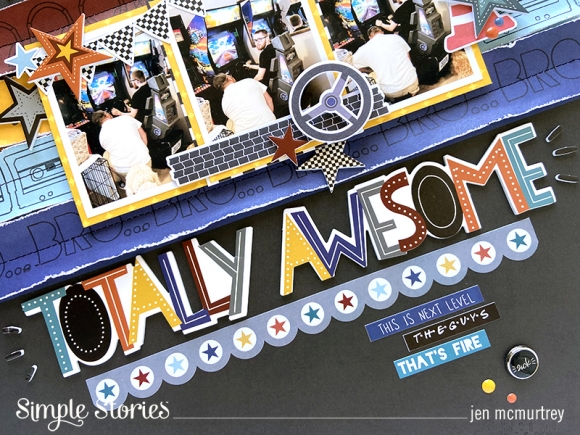
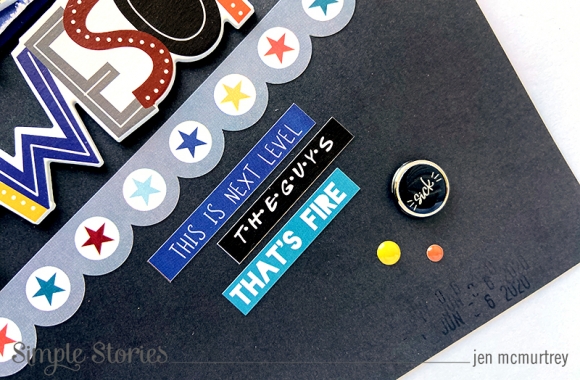
With the title in place, I set about adding more embellishments to the project. Everything in this collection is so fun! I had a hard time deciding what to use; however, the driving-themed stickers and die cuts make the most sense.

In the bottom-right corner I stamped the date with black ink, which is slightly darker than the background paper.

This layout was so fun to put together, and I cannot wait to create again with this collection!

Thank you for stopping by today, and I hope you are inspired to create.

Supplies

Hello there friends! It’s Tya Smith here today. I am so excited to share my latest batch of cards featuring the amazing ‘Kate and Ash” collection. This is such a sassy and sweet collection and I simply adored the bright and trendy color pallet and icons in this collection- it was so fun to create these 6 cards that I am going to share with you today.

Here are some close ups of each of the cards:

Card #1 uses one of my go-to design tools when I make cards. I used 2 of the 3x4 Element Cards – one on top of the other to create my sentiment. Love the shout out to one of my all time favorite 90’s TV shows on this card. I added some Bits and Pieces Ephemera, some stickers and one of our cute Decorative Brads to decorate this card

Card #2 is full of a good mix of all the fun pattern papers in this collection. I also used one of our new Color Vibe Cardstock papers in Pink on this card.  These Color Vibe papers are great basics to keep on hand when you need a solid paper to work with. I like to mix solid and patterns on my cards so this came in super handy and made for a great pop of color on my card. Isn’t that drink Chipboard piece so fun? My teenagers love their yummy drinks! So a little shout out to them! J

Card #3 features one of my all time favorite sayings. “Happy Girls are the Prettiest” – and isn’t that so true! This sentiment is found in the Journaling Bits and Pieces. I layered some of the makeup themed Bits and Pieces and stickers on this card. Some cute black crochet thread wrapped around the center is a fun finishing touch on this card.

Card #4 features one of our super fun Foam stickers.  The “Fab” word is a foam sticker and it was super fun to be able to use that as a sentiment. I layered some of the beautiful floral Bits and Pieces Ephemera on the card as well as a cute word strip and label from the Journaling Bits and Pieces.

Card #5 is so much fun. I immediately grabbed that cute water bottle and built my card decorations around it. Every teen girl needs their cell phone to find out “Sup” with their friends, so I added those elements as well. The bottom of this card is decorated with the cute spotted border sticker found on the Combo Sticker sheet.

Card #6 is our final card and I turned to the 4x4 Element cards to decorate my card front.  The back pattern papers mimic the ones found on the card so there is some unity in the décor. I simply added the fun Scrunchie and Converse shoes as well as the super fun credit card Chipboard sticker to reiterate the “shopping” theme of the card. I love the cute yellow foam heart here to – the perfect finishing touch! It would be really fun to add a gift card inside this card and give to your favorite shop-a-holic!

Thank you for stopping by today! I hope I have inspired you to pick up this fabulous collection! If you have teenage girls this is the PERFECT collection for you! Make sure you pick this one up today! Happy Crafting!

Supplies

Hello friends! It’s Kylie back with you today with a new layout to share. This one is for the boys! I’ve been creating with the fun new ‘Birthday Blast’ collection to create a fun and bright layout, to document a special birthday.

To create my background I have layered together, papers ‘Wish Big’, ‘Birthday Boy’ and ‘Have A Blast’. Using a white, fine tip marker pen I drew a free hand border around the edge. This minor detail really provides a nice ‘framed’ effect for the completed design.

My photo size for this page was kept at 4”x 6” and adhered to my page with foam tape to give a lovely dimension and draw the eyes attention to it because it sits up ‘floating’ from the background. I added a few more co-ordinating papers through the centre of my page with two cut into a fish tail banner for interest.

Using a combination of die cuts as well as some of the chipboard stickers, I layered many surrounding my photo until I was happy with the overall balance. My main title for this layout was the ‘Hooray’ die cut which was adhered to the base of the photo. However, I have added a few ‘sub-title’ phrases to support my photo also.

I really loved the garland chipboard stickers which I added to the top of my page. Again, I found this added a lovely balance as well as even more colour!

Documenting a birthday would be one of my most favourite ‘themes’ to create in a scrapbooking layout.

Thanks so much for stopping by the blog today. I hope you have enjoyed seeing my ‘Birthday Blast’ scrapbooking page and it has given a little inspiration for your own scrapbooking.

Until next time,

Kylie.

Supplies

Hello, friends!

It’s Mik here from Papermiks on the blog today and I’m super excited to share with you this album. What do you most enjoy doing in the summer? I love going to the beach to swim. When I saw the SV Coastal collection, I was sure it was perfect for my holiday album. I have an August birthday and I’ve been planning a trip to the Greek Islands for some time now. I don't know if I'll be able to go to Greece this year, but I've already made my album to document this moment that will be incredible, no matter when it happens!

I started by making the frame for my cover. I cut the outer edges of a cardboard at the same size of my Sn@p flipbook cover. Then I cut the interior of the cardboard to make the frame. Once the frame was cut, I used a cotton string and wrapped all around it. To decorated it, I used some floral die cuts and a layered frame. For the background I chose a paper from 6x8 paper pad. Then, I cut the paper “Sea you soon” in the waveform to simulate a moving sea and embellished with die cuts and stickers.

For the first page I decided to make an embossing. So, I made a page using vellum and the stamp from SV Coastal collection.

Making tags is super common when we make an album, so here I made a big tag with layered frame.

Each flipbook comes with 10 pockets pages, so with them we can combine the cards and the pieces that match perfectly with the pages that we create.

I love adding envelopes and tags in my albums. It’s so fun to make.

I made this flap divide with a 12 x 8 paper. It provides a cool interactive touch.

I hope you’ve got some inspiration from this idea and enjoyed it! If you have any questions, would like to talk some more about Sn@p! come and check out my IG account.

Thanks for stopping by and have a creative day!


Supplies

Hi beautiful Simple Stories friends, Cristina here with you today to show you a new project I made with a brand new collection Magical Birthday collection. To celebrate the birthday of my dear Aunt. I wanted to remember this day with a pic of the beautiful bouquet of flowers that I had given her. The bouquet had the perfect colors to use with this amazing collection and I am very happy with the way that it turned out.

I chose some of the patterned papers from the Magical Birthday collection kit and cut several strips from each in different sizes. I then overlapped them by crossing them at a point that I sewed with my sewing machine. I chose a white card on which I spread pink and fuchsia acrylic using the stencil from the same collection. I let the paint dry and then I glued the bunch of paper strips on the colored background.

Under some strips I added thick double-sided tape to give movement and I then completed with the decoration.

I chose some elements that reminded me of the reason that I used this beautiful photo. I used chipboards, die-cuts and stickers. I just love these amazing designs and shiny and bright colors for memory keeping! I really enjoyed creating this bouquet of flowers with paper strips and simulating the flowers with the stencil. This collection is truly wonderful and full of many designs for every occasion. The colors are perfectly mixed together.

This is my project and I hope you are inspired by it. Please don’t forget to leave us a comment below and tell us which is your own idea on how to use these collections. Thank you so much for joining me today and see you to the next post.
Bye.
Cristina xxx
 

Supplies

Hi Friends!  Thanks so much for stopping by!  Today I’m playing with the Simple Stories Color Vibe Collection.  This is a series of double-sided card stock that comes in Bright’s, Lights, Bolds and Basics (neutral shades).    On one side of the textured card stock is a solid color and on the opposite side you’ll find a dotted print.  The paper is a sturdy heavy weight for all your crafting needs.  I approached the collection as a card maker and wanted to share the different ways that I reach for solid card stock every day, other than the most obvious way to use the papers – to compliment other Simple Stories Collections.

One of my favorite “go to” techniques is color blocking.  For this card I cut ¾” strips of paper from all three color packs and adhered them to a panel to create a colorful rainbow card.  I used the Warm White Color Vibe Foam Alpha to create a simple “HELLO” sentiment, and surrounded it with swirls of gems. 

There are lots of beautiful die cuts on the market that would look great for this inlay technique.  I simple cut the die from white card stock, and then cut it again several times using the Color Vibe Collection papers.  I adhered the cut pieces inside the openings with glue.  This is a great way to use up scraps of paper that you just can’t part with.   I also used left over enamel dots from other Simple Stories Collections on my cards today.  They add some hard candy shine to make you happy!

The dot print on the paper adds another level of interest to the inlayed design. Once you’re done you won’t want to cover up the pretty panel you created.  A simple sentiment allows your design the attention it deserves.

I like to make cards with scenes too!  This card is made with dies from several different brands – but you could achieve the same effect with a little imagination and some scissors.   Start with a blue sky and some wavy lines for grassy hills.   A circle punch becomes a sunshine and the rest is up to you.

Each collection also has a color coordinated Alpha Sticker Book so you can color match your sentiments.  I used sticker alphas from the Basics Sticker Book for a hand held label maker look.

I’ve also noticed layered die cuts becoming more popular lately.  These dies are beautiful but require several ombre shades of card stock to create the layered design.   Finding papers that match is easy when you use papers from these three collections.  If you look close, you’ll see four different shades on each of the florals that look beautiful together.   The background was created with a color block technique using three shades of teal blue from the collections.

If your passion is card making you’ll love these rich Color Vibe papers for different techniques including colorblock, die cut inlay, scene building, and ombre layering.  The saturated colors and playful dot print will make your creations a stand out.

Supplies

Hey everyone, Michelle here today with a new layout to share using the Simple Vintage Coastal collection.  I'll admit, I have a thing for beach themed collections.  But this one is more than pretty, the corals and teals are sooo very pretty.  I couldn't wait to work with this one!

I loved the grungy map on the back of the 4x4 elements paper but I was afraid it would be too busy if I used the whole paper.  I decided to use half and white cardstock for the other half.

By keeping half the layout white, it gave me a place to add lots of embellishments and phrase stickers. I always like to add lots of layers.

Look how pretty these flowers are!  And the little brads are always the perfect finishing touch!

I love hoe these chipboard phrases make such a big impact !

Thanks for stopping by!

Supplies

Hello, I’d like to show you something a little bit different this week, as you probably know, I have a new found love for  Sn@p! binders, pocket pages, and I also love planners and travellers notebooks...so, I thought it would be fun to show you how I incorporate them all together! 

I’ve used the utterly magnificent , Magical Birthday Collection, and hopefully you’ll see how it can be used in any situation, not just for documenting birthdays! Just look how full the pockets of my TN are, bursting with unicorn magicalness! Ok, let’s look at where I’ve used the first Sn@p! product, here I’ve made a sparkly shaker pocket on the front cover of this insert. I made this one by sliding a 3x4 card into one of the 3x4 flip pockets, I poured a variety of sequins and tiny beads inside, sealed the top of the pocket with clear sticky tape and then stuck to the cover of my insert using double sided sticky tape.

Next up, inside the front cover I wanted to make a pocket to slide in stickers and journaling cards, to do this I cut roughly an inch off the top of a 6x4 flip pocket, I simply decorated the edge with washi tape and then used double sided tape to adhere to the page. 

I’m sure by now you are seeing how easy it is to use this Magical Birthday Collection for anything, look here how cute this cover is using the floral paper, and floral images for my List’s insert. I used the fabulous new Color Vibe Foam Alpha stickers. 

The shaker pockets can be used in numerous ways. You don’t just have to stick to flip pockets, here I cut a section of three 2x2 squares from a pocket page, filled each pocket with a 2x2 image and some sequins...all you need to remember is too always seal the edges so no sequins escape! 

Here’s a 4x4 shaker on this insert cover, I used the rainbow image in the pocket and then the chipboard rainbow to add more detail! I even used some of the tiny gold foam stickers and gold foil chipboard stickers for extra wow! 

Inside my lists insert I decorated lots of pages ready to write my lists, the colours in this collection are so bright and cheerful! It will make any list into a super gorgeous list, don’t you think?! I like to use paper from the Sn@p! 12x12 Wood Basics pack for the areas where I’ll be writing my lists or journaling. 

Last but not least if you are feeling really brave and happy to play around cutting and sticking then you can make a full pocket cover for your insert. I used two of the full page 6x8 pocket pages and did some cutting and sticking to eventually get them to the correct size where I could slide in my decorated cover. It makes for a protective sleeve which can be reused as you can easily swap around the decorated covers. 

Well, I’m hoping that now you can see just how magical the Magical Birthday Collection and the Sn@p! Products are!! and maybe take away some ideas you’d like to use. 

If you’d like to see more of my projects you can find them on Instagram here https://www.instagram.com/heartsbyemma

Supplies

Pages