Jomelle Gomez's Blog Posts

Hello Everyone! Jomelle here today and I cannot tell you how excited I am to share with you my Winter planner set up and layout using the Sub Zero Collection. I am from Chicago but I currently live in Southern California and this time of the year is when I miss seeing the snow the most. Even though I do not like driving in the snow, I must admit that the first snowfall is quite beautiful. Everything is so white and so beautiful.


"Pocket Love" I get so excited decorating and stuffing my pockets every time especially if I'm starting a new theme. It always makes me happy when I look at my stuffed planner pockets. 

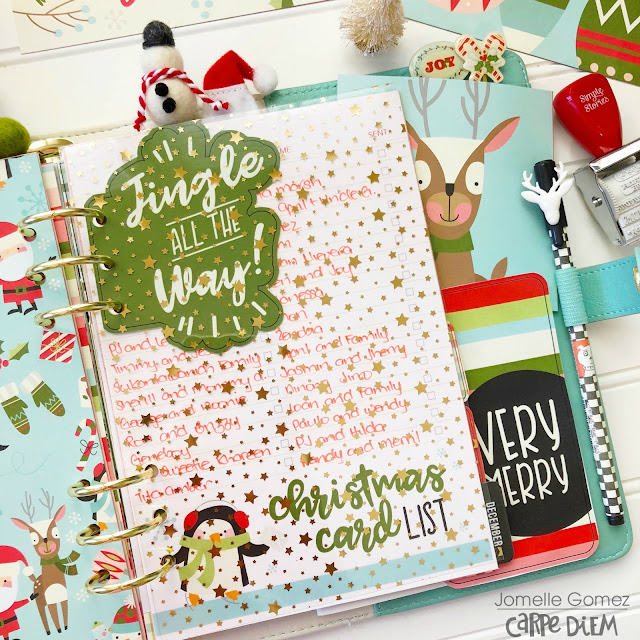
I love incorporating scrapbooking in my planner by making a dashboard. I cut up the 12x12 Elements and I added one to the bottom page. You will see in the next picture that I didn't glue this piece so that it can be flip over and I can add pictures or write a journal later.

I flipped the bottom part over as you can see on the left side of this page. This page has the space when I'm ready to add picture and to write my journal that goes with that picture.

 I've always love creating a new dashboard for each new set up to match. I used the pop up adhesive for the tram to add dimension and make it look 3D.

We may not get a Winter Season in Southern California, but this monthly layout gives me that "Winter Feel" 

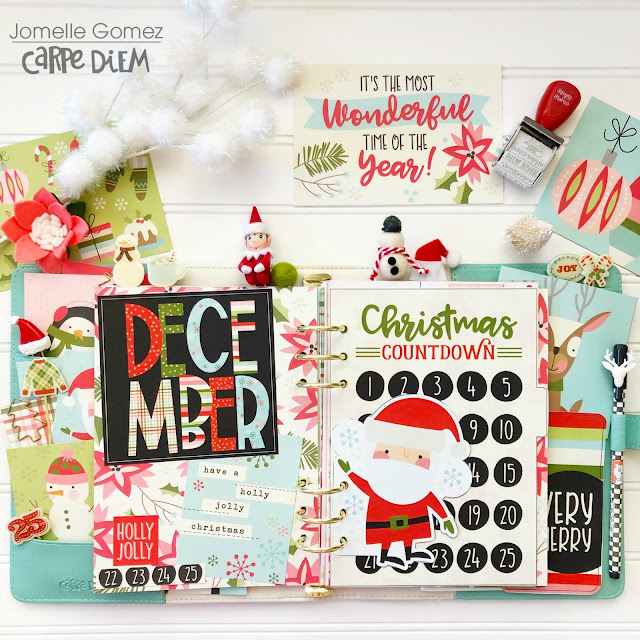
 You may know by now that I love using the number stickers to add the dates. I like that it's undated so that when I add the dates, the color will match the collection I am using.

I used my envelope punch board to make this 6x8 envelope. I added the holes on the side so I can put it in my A5 planner. I will use this to store my stickers, ephemeras and other planner goodies I want to carry with me.

Thank you for stopping by. I hope you enjoy my Winter Set Up. Come and visit me on my Instagram at https://www.instagram.com/j4fashion/

Supplies

It's the most wonderful time of the year! Happy Holidays everyone. Jomelle here today and I want to share with you my Holiday Planner Set up. 
I used the Oh What Fun Collection and the Free Printables to set up my Holiday Planner in my Cream Blossom A5. The colors in this collection are so sweet and so fun.

 
This Christmas countdown and the Santa are from the Free Printables.I printed the pages on regular computer paper, so I glued them on a cardstock so they don't feel so flimsy when I turn the page.
 
 
The one thing I enjoyed the most is creating my Monthly Layout. I used mostly the 12x12 Stickers to decorate my layout.
 
 
Here are some more of the Free Printable pages that I decorated.
 
 
Thank you for stopping by. For more inspirations follow me on my Instagram @J4Fashion.
 

Supplies

Vintage Blessings
 
Hello Everyone. Jomelle here with you today on the blog sharing my Vintage Blessings Planner Set-Up in my Blush A5 Planner.
  I started by making a dashboard. I love making new dashboard for all the seasons and holidays. I like it when I open my planner and see all the beautiful planner goodies together. 
I used the "Grateful Heart Black" planner decal as the main focus of this page and I decorated around it.  I used one of the papers from the 12x12 cardstock for the stripe on the bottom of the page.
 I always enjoy decorating my planner pockets with all these beautiful bits and pieces and chipboard pieces. I love all the warm fall colors.
 Here is my weekly layout for the last week of November. This week is my daughter Juliet's 2nd Birthday. 
 Close-Ups
 
Thank you for stopping by and hope to see you next month. 
Follow me for more inspirations on my Instagram @J4Fashion


Supplies

Pages