Linsey Rickett's Blog Posts

Temperatures are dropping and Fall is upon us! I just love this time of year! Hello friends! Linsey here today sharing my latest altered project, a lovely book box keepsake to commemorate all the beauty and love this season holds. The Forever Fall collection is perfect for all your projects during the Autumn season and this is just one idea that I hope will get you inspired to create with it!

The box is covered inside and out with 12x12 papers in Give Thanks, Gather Together, and Pumpkin Everything. The front is decorated with a variety of Forever Fall Combo Stickers, 6x12 Chipboard, Bits & Pieces and 4x6 Stickers. All edges were covered with the blue leaves in the Forever Fall Washi Tape. Inside the box is a space for journaling and there are large tags meant for adding photos from the season as well as more journaling areas.

More tags could be added or even small mementos to keep inside the box. I love how the 3x4 Elements fit just right on the tags and a 4x6 Vertical Element fit perfectly inside the large space inside the box.

A pretty bow with a cute tag was added to one side of the box.

A title for the book was added along the binding using stickers.

This box will hold all my family's memories from Fall 2018. I hope it will be a favorite for years to come. I really enjoyed making it!

And that's all for me! Thanks so much for visiting today and allowing me to share my Forever Fall book box! Wishing you and yours a most blessed Thanksgiving and Fall season! Until next time, happy crafting!

Supplies

Hi friends and happy Friday! Linsey here sharing my latest altered Simple Stories project with you! Have you ever altered a cupcake tin? I've been wanting to for quite sometime now and I finally did it! I love how this cute little piece turned out and it's just in time for Halloween too! If you haven't gotten your crafty hands on the darling new Simple Vintage Halloween Collection yet, I sure hope you'll want to after seeing this spooktacular showcase!

There's a few different choices when it comes to cupcake tins. Depending on what your project is, you can get a 6, 12 or even a 24 slot tin. The more slots, the smaller they are. For this project, I chose to alter a 6 slot tin. First, spray paint cupcake tin in black inside and out. Let dry, spray paint 2nd layer and let dry again. Next, line inside of each slot with black lace trim. Now our tin is ready to begin decorating! The circle die cuts in the Bits & Pieces are a perfect fit to adhere to the wall of each slot.

Create a main title and build the scene adorable images from the 6x12 Chipboard and Combo Stickers. The smaller images from 4x6 Stickers are just right for the insides of the cupcake slots. Add dimension to some pieces with 3D Foam Squares.

Embellish with extra accents like ribbon, sequins, bling trim, enamel dots, etc. The imagination is the limit! I couldn't help but fill in just about every nook and cranny of my cupcake tin! So. Much. Fun.

Don't forget that there's much more to this darling and festive collection! The 12x12 Collection Kit and 3 Pack Washi Tape is a must-have for any Halloween-loving crafter or planner! For me, another perk to this collection is that it's not too scary or creepy. It's much more on the cute and sweet side, which I love. It's a great collection for the young and the young at heart! I think this will be a super cute addition to this years Halloween décor!  

And that's all for me! Thank you so much for stopping by and allowing me to share my project with you today! I've enjoyed it so much and I hope you have been inspired to create something fabulous with the Simple Vintage Halloween Collection too! Until next time, happy crafting!

Supplies

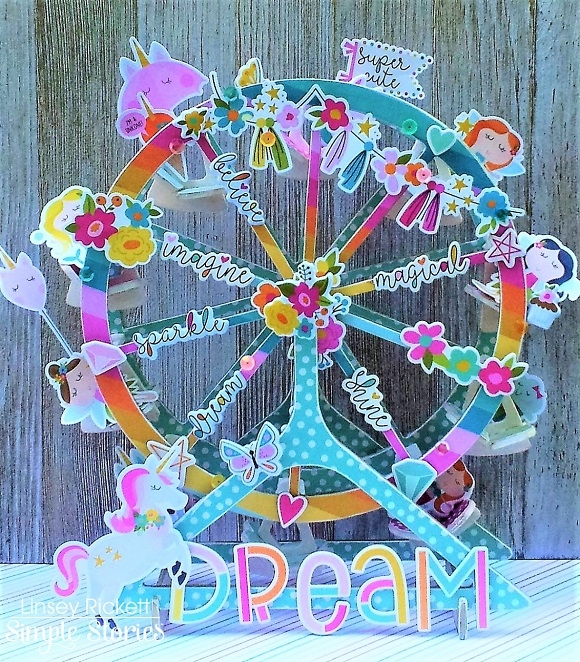
Hi friends! Linsey here today sharing my latest altered project using the Dream Big collection! This magical collection is brimming with adorable images and sentiments that bring me back to childhood. I love the rainbows and fairies, the unicorns and roller skates--oh my! So much dreamy goodness! Come along and take a ride on my Dream Big Ferris Wheel! 

First, all pieces were painted white around the edges and then covered with patterned papers from the Dream Big Collection Kit. After adhering all papers down and allowing to dry, all edges were sanded gently. 

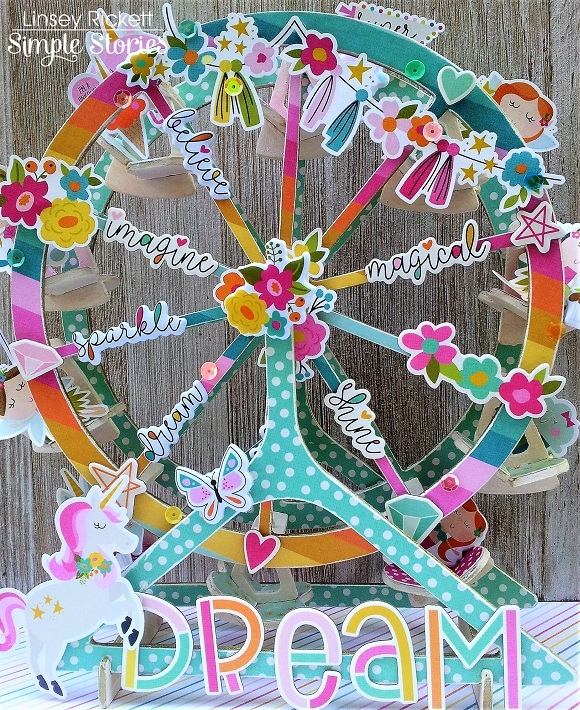
After putting together all pieces and building of the ferris wheel, it's now time to decorate the front! I love how the DREAM lettering from 6x12 Chipboard draws attention and makes one want to fly with fairies! A magical unicorn ticket-taker greets all guests and sprinkles a bit of fairy dust upon them before seating! 

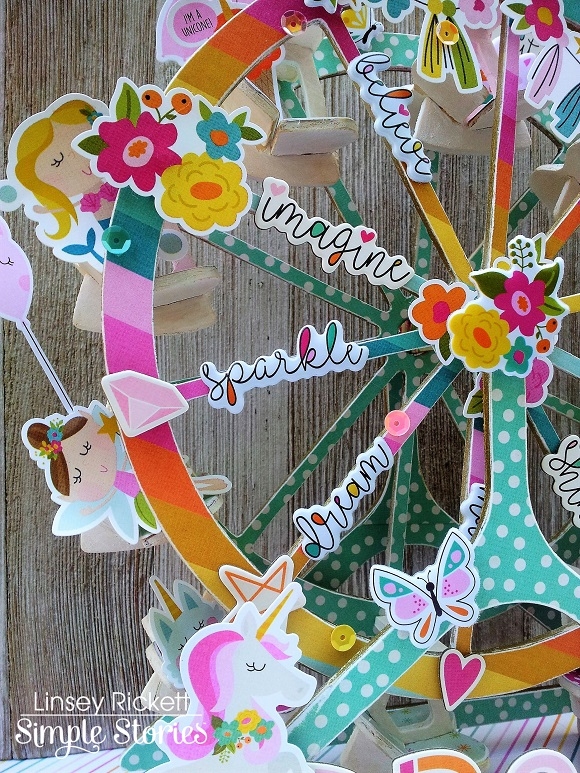
The Dream Big ferris wheel brings together all kinds of friends! Mermaids, kitty's, fairies, cupcake sweeties and unicorn-ice cream cone wannabes alike! Everyone loves to ride on the Dream Big Ferris Wheel! Make a wish while riding and it might even come true!

Thanks so much for visiting today! I hope you enjoyed my project and hope you feel inspired to create something magical with the awesome Dream Big collection too! Until next time, happy crafting!

Supplies

Pages