Lisa Dickinson's Blog Posts

p>Hello everyone! It's Lisa Dickinson here today to share some layouts with you! Since I'm currently in the middle of a few home renovation projects, including refinishing our hardwood floors, the majority of my scrap room is packed up in boxes in our basement. So when it came time to do this blog assignment, I had very few of my usual scrap arsenal available, but I decided it would be a great time to challenge myself to make something interesting with a minimum of tools and products. After all, Simple Stories is all about making creativity simple and easy! Here are the layouts that I created - and a few tips that helped me create simple pages that still have eye-catching appeal!

HelloLovely1_W

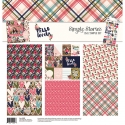
1. Add lots of color and pattern to take a basic design to the next level.  Just because a design is simple doesn't mean it has to be boring. Color and pattern add interest and movement to a page, so the more, the merrier! On this layout, I selected coordinated papers from the Hello Lovely line (and a few from the Domestic Bliss collection as well!) and used them to matte my 5"x5" photo. Each paper was cut slightly larger than the previous one for a layered look that allows lots of pretty papers to be showcased.

HelloLovely3_W

2.  Add dimension and texture to make the design pop. When you're using limited supplies, it can be hard to incorporate a lot of visual interest on a page. Dimensional adhesive is an easy way to help page elements pop. Here I adhered each paper layer with foam squares to create a dimensional frame. I also added stitching to the edge of every other paper, which is another great way to add tactile interest to a design. No sewing machine? Use a pen to create hand-drawn stitching for the same effect.

HelloLovely2_W

3. Use pre-made elements for a title.  Since I didn't have any alphabet stickers or my trusty Silhouette available to create a die-cut title, I opted to use a sticker from the Hello Lovely collection pack instead, placing it directly on the photo in the white space. Be sure to look through your stickers before creating your page - you just might find one with the perfect sentiment for your layout and save yourself lots of time!

On my second page, I used the same tips & techniques to add elements to a basic design. I started with a bold striped patterned paper from the Emoji Love line as my background:

Stripe

The colors were perfect for my photos, which included lots of pink and yellow, but I wanted to some additional pattern in the design. Instead of using the paper as is, I cut some 2-inch paper strips (the pink dot, yellow crosshatch, and aqua dot) and layered them over the solid stripes.

YAYLOL1_W

In between each of the strips, I sewed a zig-zag seam. Stitching is a great way to add texture and a handmade feel to your design!

YAYLOL3_W

For this page title, I selected a 3x4 journal card and layered speech bubbles atop it.  These are part of a Simple Stories decorative brad set, but you could also fussy-cut small elements from patterned papers or use die cuts + brads to achieve the same look.

YAYLOL2_W

While I'm excited to get my scrap products unpacked again, I enjoyed the challenge of creating simply and it was surprisingly easy with these fun Simple Stories products. (And bonus - this was way less messier than my usual scrap method!)  I hope you're inspired to create something quick and easy as well - happy scrapping!

Supplies

Hello everyone! It's Lisa Dickinson here today to share a few tips on using pattern on your pages! Patterned paper is the most abundant product in my scrap stash, and I love to incorporate lots of it into my pages. But sometimes pattern can be intimidating. Does plaid go with floral? Can you mix stripes and dots? The answer is YES when you use one of my favorite tricks to combine patterns...just follow the rainbow!

When you want to use lots of patterns in one design, using a ROYGIBIV order is a fail proof method. Mother Nature knows what she's doing, and the same color combo will look great on your page. On this layout, I'm using the Cabin Fever collection and have featured seven different patterns from the line.

OntheRoad_W

While there are no orange, green or purple papers in this line, it was easy to sub in some of the patterns (a tan dot for orange and a multi colored plaid for green) and still get the rainbow effect. Even though the patterns are completely different, they read as harmonious because of the order in which I adhered them.

OntheRoad4_W

OntheRoad2_W


OntheRoad3_W

So what if you don't want the whole spectrum of color on your page? It's easy to select just a portion of the rainbow - say red, yellow and orange - to use in your design. On this page about my son's swim team, I used green, teal, aqua and navy to help reinforce the water-theme of the layout.

FTT_W

I used a wave-like cut file with holes to fill a large portion of the page. I filled the holes with a variety of Simple Stories papers in the selected colors of green, aqua and navy. The patterns range from dots to gingham, and text to geometrics, but they all work together because of the arrangement of colors. 

FTT4_W


FTT3_W


FTT2_W

So the next time you want to punch up the pattern on your page, try this rainbow order technique. You're sure to end up with a colorful, happy page you'll love (and isn't that even better than a pot of gold??)

Happy Scrapping!

SaveSave

Supplies

Hello everyone! It's Lisa Dickinson here today and I'm excited to be sharing my recent obsession with double pagers! I love the larger canvas for creating and the fact that they hold lots and lots of photos. My only issue with the double-page spread is that I use 3-ring albums, which creates a significant gap in the middle of my two page spreads. My solution? Create a two-pager that also works as two stand-alone pages!

Milestone1_W

On both of these pages, I'm working with the new Summer Days collection, which is ideal for documenting these last days of school as well as the warm weather events happening all summer! For the left half of the page, I chose to use one photo enlarged to 11x7 and layered a bold die-cut title over it. Below the photo, I punched out ten 2-inch squares from the Summer Days patterned papers and layered them with chipboard, die cuts, brads, stickers & journaling strips.

Milestone4_W

Milestone5_W

On the right half of the page, I continued the grid design but used slightly larger (2.25") squares. In addition to eight photos from my daughter's last day of school, I alternated the 16-square grid with eight more patterned paper squares. 

Milestone2_W

Once again, I layered the patterned squares with coordinating Summer Days pieces and also used one as a journaling block. I tried to select a variety of accents that reinforced the page theme and brought lots of color and texture to the design.

Milestone6_W

Milestone7_W

To keep the two-pager from being awkwardly divided by the 3-ring album gap, I kept all the page elements with the 12x12 margins and didn't allow anything to cross over the center line. But the common design element of squares, as well as the coordinating papers, keep this spread looking harmonious. And while each page certainly can stand alone, the double-pager helps tell the story of the day with more detail (even with the dilemma of the gap!)

Milestone3_W

Thanks so much for stopping by and have a wonderful day!

Supplies

Pages