Meredy Vranich's Blog Posts

Hello Carpe Diem Girls, Its Meredy with today’s blog post. It is December and, as we all know, it can be a very busy month.  I am starting the holidays off on the right foot this year by setting up my planner, taking a look at my monthly schedule and setting some goals for myself.  

My Clover Carpe Diem works perfectly with the Very Merry Line and by using some of the decorative paper, bits and pieces and stickers my planner was looking quite festive in no time at all.

I don’t always do a monthly spread, but since there is so much happening during December I knew I needed to have it all in one place to help me keep on track.   I used washi, stickers, and bits and pieces from the Very Merry Line to decorate my pages.

I put this great December Calendar from the Bits and Pieces packet at the top of my page and will use this as my Christmas Countdown counter. Today, I get to mark off Dec 1st, just 24 more days to go!  (If you look close you can see I didn’t set my sicker down perfectly, I just left it because sometimes there is perfection in something imperfect.)

In the notes section of my monthly layout I wrote my holiday goals.  My daughter gets out of school on Dec 15th and I am determined to have it all completed before that date so I can have a fun and relaxed Christmas. I even set up my beauty appointments and ordered some new clothes so do not forget about myself as I do most years.

This year will also be my first attempt at a December Daily. I set up a Sn@p notebook with the Very Merry collection so I am all prepared. Stop by my Instagram www.instagram.com/myplanningadevnture to see how my December Daily progresses! Its not too late to start your planning and set goals for your month. Hopefully this post inspires you to get out in front of the holiday rush.

Supplies

Hello, it's Meredy, and I hope you all are having a great Fall. Last month I showed you how I set up the Aztec Travelers Notebooks and I just love how it's been working for me. So much so that I tried it out with another TN, the Beautiful Vintage Black Floral. Isn't it GORGEOUS!

This Notebook is part of a whole line of products and there is practically everything a Carpe Diem planner girl could want: Washi Tape, a Sticker Tablet, Bits and Pieces, and Sticker sheets. The inside of the TN is a dark pewter--so beautiful!!! I loaded up the pockets with items from the Mini Sticky Notes page and Bits and Pieces. 

The notebook included with the TN is unlined and it is so easy to make a weekly layout. Just draw a horizontal line every 2 inches, add some washi down the middle and embellish! 

The great thing about the Sticker Tablet is it has so many stickers that you can use to help plan your week. There are box stickers, arrows, stars, todo lists all perfectly sized. 

There are plenty of pretty florals and motivating sayings to put a pretty up your page. 

Thanks for stopping by and taking a look!

Supplies

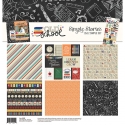
It is back to school week at our house and it is extra special this year as my daughter, Mila, started Kindergarten.  It feels a bit strange to start school when I am still dreaming of summer, but no better way to get into the spirit than with the Simple Stories “Old School” Simple Set.  You may already know that I love using the Simple Sets in my planner.  You get a few sheets of gorgeous paper that can be used to make dashboards, dividers, or can be cut up to be used as washi.  There are also journaling elements paper which have beautiful journaling cards to put in pockets or decorate a page. 

The collection goes perfect with my Black Speckle Carpe Diem Planner, and no planner girl can do without the Carpe Diem A5 punch!

Look how fun my planner looks all set up with using the Old School products.

Dashboards are so easy to make!  They are my go-to planner item when I want to be a bit crafty, but don’t have a lot of time.  I used the back side of the 3x4 and 4x6 Elements Paper for the dashboard, (don’t worry there are two of each sheet in the set!) layered on two 3x4 journaling cards, punched it and in to my planner it went.

Now, it is time to fill the front pockets.  I used most of the 3x4 and 4x6 Elements Paper to decorate the pockets.  I also added in some sticky notes from the Simple Stories Say Cheese line.

Here is my weekly spread I made with the collection.  The marker and alphabet “washi” are strips cut from the ABC 123 paper.  The rest are mostly stickers from the 6 x 12 cardstock sticker sheet and the Simple Stories Alpha Stickers.

The red Alpha stickers were actually white, but I colored them with a marker (while still on the sheet) and they worked perfectly.

What a colorful collection, all the colors and elements used together easily make a fun layout!

I also love daily planning.  When I don’t have a huge list of To Dos but have a day worth remembering, I make a daily page and fill up the lined portion of the insert with a photo or a fun memory.  I use the timeline on the right to practice my hand lettering.  For this layout, I mixed in some elements from Summer Days to play up the yellow, orange and blue elements in the Old School Collection.

Print out a picture and add some stickers iand you have quickly made a memory page.

Adding a journaling card to the page fills a bit of space so you won’t feel overwhelmed trying to decorate the whole page.  I filled the rest of the page with the remaining stickers and pieces from the decorative papers and now I will always remember my little girl dashing off to Kindergarten!

Keep your eye out for the Simple Sets, planner girls.  They can give your planner a lift and have plenty of fun things to inspire you to get crafty.

Until next time!

SaveSave

Supplies

Pages