May 2016 Blog Posts

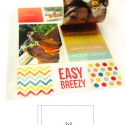
Hi Everyone! This is Jennie and today I’m documenting my happy spring days using the NEW Sunshine & Happiness Collection. This collection is aimed for summer but I also believe is perfect for parties, girly layouts or any fun sunny day!

I always start with my photos and then jump to my Sn@p Pack. If you want to get someone started in pocket pages just get them a Sn@p Pack and I’ll guarantee you’ll have a pocket pages buddy soon! I really like to put a little something on each photo so the tiny words from the 4x6 Sticker Pack work perfect!   

I love the colors in this collection and I was lucky that my daughters’ outfits that week matched the collection!

I am obsessed with Photo Flips lately. I really like fun filler cards, journaling and I don’t like to leave photos out and Photo Flips are the perfect solution to keep all my favorites! I already had 3 photos on the bottom so I wanted a little break and I decided to use the journaling card on top.

These photos were similar so I didn’t have to show them all in the initial layout. At the same time some had more details and I wanted to keep them all.
 
 
I love the two birds on the journaling card I think they are a good way to represent my girls. My daughters draw every single day! If I kept every drawing I would need an extra house, which is why I often take photos of their drawings or projects. I keep the memories but not the clutter. Once in a while I keep one that is too cool to toss.
 
I am crazy about this camera image! I just added a little word and a Self Adhesive Brad to make it even cuter! I enjoy layering but it’s hard to layer in pocket pages as you do in traditional scrapbooking. For pocket pages my layering recipe is washi tape, a simple shape like a circle, star or heart, a small word and enamel dots.
 
 
I hope you enjoyed these pages! Check out the process video to see how I made these pages in a SN@P!


Supplies

Hello again friends! Leah here, keeping it real by showing you what my planner looks like during a very busy month. I get questions all the time about how I use my planner functionally. I am ALWAYS going to have some decoration in my planner, because decorating my planner is a conscious choice I make to prioritize creative time, which helps keep me sane AND makes me excited to open my planner and actually use it. Because I have been insanely busy this month though, I have not had time to decorate as much as I normally would. I thought this would be a good time to show you how I am using my planner functionally, but also show you how I am still finding ways to get creative and dress things up!

This month, I used the Bloom and Grow scrapbook collection to decorate because I am so in love with the garden theme and the sweet little gnomes!
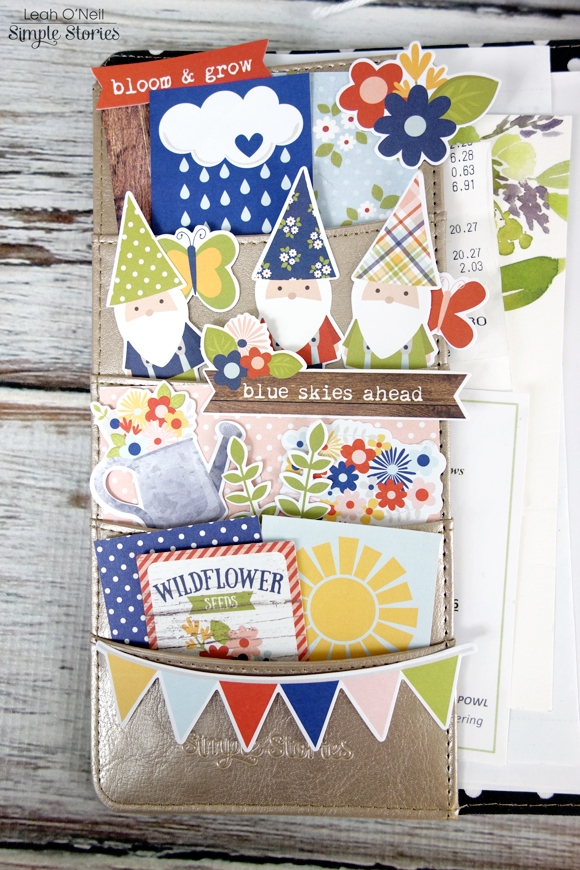
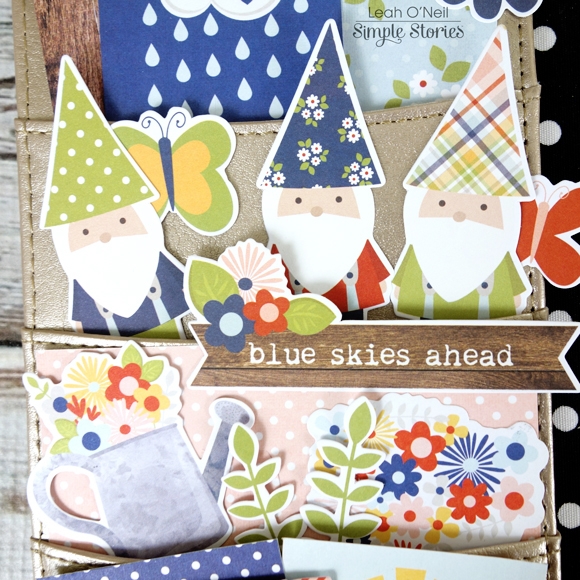
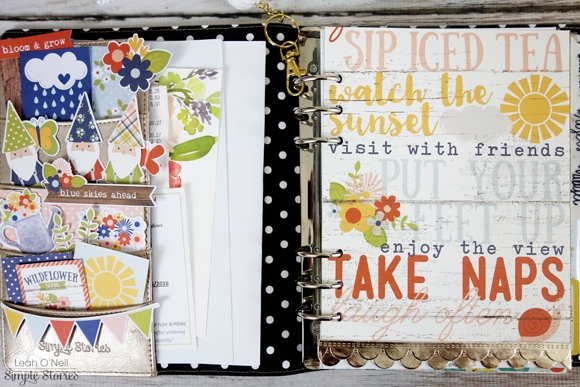
I can’t help but add some décor to the front pockets. The Bits and Pieces pack for the Bloom and Grow collection is so full of adorable ephemera! That is mostly what I filled the pockets with this month because I just HAD to use those die-cut gnomes. They make me so happy to look at! The little square pieces are from the Bloom and Grow SN@P! Pack.  I use a repositionable adhesive to make the pieces stay in place in the pockets, which also allows me to easily remove them later.
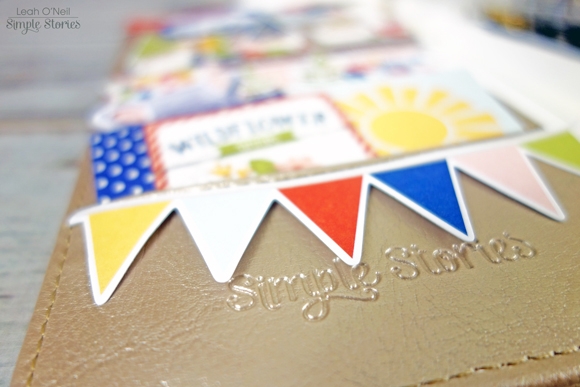
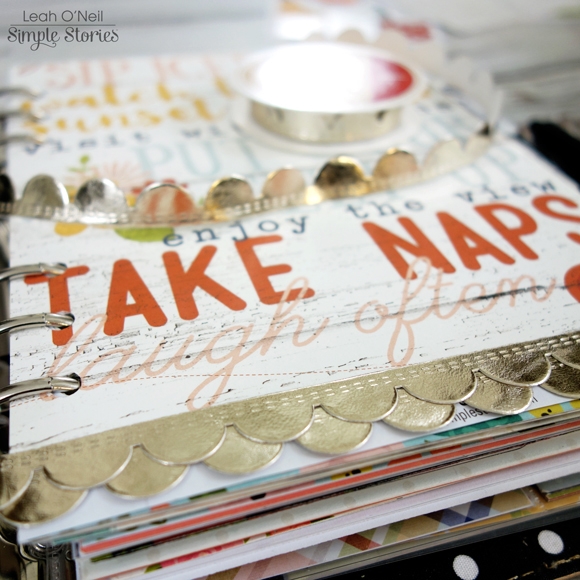
After decorating my front pockets, I usually like to create a matching dashboard so everything coordinates. As you can see, I have kept my dashboard very simple this month. I picked one of my favorite 12x12 papers from the collection and cut it down to fit my planner. Because of the words on the paper, I had to make the decision to either cut through one of the words, or try to cut in between them. I chose to cut in between the words but that made the paper about a half an inch too short. I thought about leaving it as is, but then I remembered I had this pretty scalloped ribbon that I could glue to the bottom to extend the length a bit. I actually ended up adding two rows of the ribbon and I love how it turned out!
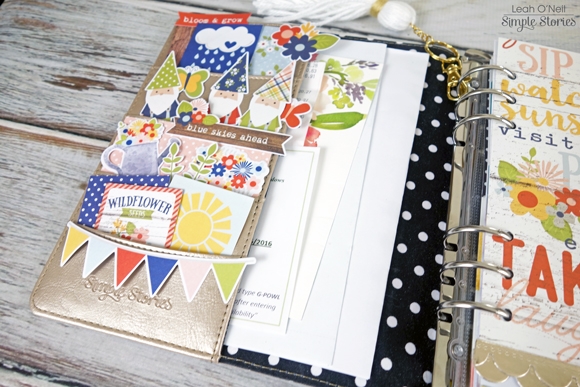
Whenever I am super busy, I need my planner to be everything I need on-the-go. This means it has to store important papers/information I need to reference and have ample space for making to-do lists. Even though I decorate nearly all my front pockets, I do save the bigger secretarial pocket for holding larger papers or information I need to access easily. For example, right now this pocket is holding tickets I printed to an upcoming concert, a couple of receipts, a bill, a wedding invitation and a blank birthday card. I could fit even more into this roomey pocket if wanted to!
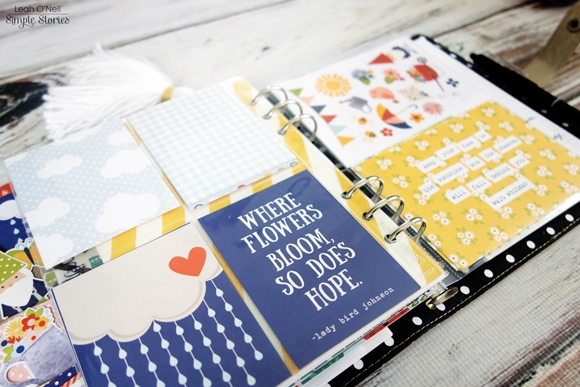
When I know I am going to be running around a lot, I will load up my planner with extra craft supplies in case I get a little free time to decorate while I am away from home. Simple Stories makes pocket pages that are made to fit the 6x8 SN@P! binders, but they fit perfectly in my Carpe Diem planner. They are a little larger than the calendar inserts, so I do prefer to keep them in the very back. I use these inserts to hold stickers and washi paper tape, as well as various sized journal cards from the SN@P! Pack, which I like to use to write lists on or to journal special moments I want to remember.
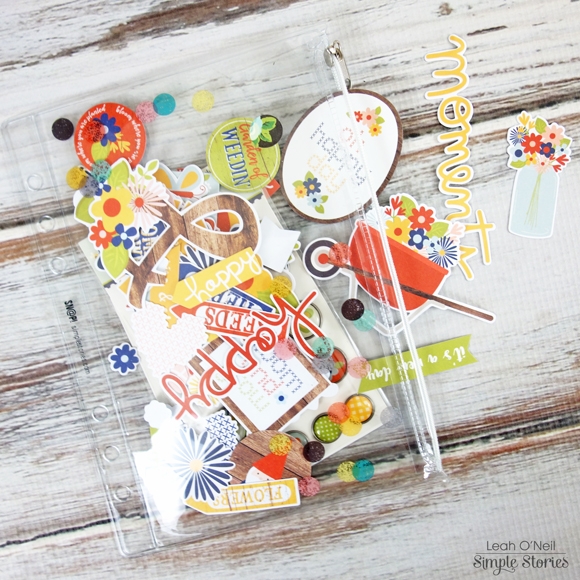
I use this plastic storage pouch to hold my favorite die cuts. The zipper keeps all the little pieces from falling out of my planner. I use die cuts on pretty much every single project I create, so I had to find an easy way to store them in my planner.
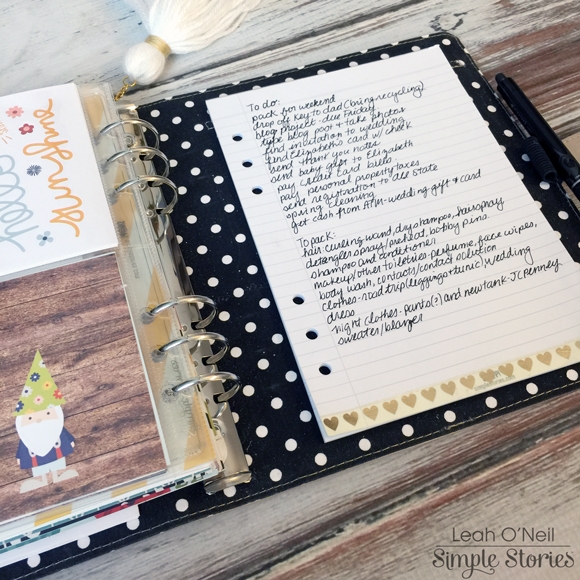
I haven’t really had time to sit down and plan out a whole week at a time during the first half of May. Instead I have been making daily to-do lists. Simple Stories sells a lined paper pad that slides into the back pocket of your planner. This pad is SO useful because you can easily tear a sheet off and put it wherever you want in your planner since the paper has pre-punched holes for the rings! Lately, I have been writing my to-do lists on this pad and then putting the list at the front of my planner to keep me extra focused on the tasks I need to complete.
As much as I LOVE decorating weekly, there are times where that’s just not possible, and that’s okay! One compromise I always make time for, no matter how little time I have, is to decorate at least my monthly spread. So I did just that!
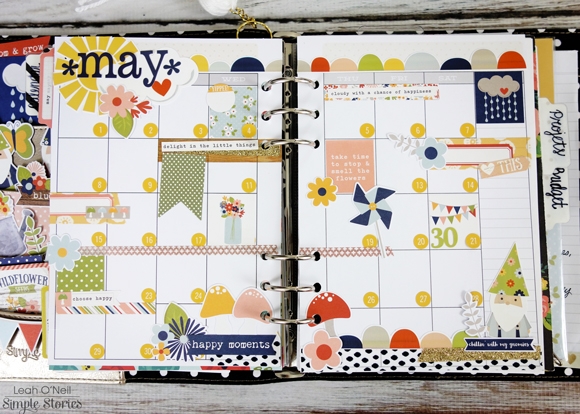
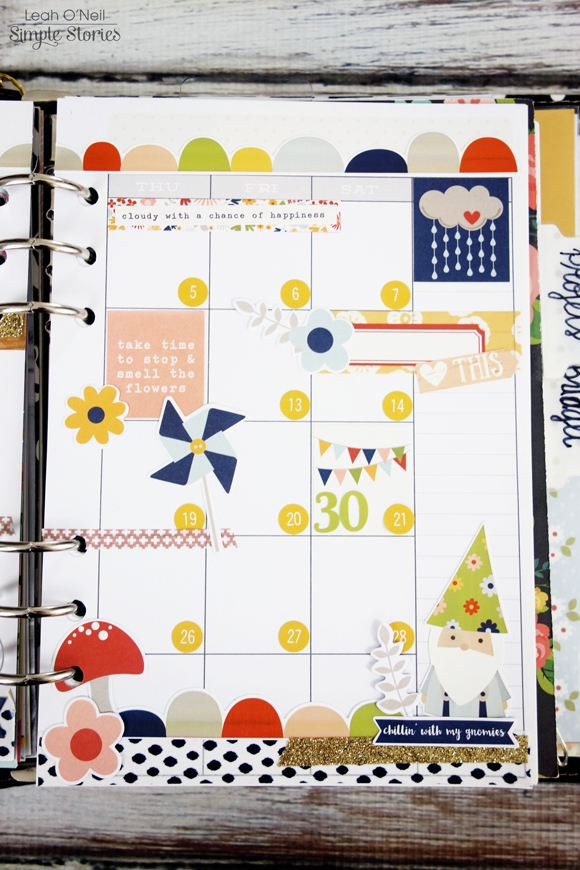
Have I mentioned how much I LOVE the gnomes in the Bloom and Grow collection?! Well here is another one, with an accompanying word strip from this sticker pack that says “chillin with my gnomies!” That gave me a good chuckle and still does every time I see it on this page. The same sticker pack includes several more sheets of various styles of stickers that all match the collection; I used many of them in this layout. 
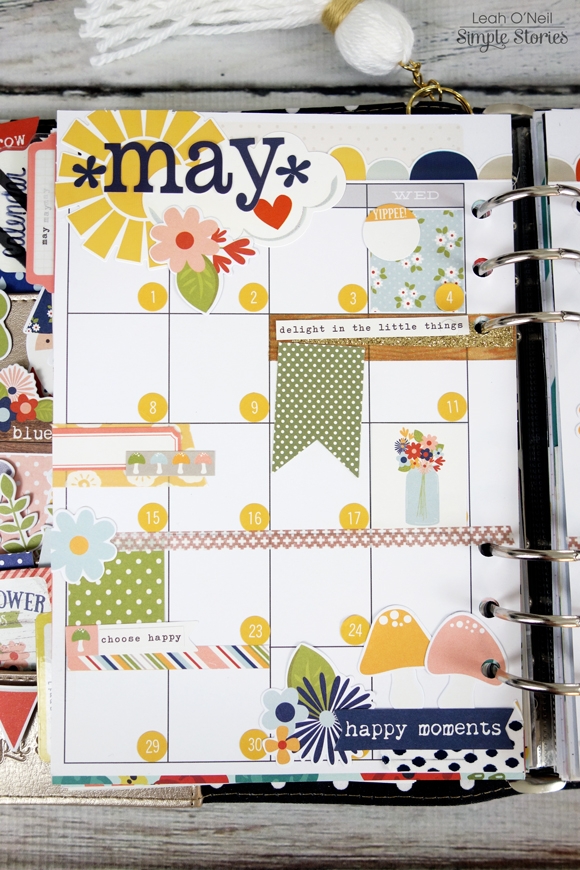
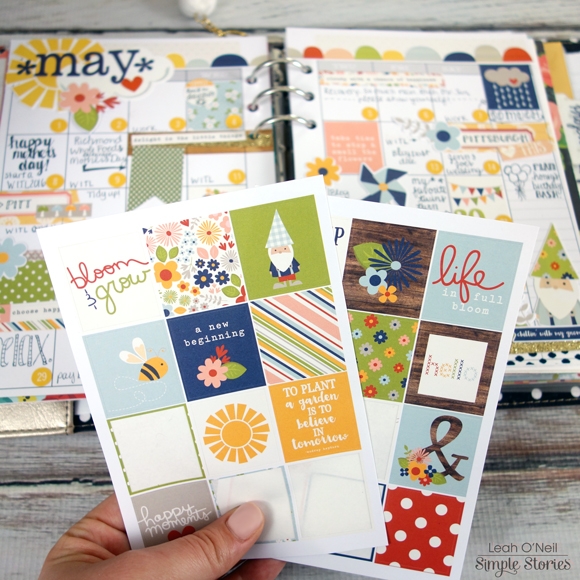
The box stickers are not exactly a perfect fit for the monthly squares, but they are very close. I love how they look, so I used several of them to fill some of the boxes throughout the month.
I added some extra layers to the layout with washi tape and die cuts from the Bits and Pieces pack.

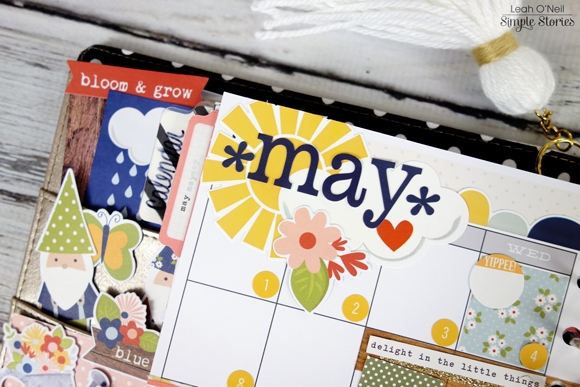
The letters that spell out May and the cloud and sun sticker behind them are both from the 12x12 cardstock sticker sheets. It has been raining SO much in Virginia for the past month, which is another reason why I felt this collection was perfect for decorating May. Since it is garden-themed, there are a lot of weather-related references. I used a few in this spread.
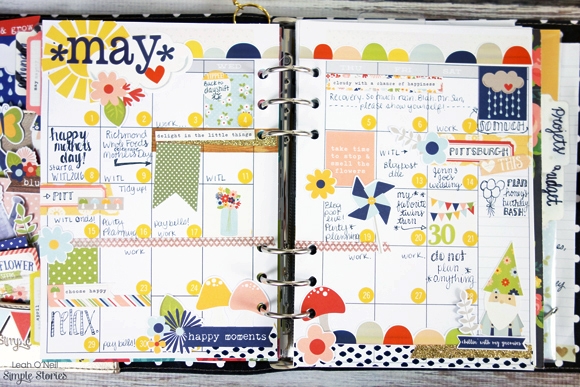
If your month has been as crazy as mine, I hope I have given you a couple of ideas on how to add some creative details to your planner without spending too much time decorating. Of course, it’s always an option to not decorate at all, as the Carpe Diem inserts have quite a lot of pretty details already. I am feeling so thankful for the fact that the inserts are undated because otherwise I would have wasted a couple of weeks of inserts this month. What are some ways you have made your planner more functional for your needs? Tag me on Instagram @sunny.leah, I would love to see your ideas!

Supplies

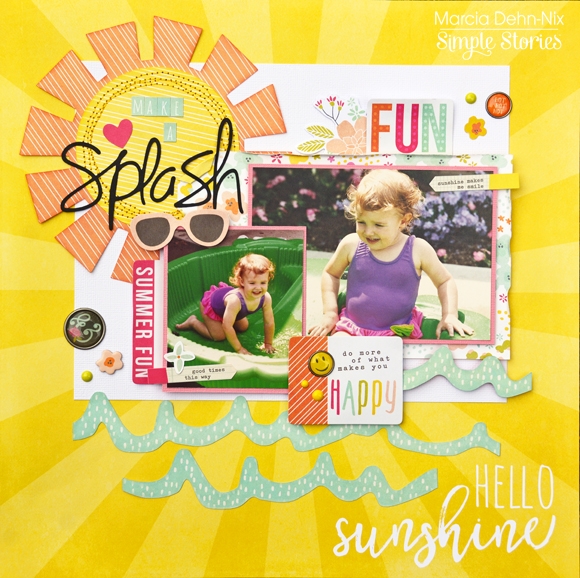
Hello everyone, Marcia here! I am so excited to share a couple projects today using the brand new Simple Stories Sunshine and Happiness collection. It's bright and fun, perfect for all kinds of summer photos.


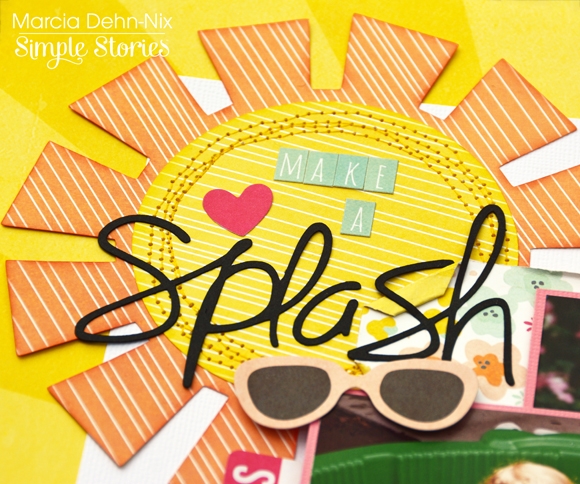
This first project is a fun summer layout titled Make A Splash. I am using some photos of my daughter playing in a small wading pool. I added a few JustNick Studios digital cut files as I wanted a big warm inviting sun and I also wanted some water. Take a look ...


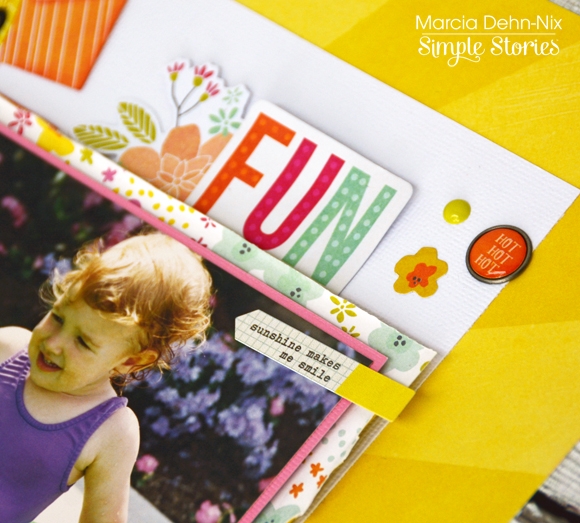
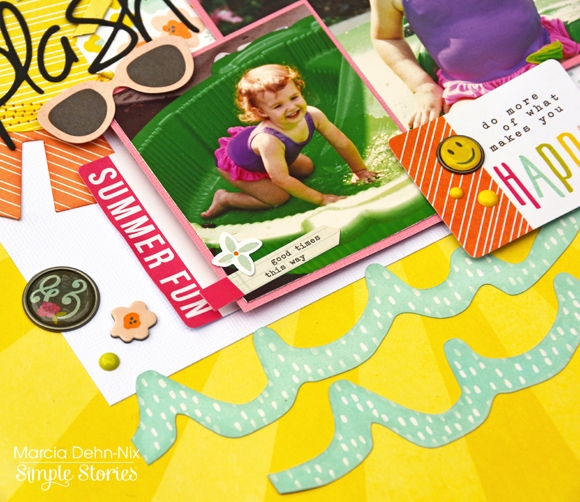
I really love that yellow Hello Sunshine paper. I used some white cardstock to layer under my photos so they wouldn't get lost among all the color. I used some fabulous Bits and Pieces die cuts, Enamel Dots, Bradz, and Stickers to embellish. These phrase stickers are awesome!


I placed my title inside that big sun using some of the Simple Stories alpha stickers combined with a JustNick Studios digital die cut word; Splash. Mixing fonts and text size makes my title more interesting. I added some machine stitching for texture inside the sun as well. I think I add machine stitching on most of my layouts.


____________


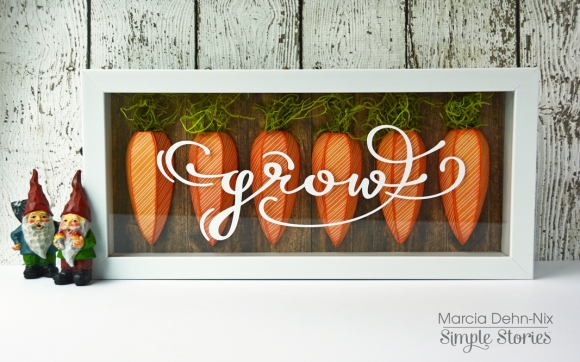
For my second project I created a home decor piece. I am an avid gardener having both flower and vegetable gardens and was ecstatic to see the Simple Stories Bloom and Grow collection. There are all sorts of projects I want to make with it. This shadowbox frame was one, but I needed some orange. Good thing that the Simple Stories Sunshine and Happiness collection had the perfect orange. The woodgrain background paper is from the Bloom and Grow collection. There are also different woodgrain background papers in the Simple Stories Snap Basics that could be used instead.


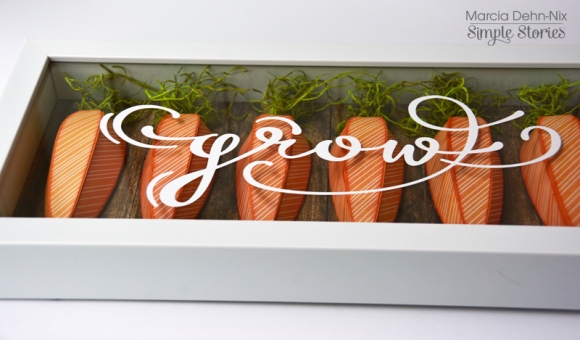
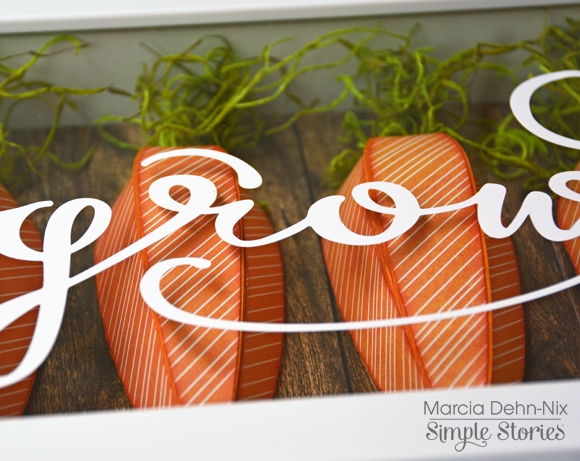
The 3D carrots are from the SVGcuts Happy Easter digital cut file. Yes, 3D .... here are a few more detailed shots ...


I used some white vinyl and my Silhouette to cut the Grow script that I mounted on the front of the shadowbox frame glass.


I am thrilled with how this turned out. It looks fabulous in my porch! 


Thanks for stopping by today. Watch for both of the new Simple Stories collections at your local scrapbook store. You will love them!


Supplies

Hi everyone!  Theresa here to share a few of my Carpe Diem layouts for the month of May.  I am in love with the fun and bright colors in the new Sunshine and Happiness collection!  

For my monthly layout, I used the Carpe Diem number stickers to label the days of the month.  After I filled in important dates, I filled in some of the empty space with stickers.

I wanted to keep the layouts for the entire month uniform, so I used the same color number stickers for the weekly layouts.

After the first week of May was over, I added a vertical pocket page to my layout by punching additional holes to the page protector.

I cut down a couple of my favorite patterned papers to 2"x2" to fill the smaller pockets.  I then embellished the photos and cards with stickers. 

This is such a fun scrapbook line but also perfect for planners! 


Supplies

Hello crafty friends!

I am so excited to share two new layouts with you today!  I created them using the Bloom & Grow collection and I have to tell you that it is just such a fun collection! Actually, if truth be told, I was having a trying day up until I sat down to create and before you know it this happy collection with it's fun primary colours and sweet embellishments had me singing away.  I may or may not confess to telling myself gnome puns!  When I was almost done my second page, I remembered another photo I have that is so perfect for this collection, so watch for that at a later date!
 

Friends are the Sunshine of Life
 
 
There is very little that says happy like sunshine yellow and gingham, so I knew this paper had to feature on my layout along with my all time fav - notebook paper! This photo was taken back in 2010. these sweet boys belong to two friends of mine and they had so much fun trying to walk our new puppy!  I layered a couple of the cut-a-part cards behind my photo and then layered some phrase stickers and label stickers around it as well as the fun banner sticker.
 
 
I designed this cut file to sit behind my photo because I wanted to use so many of the patterned papers from the collection! 
 
 
My title was inspired by a phrase that was printed on one of the cut apart cards, which I cut part of it from and then mixed in stickers and alphas for a fun multi font look.
 
I just cannot resist the gnomes and toadstools, so I flanked my title with one of each of them.  The tiny little banner hanging form the word "sunshine" was fussy cut from a larger square sticker.
 
 
This wonky scalloped border sticker was just perfect to embellish the seam between my two background papers, I added a bit of stitching to give it a bit more detail.
 
 
I finished off this page with a couple of small embellishment clusters.
 
Let's go fly a Kite


My youngest son loves to fly his kite, but boy do I find it challenging to photograph!  I struggled with getting my boy and the kite in the same shot!  I am glad I was able to get a few pictures that I could add to my scrapbook to document his fun.  This was such a gorgeous day, the lake and the sky were so clear and blue.
 
My three photos were double matted, first with yellow polka dotted paper and then with some plain white cardstock to help them pop off of the dark wood-grained patterned paper that I really wanted to use as my background. Then I layered the photos over 3 strips of different patterned paper adding some dimensional adhesive behind them.  
 
 
The top of my page also got treated to some patterned paper and a tiny scallop that was fussy cut from one of the bar code strips from the collection.  Then I added some machine stitching for no other reason than I thought it would be pretty.
 
 
Wow, did I ever have fun embellishing this page!  On the right side of my page, I combined stickers, chipboard pieces, and ephemera to create a little sunny day scene ... I just couldn't resist.  I used lots of foam adhesive to create dimension within the cluster.
 
Again my title is a combination of a phrase cut from a cut-a-part sheet and some alpha stickers - so fun to create!  And I didn't have to think of the perfect title, the collection did that for me! (For both of my pages!)
 
 
The left side was treated to a smaller cluster.


As a last step, I added a couple of die cut butterflies and some enamel dots.
 

Thanks so much for stopping by today! 

Supplies

Good morning friends! Brenda Smith here with you today to share a pocket page made using the new Sunshine & Happiness line. My daughter turned 6 in April and though it wasn't summer, I knew this line would be perfect for documenting her water party. 
 
 
I had several photos I wanted to include in this spread so I turned to photo collages. I used Photoshop to arrange the photos before printing. The Bits and Pieces pack always contains the perfect embellishments for finishing off the photo collages. 
 
 
My photos are pretty busy and of course I wanted to use all the pretty bright colors in the Sn@p Pack so in order to keep the spread from looking too crazy, I made sure to include plenty of white across the spread. I widened the white borders around my photos and chose cards with a lot of white. It's certainly fun to have bright and colorful layouts but I really wanted to make sure the photos and the stories were the stars of this page. 
 
 
I wanted to finish off my cards with some hand-stitching details. I used some stitching templates from my stash and stitched on some sequins and some other little bits here and there.
 
 
I used the coordinating alphabet stickers to make little mini titles all across the spread. Because I wanted them to stand out a little more, I outlined the letter stickers with black pen. 
 
 
I used hand-stitching as a means to add more texture and dimension to the spread. These yellow arrows are the perfect accent without standing out too much. 
 
 
There were a lot of little stories to tell about her party and this photo collage allowed me to document random photos along with the stories. 
 
As you can see, this collection is so versatile and can be used for so many more types of pages than just summer pages. Once you pick up this line, make sure you share with us what you are making with Sunshine & Happiness!

Supplies

Good morning!  It's Mary-Ann here with you today :)
 
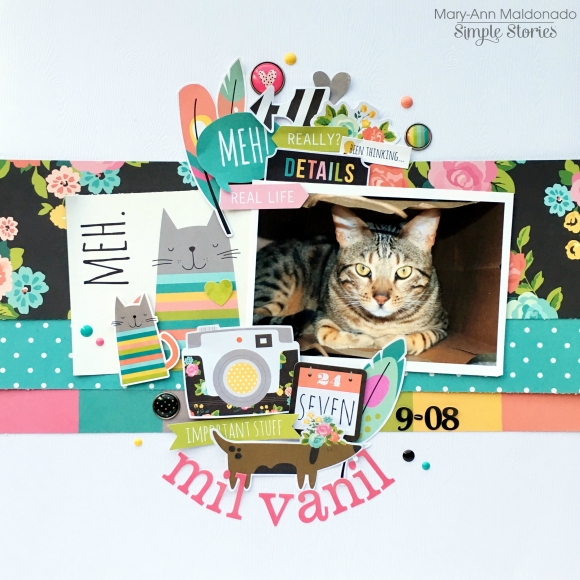
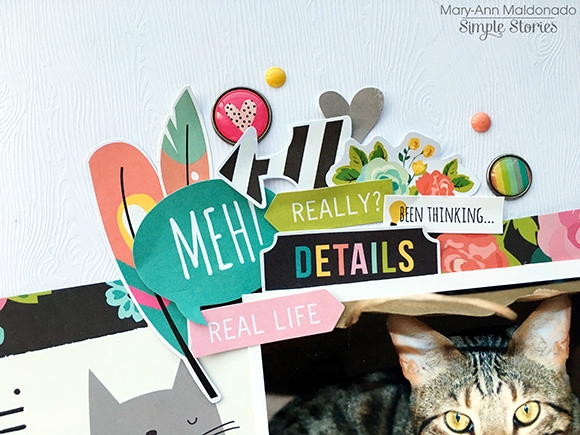
We adopted this handsome boy when we lived in a little town called Milford.  Hence his name, Milford.  Of course we found nicknames for him rather quickly.  We called him Milly Vanilly, Mil Vanil for short!  For this layout, I used Carpe Diem.  The cat embellishments were perfect for this photo that I have had printed for quit a while.  

The Meh 4x4 was perfect for depicting his personality.  He didn't care about anything!  Quite lazy as a matter of fact.
 
 
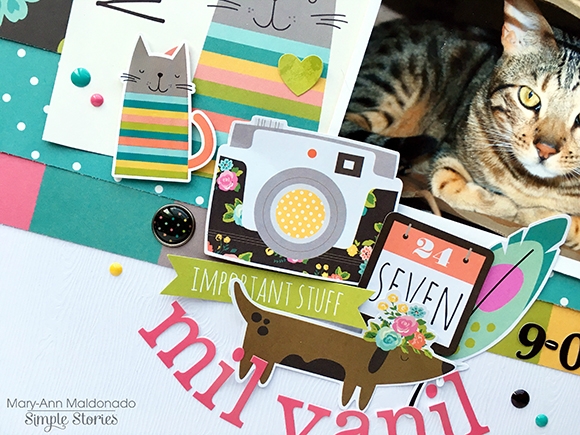
Adding the puppy was a MUST and just pure fun.  
 
 
I love to layer, combining Bits and Pieces, Stickers with Chipboards!

Supplies

Good morning all! Brenda Smith with you today to share something a little different. I've been asked to share my memory planner spreads in my Carpe Diem here on the blog in addition to my pocket pages.

For those of you who might not know, memory planning is part journal, part planner. Instead of filling up a planner with to-do's, you fill it up with stories and memories. Because I do pocket pages as well, I use my memory planning as an aid in helping me remember the stories that go along with the pictures.

This planner spread was made using Life in Color.  I used one of the 12x12 papers and cut two strips to go down the sides. Then I used the labels from the Stickers and the phrase stickers with the days of the week on them because I covered up part of my days titles with the paper. I like to combine stamps from my stash because I find it the perfect opportunity to use all those cute phrase stamps I never seem to use anywhere else.

One of the most important things to note about me as a planner girl is that I'm a scrapbooker first. I approach my planner pages in the same manner I approach my pocket pages or my layouts: heavy on the die cut embellishments like those from the Bits and Pieces sets and clean and balanced. I've realized that I do not have to reinvent the wheel with planning. I can do what I've always done in my crafting.

This spread was made using the new Sunshine & Happiness line. This was the week of my daughter's 6th birthday so I knew I wanted there to be a focal point with something to do with her birthday. These big letters spelling "Happy" from the embellishments in the Sn@p pack worked out great despite their monstrous size. Don't be afraid to work in larger embellishments onto a smaller canvas like a planner spread. Big things can work on a small canvas when good design balance is kept in mind. 

I use a typewriter because I like the clean, crisp look. I don't particularly care for my handwriting to be honest. I make sure to put enough of my handwriting elsewhere in our albums but I'm allowing myself to do this planner thing exactly how I want, not necessarily how I see others doing it.

When journaling in my memory planner, I try to keep the pressure off myself. There's not a lot of space to write so I can't write everything. My stories get told through my layouts and pocket pages and I use this memory planner as an aid in helping me remember some of the small details of that week.

This spread was made with the new line Bloom & Grow. You may have noticed my go-to's when it comes to making planner spreads: Strips of paper (or in this case, strips cut from journal cards from the Sn@p pack), Bits and Pieces (die cut ephemera), enamel dots, phrase stickers, alphas, and stamps. 

I'm definitely a no muss, no fuss kind of girl when it comes to my planner. I've found that by removing the rules for creating in my planner that I was imposing on myself, creating these spreads has become one of my favorite crafty outlets. Because there are no rules, there's no pressure. I make what I feel inspired to make and every memory planner spread done means another set of stories documented, whether or not the ensuing pocket pages get made in a timely manner. 

Pages