July 2017 Blog Posts

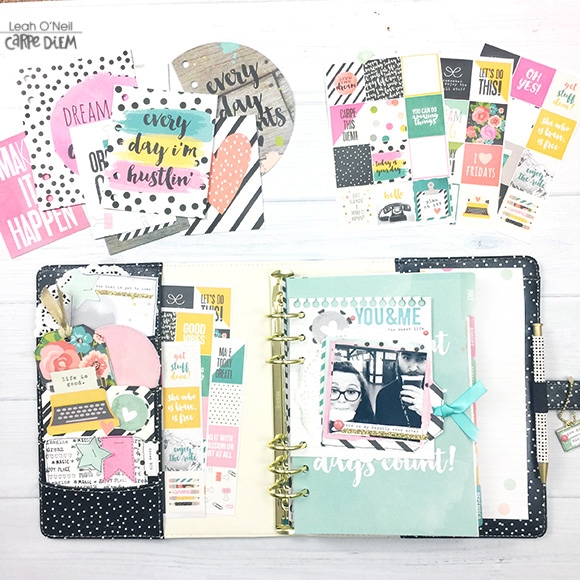
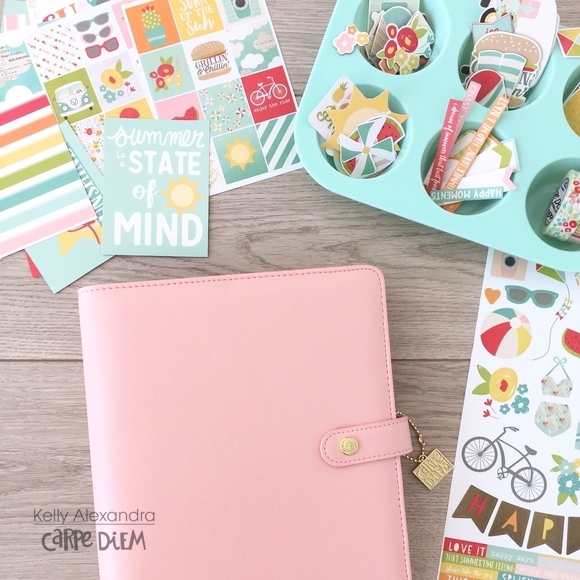
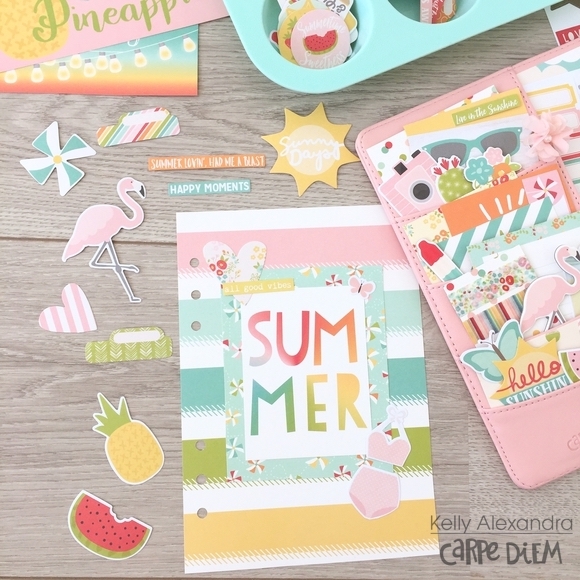
Hi everyone, its Meredy aka @myplanningadventure.  I’ve been using my Carpe Diem Daily Inserts and it is a great way to organize your day.  It doesn’t take long to pretty up the page with decorative elements and I love that each day can have a different look, or even work together.  I am going to take you through a recent week of daily planning, and I hope you feel inspired to plan a bit every day.

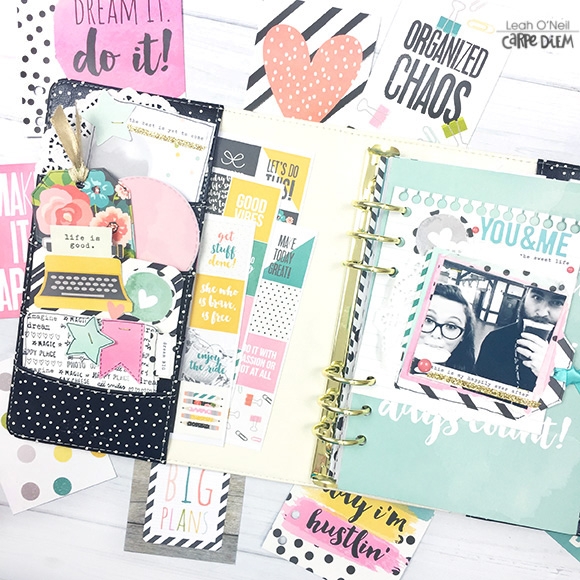
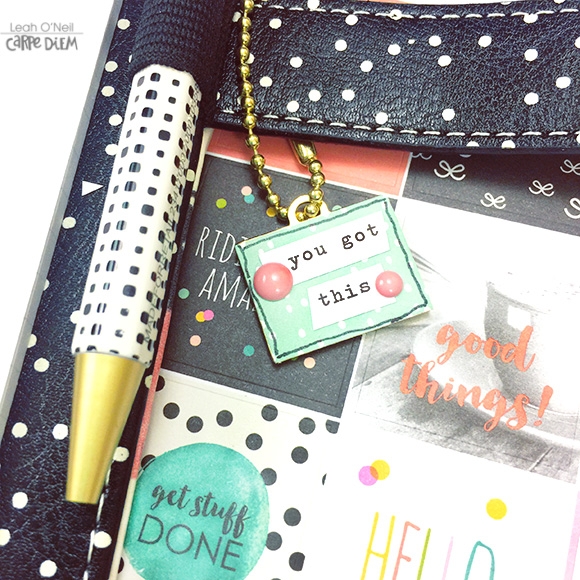
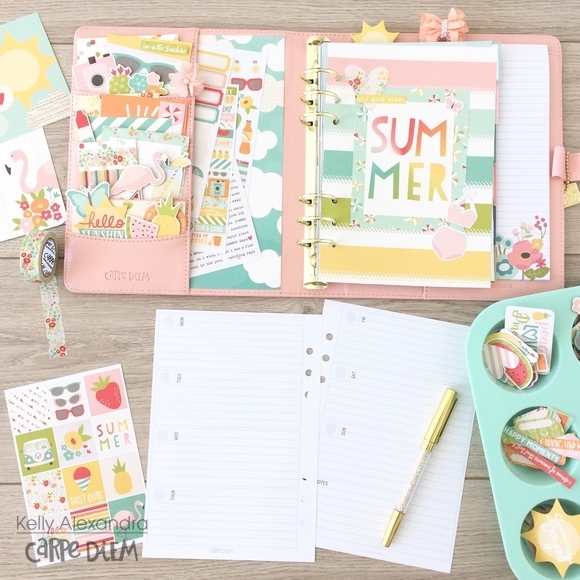
I use my Black Speckle planner for daily planning, It’s a perfect mix of professional and playful—just like my day.  The new Carpe Diem A5 punch is my new best friend!  I always hand punched my holes after I added washi because I could never line up the page correctly in a multi hole punch.  The carpe Diem punch has a ridge that keeps the page in place and it punches perfectly to the Carpe Diem Inserts.

This planner stays at home and is primarily my tool to help organize my day.  Whether I am at the kitchen table, or at my desk, these daily inserts really help me to get my day organized.

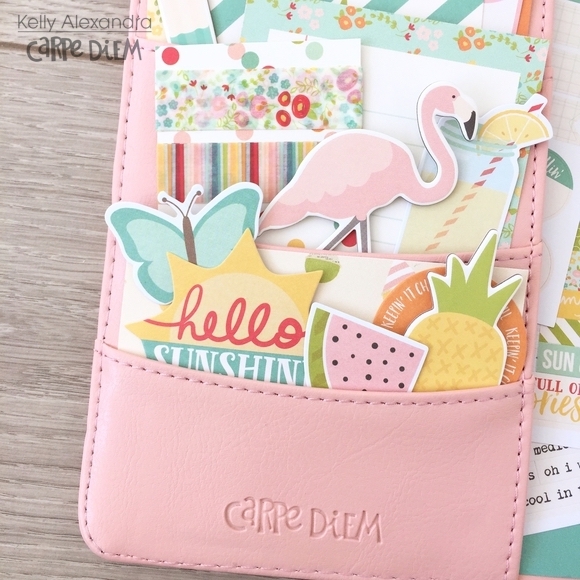
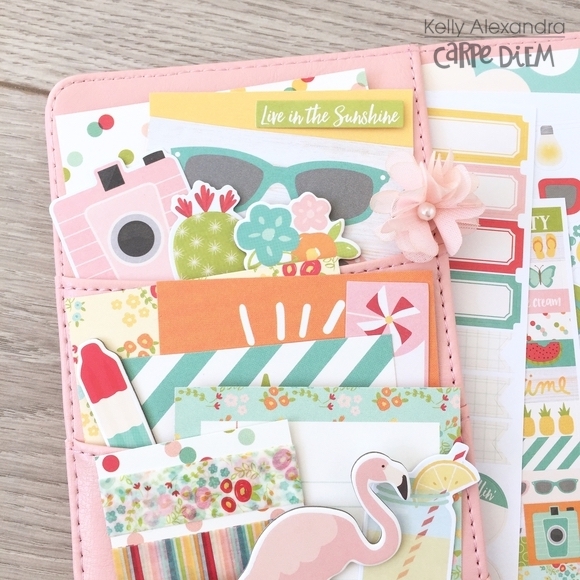
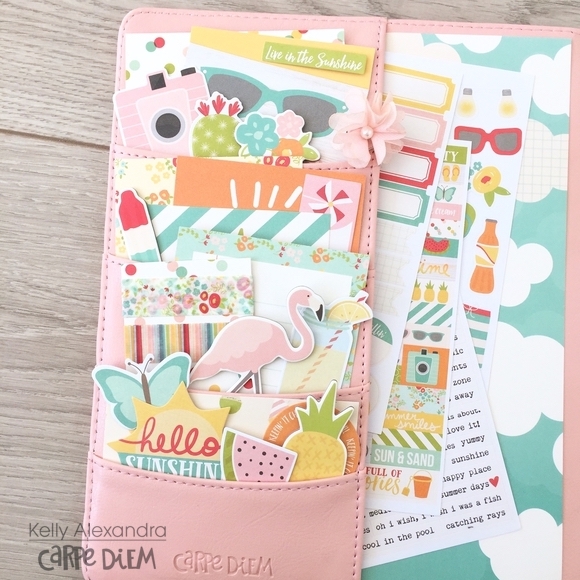
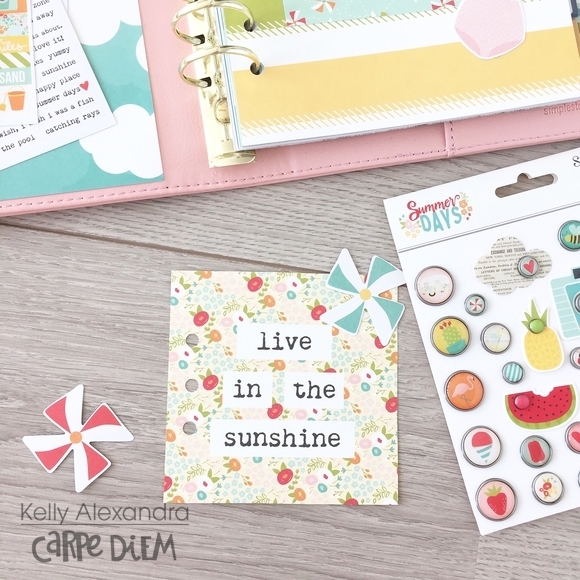
One of my favorite aspects of decorating a daily page is you can really have fun with it!  When I am decorating a weekly layout, I feel extra pressure to make it just the way I want it as I will be looking at those pages many times throughout the week.  With a daily insert, I can just have fun—it doesn’t have to be perfect.  

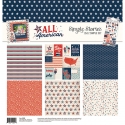
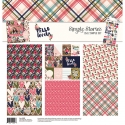
Fourth of July was on a Tuesday, so I did a quick layout using the All American Simple Set from Simple Stories.  I used the stickers that came in the set to decorate the page and just made a couple of reminder lists—the day was for celebrating our freedom with friends (and maybe the freedom to take a nap as well).

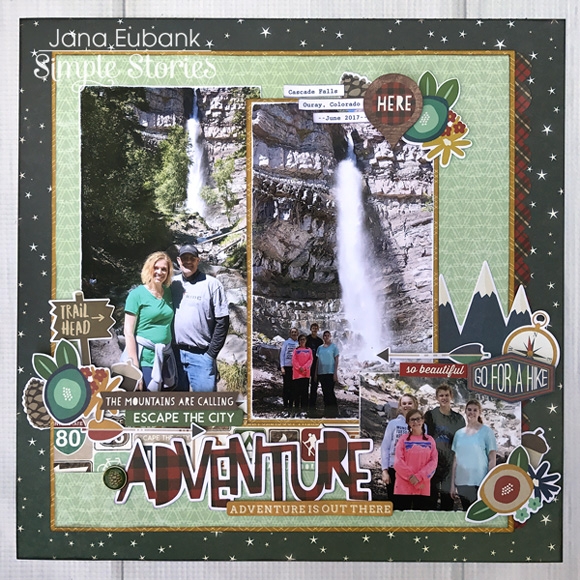
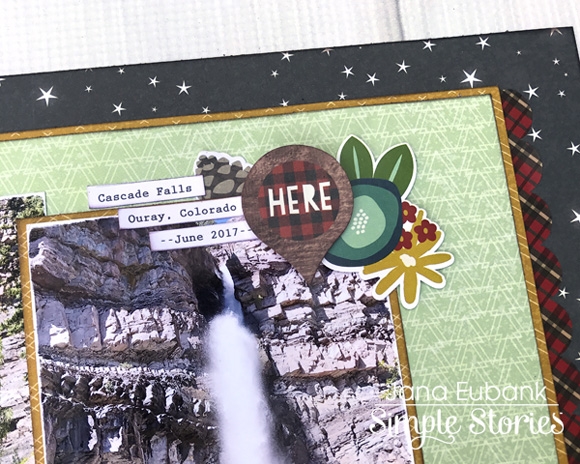
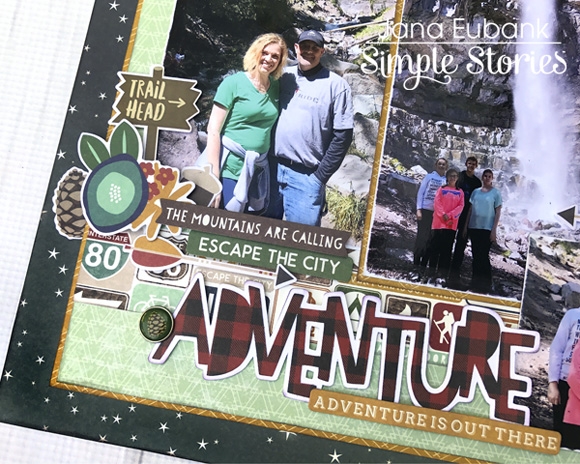
In the morning, we went to a parade with friends so I made a quick Memory Page with some of the elements I loved from the All American Set.

This add in page turns this daily into a quick two page spread

Wednesday, it was back to work, and I had a lot to accomplish.  I break my To-do lists into Work and Home and I always try to add in an item or two that I am wanting to accomplish for myself. 

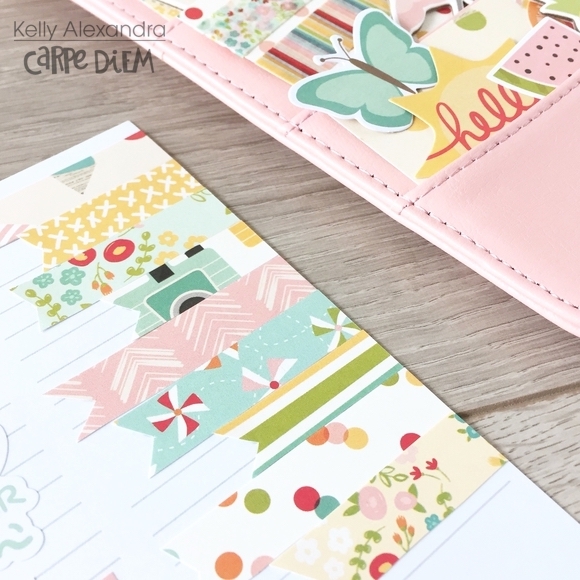
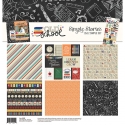
I used this decorative paper from the Domestic Bliss Collection on the back of the memory page I made on Tuesday.  I added an inspirational card, and a small piece of paper that I could jot down the items I need to pick up at the store.  I also used the Brads from Domestic Bliss to make a quick paper clip.

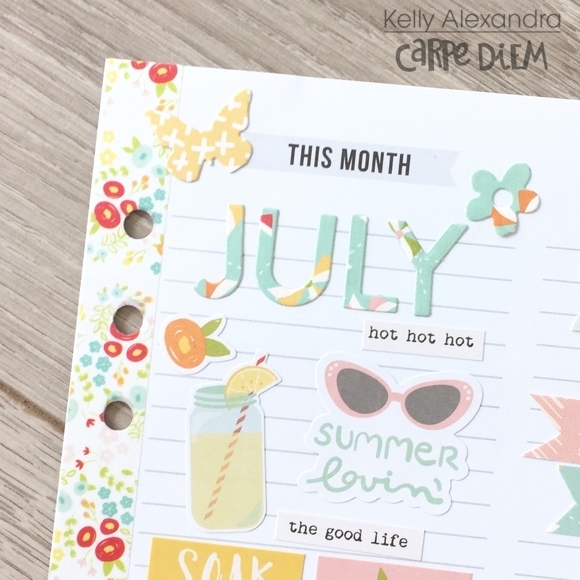
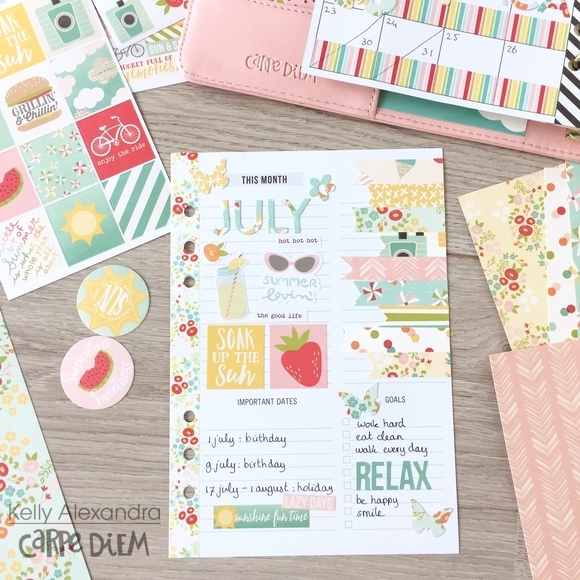
One of my favorite parts of decorative planning is layering stickers on the page.  I like to add in fun sayings or ephemera and add in smaller stickers like stars, hearts and arrows. 

Now it was on to Thursday and Friday.  I used similar colors on these two pages, but are different but work together.

Thursday was a mix of home, work and socializing.  I used ephemera pieces instead of alphas for Home and Work.  I didn’t have long lists this day so I dressed up the page by layering stickers and other decorative elements.

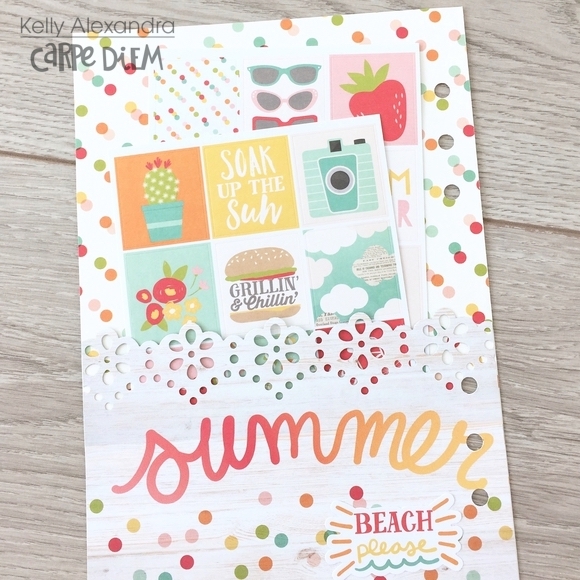
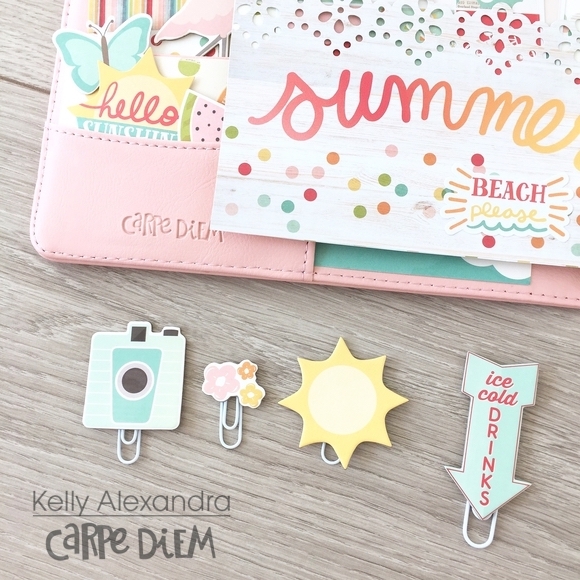
Friday was back to my standard Alpha Headers and Todo lists.  I love the Summer Days collection, such a fun way to celebrate the end of the week!

I hope you enjoyed seeing a week of my daily layouts!  Daily planning is a fun way to get some creative time in each day.  The pages are quick to decorate and a great way for me to practice some hand lettering.  Give it a try!

SaveSave

Supplies

Hi, Everyone! Jana Eubank here. This year our family took a road trip through the beautiful mountains of Colorado. Being in the mountains is my favorite place to be! I love enjoying the fresh air along with the sights and sounds of nature. You can bet that I took a lot of photos on that trip that I couldn't wait to scrapbook using the Cabin Fever collection.


ADVENTURE


The first thing I did was to pull out the Bits & Pieces pack. I sifted through all of the designs and selected several that went along with my photos. The red checked geotag die cut was perfect for calling attention to the photos of this beautiful waterfall.


I die cut the title from the Summer Camp Paper (red buffalo check) using my Silhouette Cameo 3 Electronic Die Cutting machine and the "Adventure" cut file by Simple Stories found here in the Silhouette Design Store (Design #199552). I added a pinecone decorative brad to the left side of the title.


I then used more Bits & Pieces die cuts and stickers from the Combo Sticker Sheet to create two clusters around the bottom of my photos. The floral clusters and word phrases are repeated in both clusters to tie things together.


_________________________________


This next page features a few snapshots taken closer to home ... in fact, they were taken in our backyard last fall as we enjoyed the fire pit one cool night.


FIRE PIT


I wanted a plain cardstock background, but decided to make it a little more interesting by die cutting stars all over it. I placed a second sheet of the same color of cardstock behind the die cut piece. The result is a subtle tone-on-tone texture that doesn't take away too much attention from the photos.


At the top of the photos I added the heart sticker matted with white cardstock. I added the date and a decorative brad for a bit of dimension.


I used my scissors to cut the fire from the 4x6 Vertical Elements Paper. It was the perfect size to accent my title! I couldn't resist adding the chipboard piece with the  marshmallows on a stick above it. Too cute!


At the bottom of the page I layered up a few chipboard pieces. Two wood slice circles overlap each other and anchor the rectangle chipboard piece. I love what it says! "Life is better by a campfire" So true!


I cut the journal block from the 4x6 Horizontal Elements paper and added it to the right of the photos. I used a black pen to handwrite my journaling and then accented the bottom with the Roughin' It washi tape and a floral sticker.


Thanks for joining me today! I hope you leave feeling inspired to pull out those outdoor photos and get them scrapbooked!


SaveSave

Supplies

Hello again creative planners! Leah here on the blog today to show you how I give the front of my Carpe Diem planner some “curb appeal.” I will be using the new Carpe Diem collection and showing you just how versatile a few of these products can be. I have shared many blog posts on here featuring decorated front pockets and dashboards, but this will be the first time I have filmed a video of the process, start to finish. I am SO excited to share it with you! 

I have taught an online class all about front pocket design and techniques if you want more thorough explanations of the “why” behind a lot of my decisions when decorating my planner pockets. You can find a link to that class in my Instagram bio. In this blog post and video, I will be showing you all about the “how.” I will take you through how I made several of the elements for the pockets using the Carpe Diem Dashboards and Pocket Cards set and a few papers from the new High Style 12x12 paper pad.

These pockets came together fairly easily, just by cutting and punching out a few basic shapes. When it comes to pocket decorating, I like to use a variety of shapes. For example, in these pockets I have a large circle, a smaller circle, a tag, small stars, a banner, cards with sharp edges, cards with rounded edges, and a die cut typewriter that I fussy cut from a pocket card. Having a few paper punches in basic shapes is always a good investment for creating your own die cut shapes, but I collected the punches I have over the course of several years. Several of these shapes can be hand cut pretty easily without paper punches. The circle is probably one of the hardest to hand cut but is still possible with the trusty technique of tracing around a cup onto paper and cutting it out, or you can get these awesome photo cropping tools from Simple Stories that make it super easy to cut different sized circles. They are much more cost efficient and portable than having to buy several different sized circle punches.

I also like adding some texture to my planner pockets by adding things like doilies, ribbon, and staples. Another common technique I use to add the illusion of dimension and texture, is to add doodled borders and hand drawn stitching to the edges of some shapes.

I made this pocket card from scratch using some white cardstock that I cut down to fit in the pocket, and then I used the Say Cheese III roller stamp to stamp words all over it. This gave me a cool black and white text background which added an interesting detail to my pockets without competing with all of the other colors I was using. You can get this effect with any word stamps, but the Simple Stories roller stamps make it so easy and quick to do, and I like how they always have a few shapes added in too. Like the Say Cheese III roller stamp for example, has an arrow and rows of hearts and stars that break up the words.

All of the patterned paper dividers in the New Carpe Diem monthly planner inserts are so beautiful. The collection has many of the same fun elements from the original Carpe Diem line, but there are some black and white images that give it a very trendy, modern vibe – kind of reminds me of some of my favorite pieces in the old “Life in Color” collection, but with the Carpe Diem colors and designs.

The monthly dividers are pretty enough on their own without adding anything, but I always like to jazz things up in the front of my planner. In this case, I used a smaller decorative dashboard from the collection and customized it with a photo and some fun layering. I love that because the dashboard is smaller, I get that personalized feel at the front of my planner but I can still see the monthly divider underneath.

In an older blog post (read it here!), I customized one of the Carpe Diem planner charms for one of my planners and got a lot of a great feedback on it! I did the same for this planner, but this time I filmed a quick tutorial to show you how incredibly easy it is to do. I will be posting that video clip over on my Instagram, so be sure to come say hello over there and check it out! Here is the YouTube video of my process for setting up the front of my Floral Dot planner, I hope you enjoy it! Hit “subscribe” while over on my YouTube channel to catch future Carpe Diem planner videos!

Supplies

It’s no exaggeration to say that ours is a camping family.  My daughter was a Girl Scout, and my son a Boy Scout.   We were very involved with the troop and at one point my husband was even Scoutmaster.  It was a privilege to be a part of so many lives and watch these children grow into young adults.

I was so excited when I saw the Simple Stories Cabin Fever Collection!  It’s everything I love about the outdoors.   The papers are a wonderful mix of nature inspired elements like trees, animals and flowers.

The collection has all the survival tools you’ll need to get you through lots of layouts so you can capture all your favorite memories.  I love the clever sentiments you’ll find in the #3047 Cabin Fever 4x6” Stickers and Combo Sticker.

For this scene I hand cut borders of pattern paper to create a landscape.  It’s best to keep the lightest color in the foreground to add some depth to your scene.

I fussy cut some pine trees from a journaling card in the paper pack and tucked them behind the hilly landscape.  A circle paper punch makes an simple sunny sky!

The fun tent and campfire are chipboard stickers, and the bitty flowers are from the combo sheet.

_________________________________________

I’ve been sending a card in a care package to my son at summer camp for as long as I can remember. This was his last year as a Venture Scout – that means he’s 21 years old.

And while he’s no longer part of a troop that doesn’t stop him from going on adventures.  A few weeks ago, he and two friends who are also Eagle Scouts took a road trip to Colorado to do some exploring.

Of course he’ll always be my little boy; always in my heart and on my mind.   I packed them up some snacks for their trip and tucked a card inside his duffel bag so he doesn’t ever forget it!

I cut the sentiment from a journaling card.  The hiking prints are chipboard, and the fun compass is a decorative brad.  Do you spy some plaid washi? 

If you’re a camper too I just know you’re going to love this fresh new collection from Simple Stories!


SaveSave

Supplies

Hello friends! Jennifer on the blog today to share pages I created with one of the fabulous NEW collections!  Summer Days includes a variety of fun, bright patterns perfect to document those summer memories!   And with any Simple Stories line you always have a multitude of embellishments to choose whether it be coordinating stickers or washi tape! 

For my first layout, "Summer", I wanted to mix in lots of patterns on my layouts!   Using a background cut file helps me do so!   I chose a 12x12 starburst overlay with my favorite cloud pattern Beat the Heat. I then added in strips of additional papers to fill in the blank areas.  Once together, I trimmed it down to 11x11 because I wanted to allow the edge of my white cardstock to show.  I also incorporated the 4x6 Vertical Element Cards to tuck behind my photo and journaling card.  This is a great way to add color to your pages if you don't use the Journaling Cards for pocket pages! 

For my title, I used the cute "Summer" banner from the 6x12 Chipboard placing it just under my photo. I also added in a cloud/sun sticker from the Combo Sticker Sheet using foam dots to pop it up. 

I like to cluster my embellishments in the corners of photos or journaling cards doing a lot of layering!  Honestly, I can't even tell you how I come up with it; I just arrange them until it "feels" right.  LOL  If you weren't aware, Simple Stories has many fun designs in the Silhouette Shop including this pineapple! I used the bright yellow of the B side of Lazy Days then added the cute flamingo from the Bits and Pieces pack along with stickers and Decorative Brads.

Speaking of Decorative Brads, how cute is cloud/heart combo?  I am drawn to the vintage print on the cloud with the contrasting blue and red of the brad!  I had to include it on my page!  

The Combo Sticker Sheet always has a variety of shapes and sentiments to use on your projects! A big favorite are the tab stickers that are fun to tuck behind your photo or journaling card! I also adding in some colorful Good Vibes Washi Tape to fill in some white space!

You will also find lot of different shapes in the Bits and Pieces pack including this circle journaling spot and green/white arrow!  I used the Carpe Diem Make It Happen Roller Stamp to add a little sentiment under my date then finished with a small Decorative Brad and a piece of the Summertime Sweetness Washi Tape.

_____________________________________

For my second layout, I was inspired by the "Just Add H20" card on the 4x4 Elements Sheet and knew just photo I would use!  A few years ago, my husband caught this awesome pic of our daughter launching a water balloon at him! You can see the balloon mid-air (I don't remember if it met its directed target or not).  Water games are always a big part of summers here in Illinois whether it be running through the sprinkler or getting out some water balloons to cool down!  

I began with a white sheet of cardstock and added color by painting yellow spray ink across the middle with a foam brush.  I also incorporated blue spray ink adding some ink splats in random places.  After allowing to dry, I was ready to start adding in my papers!  

I again utilized some of the 4x6 Vertical Elements as well as pieces of the B side of Sunny Days and So Much Fun.  I also added strips of Sunny Days and Summer Snapshots at the bottom and top of my page. Using a border punch, I incorporated a small strip of the B side of Lazy Days at the bottom of my title card. I love using my sewing machine and so I ran a quick stitch through the strip then finished by adding the beach ball sticker (which I popped up) and well as a cute chipboard flower and a small brad. 

Here is where the Journaling Card Elements come into play again!  I love using the cards with ledger or white space for journaling! Since I don't care too much for my handwriting, I will use my typewriter if I'm at home.  I decorated the edges of my journaling cards with cute die cuts from the Bits and Pieces pack. Don't you love the bikini?  

Showing more cluster of embellishments as I usually do this to fill in some white space or accent my photos. The smaller brads remind of enamel dots and I think they are perfect to go alongside larger embellishments such as the chipboard sun!  Also, the tiny heart stickers from the Combo Sticker Sheet are perfect little additions, as well! 

Adding in a banner in the corner can also be a great way to add more color to your layouts! I layered many pennants then stitched through with my sewing machine as well as added a Decorative Brad and bakers twine from my stash.  

I used patterned hearts from both the Combo Sticker Sheet and Bits and Pieces pack to accent my photo! I also love the many sentiment sticker found on there as they are a nice touch


Supplies

Hi everyone, Kelly here and today I want to show you how I set up my planner for Summer.  Besides working, this month is all about sunny weather, relaxing and holiday to me, so it is important my planner reflects the time of year.

For this setup I am using all the stickers, papers and pieces from the Summer Days collection together with my Blush A5 Carpe Diem Planner. Before I start, I placed the washitapes and pieces in a cupcake tray for easy access and displayed all the stickers and papers on my desk.

The first thing I always do when I set up a new planner is filling the pockets with journaling cards, decorative bits and a little washitape sample! A little tip for keeping the decorative bits in place when you open and close the planner: take a bit of washitape, make a little roll and put it on the back of the ephemera and adhere it to the spot where you want it to be. This way you can easily remove it and it will not get damaged!

In the large side pocket I used the blue paper with clouds as a background and slided some stickersheets of the collection in there, to always have them on hand.

Now that my pockets are filled I created a new front dashboard. I cut the rainbow colored paper down to size, punched holes and decorated it with some cards and stickers! In the back of my planner I inserted a little notepad to write down things I need to remember.

The 4x4 Element have this awesome quote card: ‘Live in the sunshine’! I punched holes using the planner punch and simply put it in my planner. A quick and easy idea to decorate your planner!

Since I would always like to have multiple stickersheets in my planner, I created this pocket on the back of the front dashboard. I grabbed a 4x6 card from the cut-apart paper, punched a border with a flower pattern using a punch from my stash and adhered it to the bottom and sides of the page. I also used a few of the thickers to create diy paperclips, I adhered them with strong tape on some white paperclips.

For this summer I had the idea to make a bucket list with things I want to do. I decorated a page with a big flamingo and made sure I had enough space to write down a few lists.

I also created a pocket page by punching some extra holes in a SNAP pocket page and filled these with pattern paper, cards and stickers. I like to put these at the back of my planner.

Now that all the extra ‘Summer themed’ pages are done it is time to decorate the July monthly spread. I used some butterfly, flower and alpha dies to cut shapes and words from the patterned papers. With washitape I marked the days of my holiday!

At last, I wanted to decorate the ‘This month’ page for July. I used alpha dies to cut July from the patterned paper and used some scraps of paper to create a fun banner border to show of all the pretty colors and patterns.

I love the ‘this month’ page because it gives you room to write down important dates, appointments, and monthly goals. Since this month is all about holiday for me I used lots of stickers and did not write down any to do’s!!

On my instagram (https://www.instagram.com/createplannernl) I will share some more weekly spreads using the Summer Days collection in my Carpe Diem planner. See you next month!

SaveSave

Supplies

Hello Simple Stories fans and welcome to the blog today! One of the best things about SS collections for me, is that you get a brilliant selection of elements that all go together effortlessly. I love having some washi, that matching brad or enamel dot in just the right shade!  Sometimes though, it’s awesome to have a few bits and bobs that co-ordinate perfectly plus you know you will make use of every bit, for occasions like Halloween etc… Enter Simple Sets. I love them! I’ve created two pages to share with you today using ‘Old School’ and ‘Hello Lovely’ Simple Sets.
 
Hello Lovely
 
The combination of pink & navy was too pretty to resist for these fun snaps taken in a photo booth recently. 
 
 
The woodgrain print was a perfect base on to which to start my layering. This one is the Hickory/Cream Grid. The great news is that you can grab a selection of these useful papers in a Sn@p! Basics Pack which has 8 double sided sheets and is also available in a handy 6x6 size! Perfect for a variety of projects.
 
 
I started with a bit of texture paste through a stencil to echo the floral patterns in the Hello Lovely set. I purposefully didn’t add it in a uniform pattern. I just wanted it to show here and there.

Once the texture paste was dry, I began adding my elements. There is lots to choose from to hand snip if you enjoy fussy cutting!
 
 
Below my photo strip are some black plastic bits as well as an overexposed pic I probably won’t use. The black bits are the pieces that are left over from a pack of Instax film. I used a stapler to quickly bind them together and pop them behind the images I was scrapping. I really like the bit of interest they provide!
 
 
Stickers can be used like a die cut if you pop some talcum powder on the back of them. I’ve mounted this one on to some pop dots and used a chipboard frame from the Enchanted collection to highlight the title.

There are lots of little details on this page, like the confetti which I used to show happiness bursting off the paper. It was a bit of a labour of love adding adhesive and subsequently the teensy bits of paper, but it adds that extra element of fun to the page.

________________________________________

This page also uses an element from a Simple Set to create the page title. This phrase is so apt right now, so I cut a section from a 3x4 journalling card from the Old School Journalling Card Elements. My son will be completing his primary school journey at the end of this year and we are so excited and nervous for him as he starts a new chapter in his schooling career.

The background is a combination of Old School ‘Hall Pass’ and the 3x4 Journalling Card Elements B side. The chalkboard print is super cute! I also echoed the paperclip theme of Hall Pass by using some coloured paperclips as embellishments. You’ll notice my materials list is pretty minor for this page, but by using a mixture of elements, it can still pack a visual punch!
 
 
I pretty much used up the whole sheet of 6x12 Cardstock Stickers on this page. I ran them along the edge where the two papers meet, tucking some in and raising some up on foam dots. I’ve added some typed journalling above and below the title to draw the eye along the same line, so it doesn’t look like too sharp an angle jutting out on it’s own.
 
 
Thanks so much for joining me today.
 
Happy creating!


Supplies

Who doesn’t love a sale?!  Through July 8th, all Simple Stories designs are 25% off in the Silhouette store.  While you’re at it, make sure to grab this FREE fringed flamingo cut file design!

Visit Simple Stories here in the Silhouette online store for more than a thousand of your favorite Simple Stories designs!

Pages