January 2019 Blog Posts

Hello and happy Friday! Linsey here sharing my latest altered project, this super sweet love note box decorated with the beautiful Kissing Booth Collection! It's a fun and easy way to spread the love this Valentine's season!

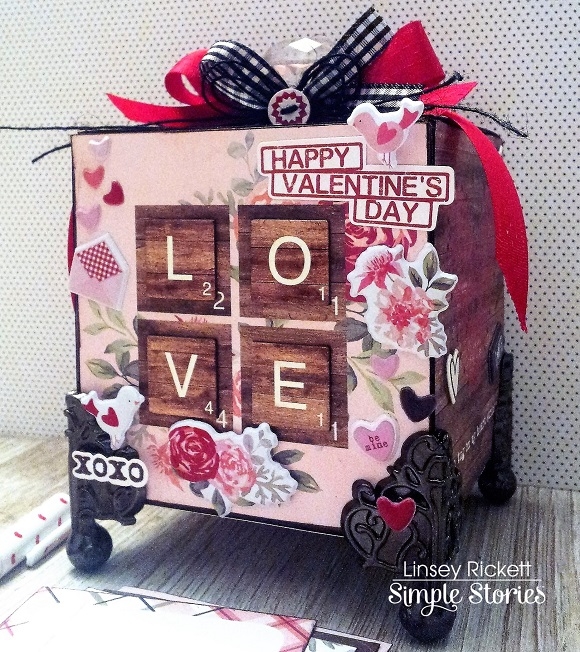
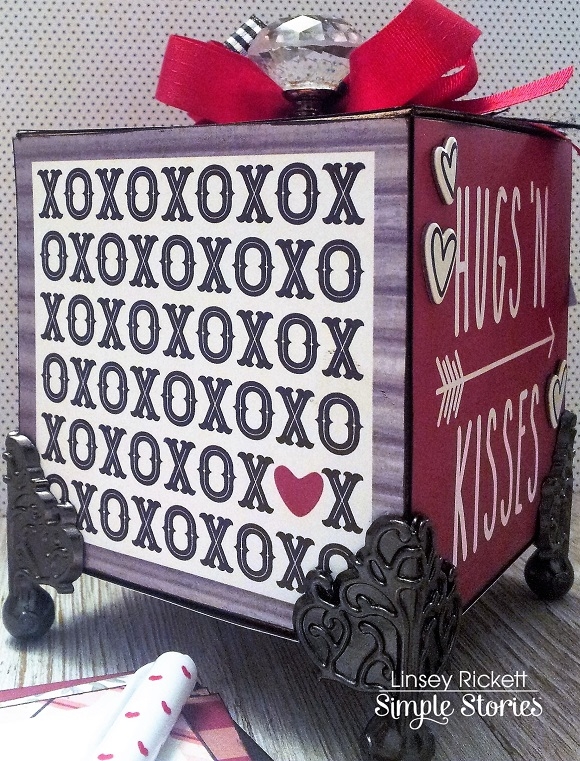
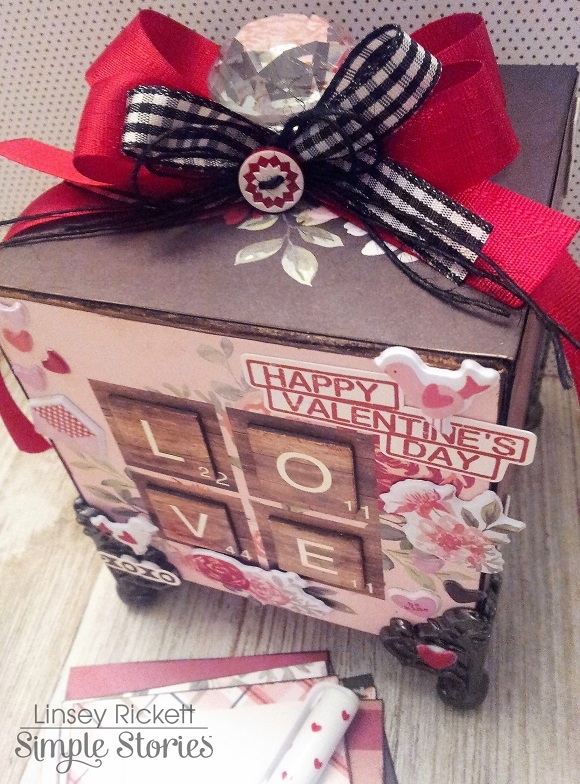
My box was a 4x4x4" blank canvas and so the 4x4 Elements were a perfect fit, covering every side with a different and lovely design. So quick and simple! So L.O.V.E that!

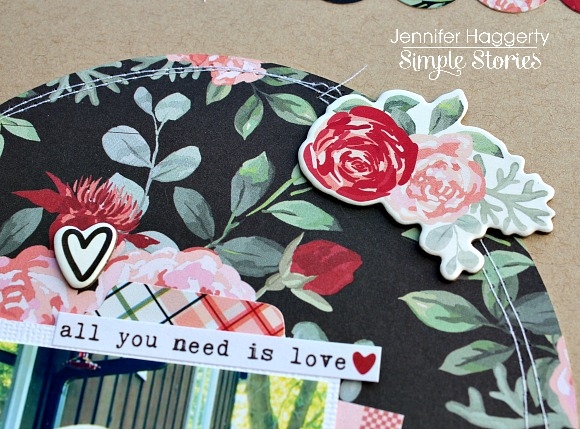
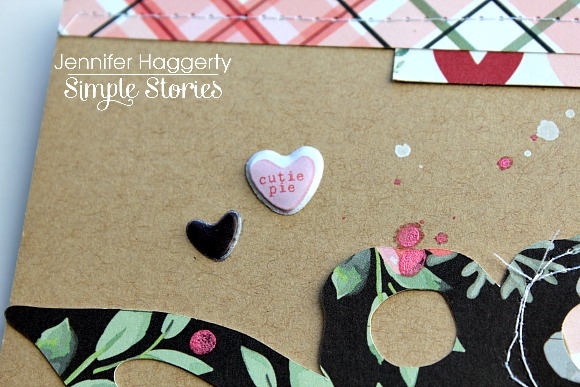
Each side was prettied up even more using a variety of 6x12 Chipboard, 4x6 Stickers and Puffy Stickers. Just as in every Simple Stories collection, everything in Kissing Booth coordinates beautifully together making it so easy to mix and match elements and papers. I'm definitely crushing on this collection!

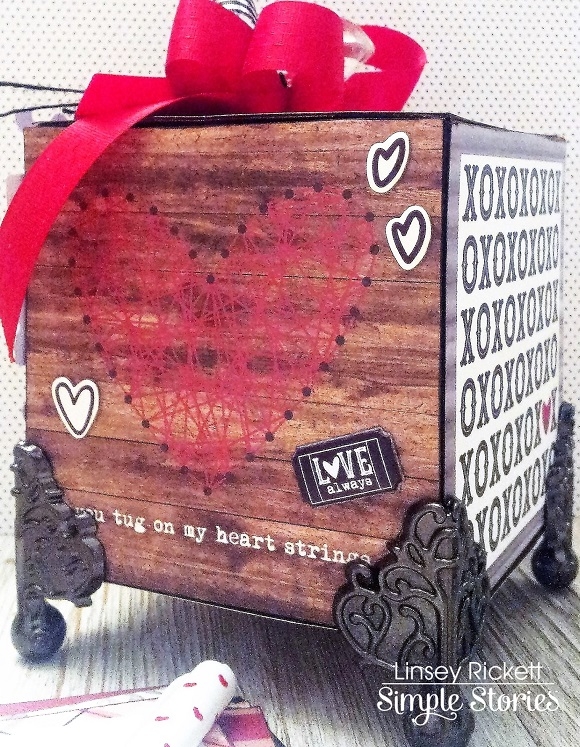
The 3x4 Elements are great for jotting down a quick note to a loved one! Place the box in a family-friendly area along with blank note cards and a pen--then have fun checking the box each day to see who leaves a note! The idea is to encourage one another, build each other up, let them know you love them. The idea is simply LOVE. Spread the love and see what happens!

And that's all for me! I hope you've enjoyed my love note box project and feel inspired to create something with the Kissing Booth collection too! Until next time, happy crafting!

Supplies

Hello Scrappers! Jana Eubank here. When I think back to the winter days of my childhood, I fondly remember playing for what seemed like hours out in the snow. Now that I am a mom, I realize that I probably was only out there for about 20 minutes before I was ready to come back inside for a mug of hot cocoa. Ha! At least, that was the way it was when my own children were young.

For today's page, I pulled out some older photos of my girls frolicking in the snow in our yard. The Freezin' Season collection complimented their brightly-colored snowsuits perfectly!

Even though my journaling for this page is a bit snarky, I assure my girls that I still love them "snow much" with this cute banner die cut from the Bits & Pieces pack. I stitched around the edges of the paper layers with black thread to tie them in with the black lines of the adorable hand drawn art in this collection.

I love this chipboard snowglobe with it's cozy little house. Looking at the wisp of smoke coming from the chimney makes me think of the smell of chimney smoke outside on a cold winter day! I added the pair of snowmen, fussy-cut from one of the 4x4 Elements cards, to mimic my girls in the photo.

I used the "SNOW" sticker word, combined with a word I created with my electronic die cutting machine for the title. I used large circle punches to create the journal spot and then accented it with pine trees cut from the 4x4 Elements cards and a pair of snowflake circle die cuts from the Bits & Pieces Pack.

I love scrapbooking photos of my kids playing in the snow and need to make a point to get out there this winter with my camera. Have you snapped any winter photos lately?

Thanks for coming by today!

Supplies

Hello lovely planner friends! It’s Kylie here with you today and I’m going to share with you how I have been using the Seasons A5 Monthly Planner inserts as well as some of the fun sticker tablets!

I love the bright colours of these monthly inserts and each month features a beautiful theme. I decided my A5 Colour Wash planner was the perfect match.

Today I am sharing my February monthly page and it’s ‘All about Love’. I’m teaming it with the Seasons Sticker Tablet.

The Seasons sticker tablet also matches perfectly to the Seasons monthly dividers so your planner will be beautifully co-ordinated!The stickers have some decorative pieces as well as practical banners and tabs.

The monthly inserts come undated so to begin with I added some date stickers from the Numbers A5 sticker tablet.

Once my pages were dated I was able to add in some decorative stickers as well as some extra banners etc. Down the centre of my pages I add a strip of paper from the Kissing Booth collection and re-punched my ring holes. Not only did this add some nice colour to my pages but it also reinforced my ring holes.

For the spare planner boxes at the start of the month, I again cut some of the paper from the Kissing Booth collection to act as a decorative border.

Through my note column I have added one of the monthly stickers for both the past month as well as the coming month.This is ideal for quick reference. I’ve also added some of the highlighted tab stickers for any important notes I want to add. Now my month is all set to go to start adding in all my important events and notes.

I hope you have enjoyed seeing my monthly set up today,

Chat soon,

Kylie

Supplies

Recent family photos have been sitting on my desk just begging to be added to an album, and when I saw Kissing Booth I didn't immediately think of these pictures. It's a beautiful Valentine collection, but my family photos were taken in the fall. Would it work? You bet! I'm thrilled with the way I was able to document family love and togetherness with these pretty papers!
 
Family photos courtesy of Capturing Bliss Photography
 
I used a black 6x8 Sn@p album and incorporated black and white card stock in with the patterns. The die cuts are so pretty ... lots of flowers, hearts, and cute sayings that are perfect for Valentine's Day or general everyday family moments.


Even though I love the divided photo sleeves, I used more of the full 6x8 pages for this album. I enjoy creating full scrapbook pages, and with this size I don't have to commit to an entire 12x12 page.
In addition to bits & pieces die cuts, I also used chipboardpuffy stickers, and combo stickers throughout the album. And by the way, my granddaughter IS sweet, don't ya think :) ?
I confess that the Feb. 14 chipboard doesn't match up with the photo I tucked into the pocket, but I loved the piece on this page.  I'll add Valentine photos of this little sweetie when I have some in a few weeks.
 
Visit me here on instagram to take a peek into more of my albums!   https://www.instagram.com/artsyalbums

Blog * Facebook * Instagram * Pinterest

Supplies

 
I am truly, madly, deeply in love with you. 
 
Today I am sharing how I used the Kissing Booth to set up my Blush Personal Planner. I can't believe I have forgotten how cute and very portable personal size planners can be, especially as my everyday carry.
 
I added many bits & pieces of my heart into the planner to create my "Pocket Love"
I've also punched some hole reinforcers using one of the red 12x12 paper. It has a double purpose, one as reinforcer and the other is decorative.
 I love decorating my dashboard by layering different elements from this collection. I decided to use the "always be true" 12x12 paper with the light pink flower as my background. Then I added the scrabble pieces "LOVE" from the chipboard stickers. I added a light pink doily on the bottom right of the page and I finished it off with stickers.
 I wanted to use the kissing booth as my main focus of this page, hence the name of this collection. I chose sticker pieces that has anything to do with kissing such as smooch, shut up and kiss me, mwah, and of course kiss me,
 
I made dividers using different pattern 12x12 paper. I used the personal divider template. I've decorate some of the dividers and some I left them plain. I also decorated one of the vertical pocket pages to add some layers in my set up.

  Happy Valentine's Day My Love. You are my everything today, always and forever.
How are you spending your Valentine's Day? You can set up your planner using the Kissing Booth collection and jot down your plans or you can just have a set up all about love. Thank you for stopping by.

Supplies

It's the final day of our Spring AND Summer Release Reveal & today brings a brand new Carpe Diem release!  From 3 gorgeous new A5 Planners, new Monthly Insert Sets, Sticker Tablets and FOUR new Spiral Planners - including Home and Budget! - you'll find everything you need to get & stay organized in a simple, yet beautiful way.  

Make sure to visit us on Facebook & Instagram for chances to WIN the new products before you can buy them!   
 
A5 Planners & Monthly Insert Sets will be availalbe later this month; Spiral Planners and coordinating sticker tablets shipping in May.  


Head on over to the carpediemplanners.com and sign up for emails so you receive notice when these fun new products are available!  

Make sure to visit us on Facebook & Instagram for chances to WIN the new products before you can buy them!   

Hello! It's Jennifer on the blog today to share with you a layout I  created using the fun Kissing Booth collection! Of course this line is geared towards Valentines Day, however it really can be used for just about any theme! For example, this photo of my daughter was taken this past summer! It's such a "girly" picture and there are so many great patterns in Kissing Booth!

I almost always start with a plain background for my layouts so I  began with a piece of kraft cardstock. Then using the beautiful floral print of "Love & Adore", I  cut a heart die cut from my Silhouette (Flower Heart by Paige Evans #222462).  For my title, I  used the  script "love you" from the 6x12 Chipboard. I really love the black/white color combination against the bold reds and pinks!  I also added a floral cluster found on the Combo Sticker sheet which I  popped up with foam tape!

The Bits and Pieces pack never disappoints with cute journaling spots such as this fun heart shaped ledger print! The little flowers are a nice addition, too!  I  always love to add a couple sentiment stickers from the Combo Sticker sheet as well as one of the 4x6 Stickers!

Here, you can see I  added in additional patterns under some of the flowers by using my circle punch. I  then finished the look with a bit of stitching with my sewing machine.

Around the edges of my heart, I  added smaller embellishments such as this floral cluster from the 6x12 Chipboard. I  also tied in the plaid pattern of "Crazy In Love" with this sticker tab tucked underneath the top of my photo (I adhered strips of the same paper at the top and bottom of my layout as well as in the center of some of the flowers of my die cut).

The Kissing Booth collection also includes Puffy Stickers which make a fun accent! I  love the tiny ones that look like candy hearts!  I  added a few around my layout to add extra dimension along with some paint splatters. 

Thank you for stopping by the blog today! Be sure to check out Simple Stories' social media sites for upcoming releases and giveaways! Have a great day!

Supplies

Ok so we're in the cold, seemingly endless, days of Winter. What better way to cheer yourself up than to get into your craft room and make a bright and fun season inspired project!

The 'Freezin' Season' paper collection by Simple Stories will definitely give you chills but in the best way! Adorable characters and wintery images in pretty pastel colors are just the cure for a snow day! This sweet zig zag mini scrapbook is just waiting to be filled with playful pictures and mementos of a winter wonderland!

I made this album using two sheets of 8.5"x11' card stock and then covered each page with the delightful and charming patterned papers of the collection. I also used lots of the paper along with journaling cards to create oodles of pockets, flaps, tags and inserts that have been decorated and embellished with the darling and colorful stickers, chipboard and Bits & Pieces!

All in all, there were nine pages to fill with this entertainingly snowy collection and I had 'snow' much fun adorning each page! Here is a closer look at the front sides of the pages:

And a closer look at the equally adorable back side pages!

Don't let Winter get you down! Grab this collection to show the coldest season just how much fun it can be!! There is a short tutorial on my YouTube channel if you want to make one of these zig zag minis of your own!

Supplies

Pages