May 2020 Blog Posts

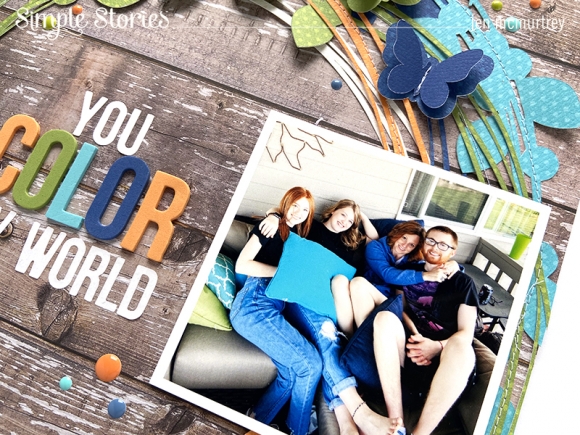
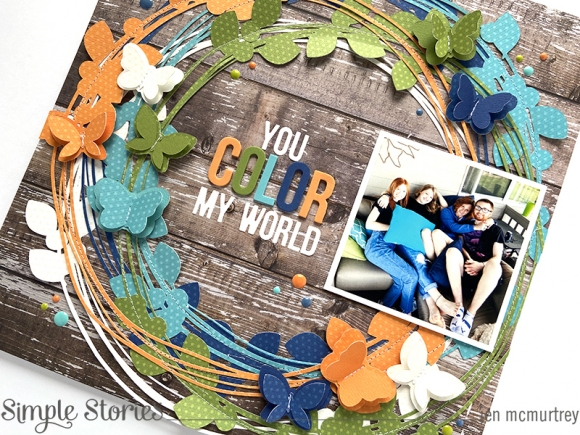
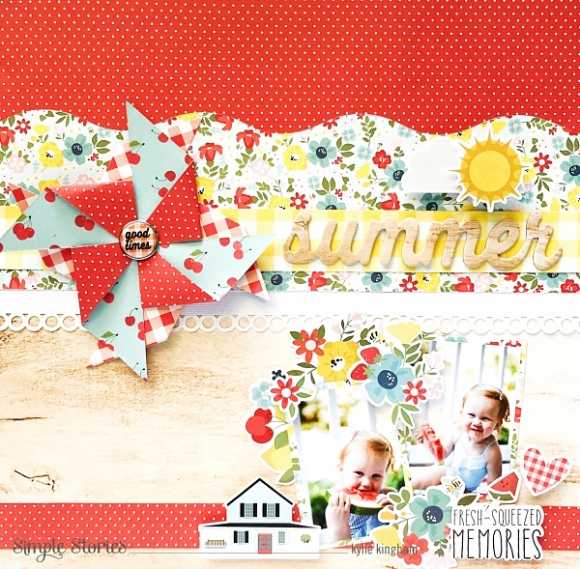
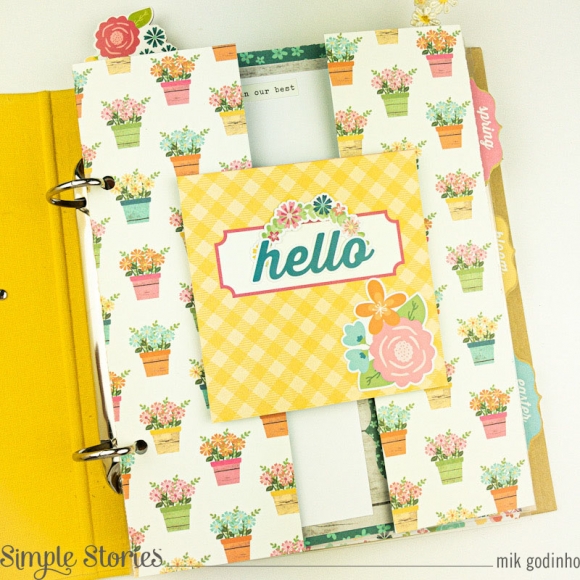
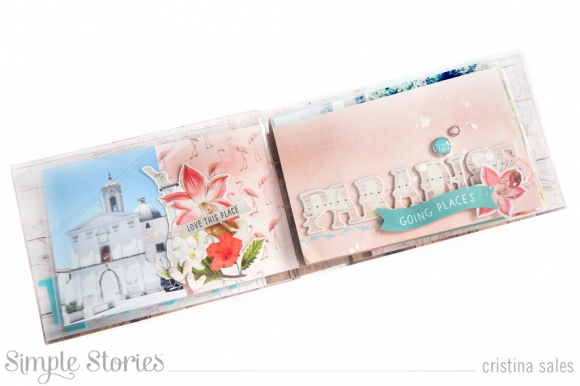
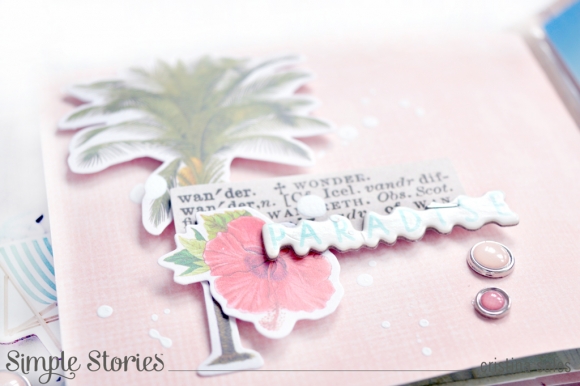
Have you ever looked at a a patterned paper and been inspired to recreate it on a larger scale?  As I was looking through the 4 X 6 Elements Paper in the Summer Farmhouse Collection, I was completely inspired to recreate the pocket piece!  So I set off into the collection to figure out how to do just that!  Christine joining you today with a colorful Summer Farmhouse layout!

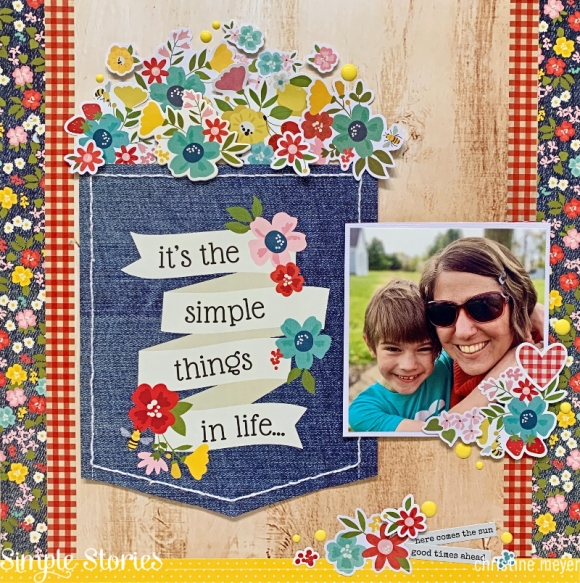
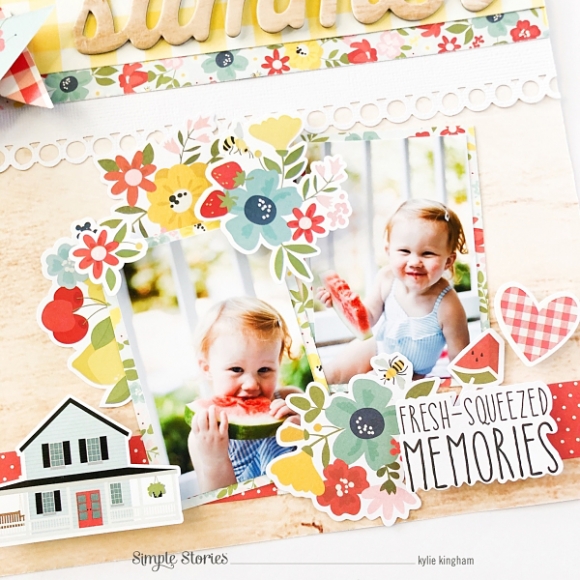
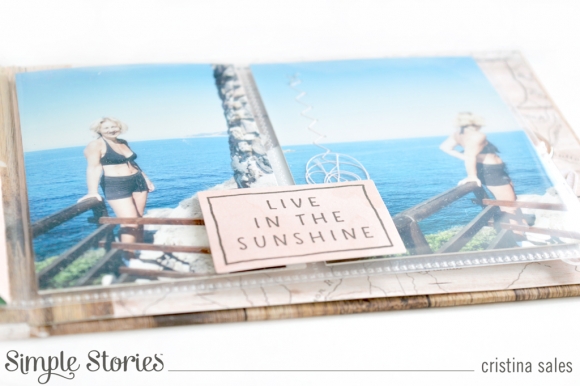
I have really been drawn to incorporating the 6 X 8 paper pads lately and today was no exception.  My actual pocket for the layout was cut out from one of the papers in the 6 X 8 pad. I created a pocket template on my own and then used that to cut this one out.  Then I went over the printed stitching and added actual hand stitching to the pocket.

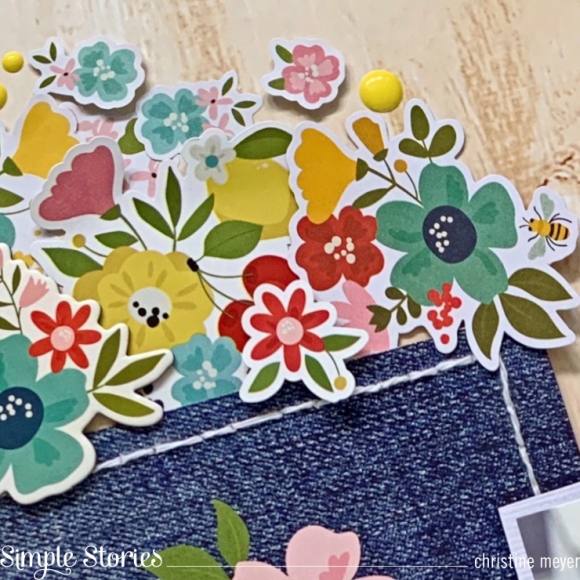
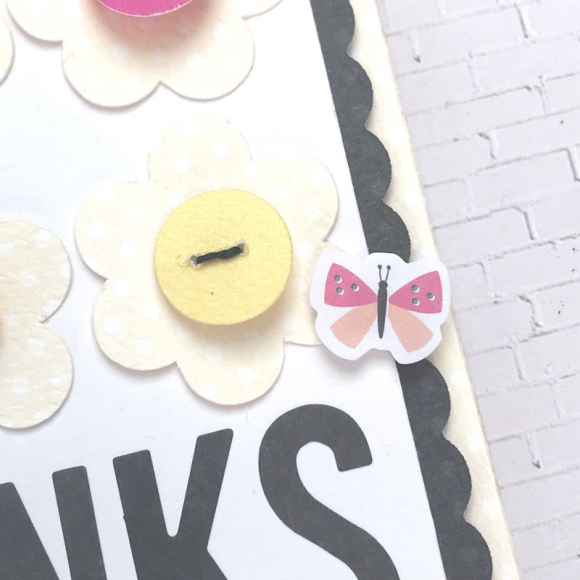
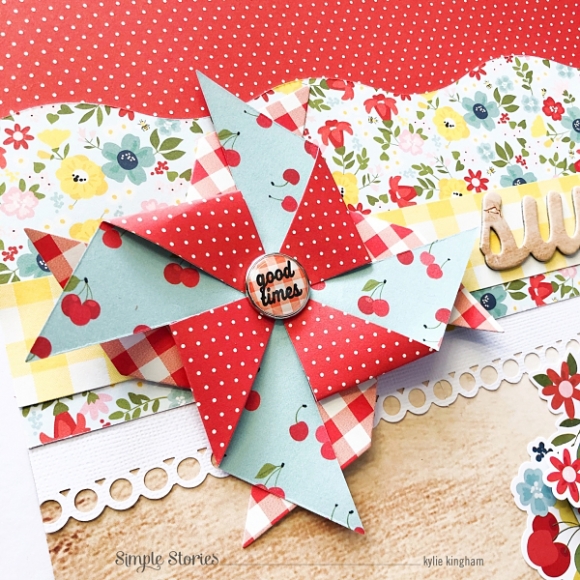
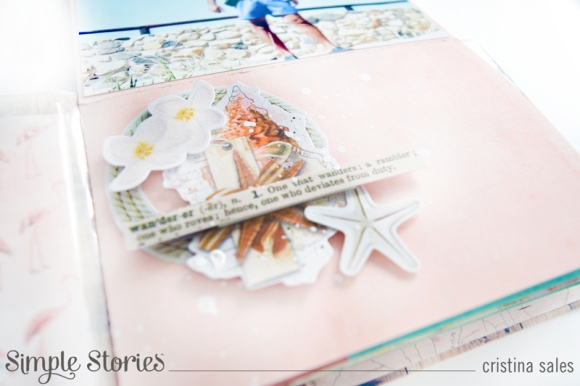
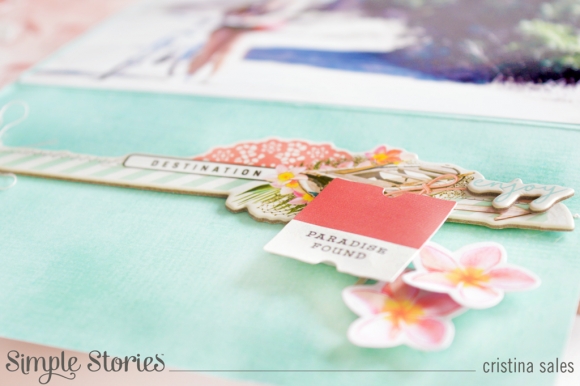
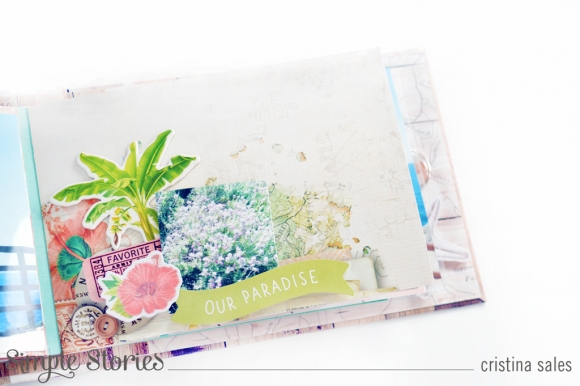
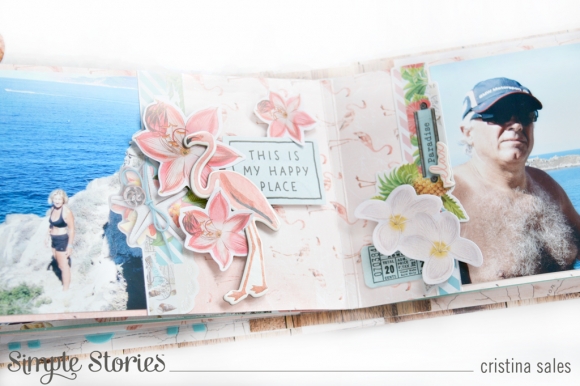
I wanted to have lots of flowers overflowing from the pocket.  But I had to approach this somewhat cautiously - not wanting to go overboard.  A combination of cardstock stickers, stickers from the 4 X 6 sticker book, ephemera, and chipboard all make up this bouquet. I did use a variety of adhesives in order to add dimension as needed.

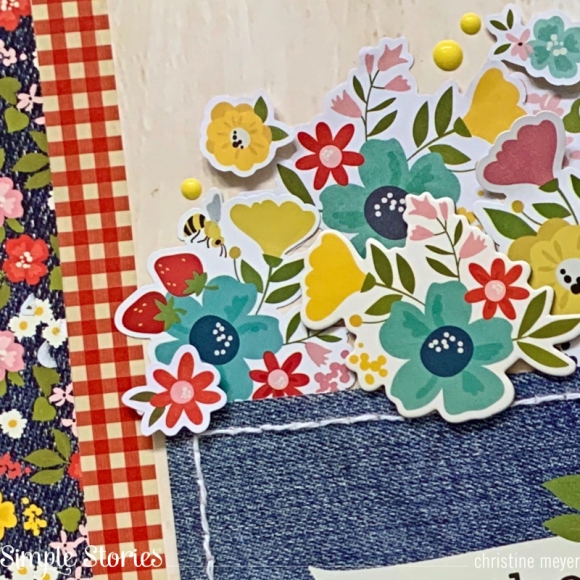
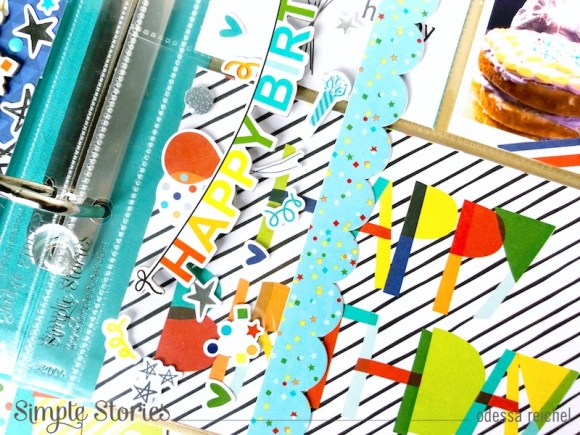
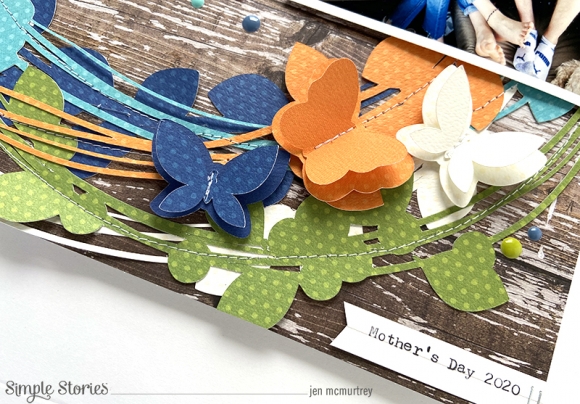
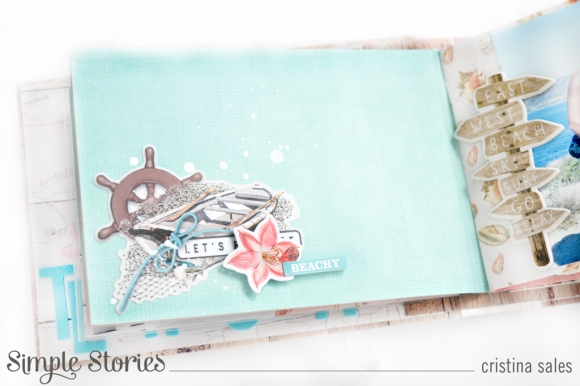
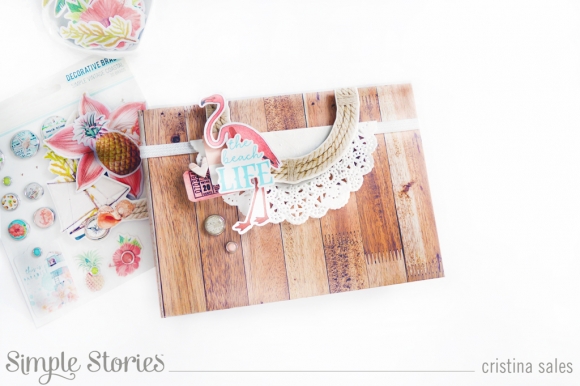
The Washi tape in this collection is gorgeous and was perfect to add as a boarder on the layout.  I also incorporated lots of enamel dots throughout the layout.

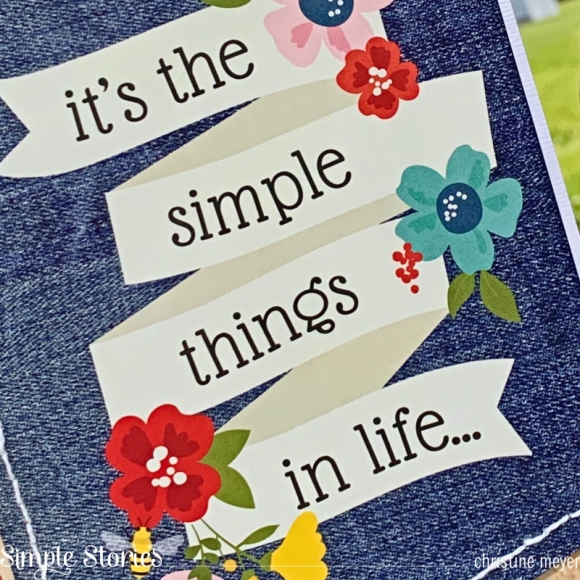
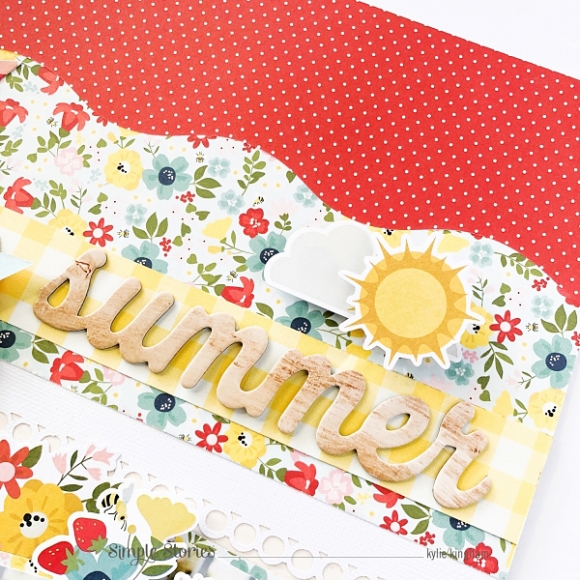
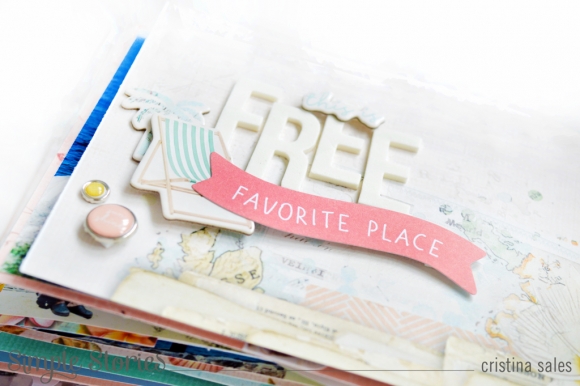
Although I love the words on the original pocket - I opted to stick with what was printed on the sheet from the 6 X 8 paper pad.  

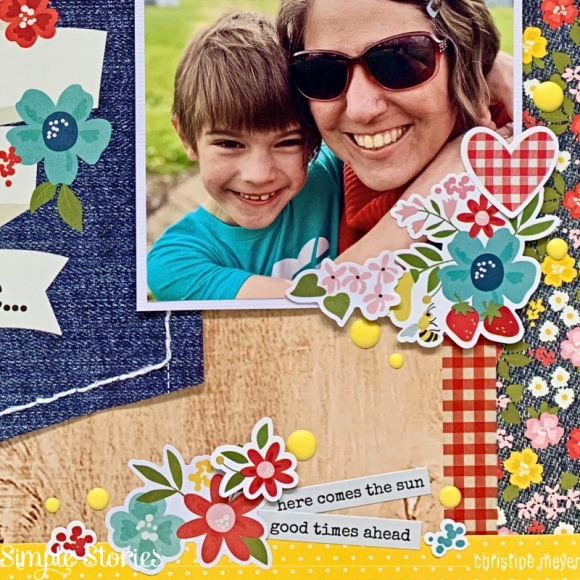
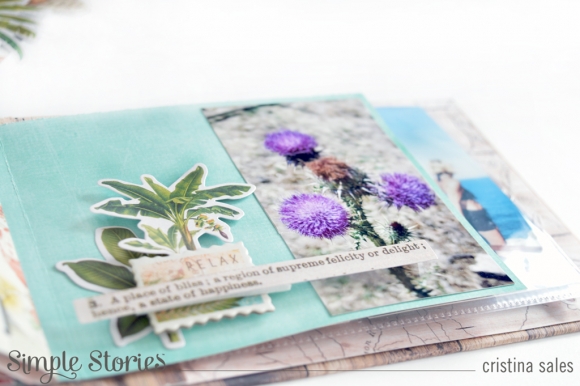
Having already used words in a big way on the layout - I only added some little word stickers to the bottom of the layout. I didn't want the other elements to get lost to text.  If you'd like to take a closer look at this layout you can catch my process video on my YouTube Channel

Thanks so much for joining us at Simple Stories today!

Supplies

Hi! Odessa here with a project I’ve been working on with the new Simple Stories Birthday Blast. It was just what I needed to go with some photos of my two boys. Packed with bright bold colours, fun patterns and lots of balloons and streamers and banners, I was excited to get embellishing.

I used the Birthday Blast 6x8 Pad to decorate the cover of my Teal SN@P! Binder. I used the fun rainbow plaid as the base and then used different blue patterned cardstock from the pad on the top and the bottom of the page set at an angle. 

I added an extra strip of each of the edge cardstock paper and then used some big word stickers from the Combo Sticker Sheet with s cheery balloon Chipboard Sticker. I finished it off with a couple of the banner stickers from the Combo Sticker sheet. It’s was really easy to put together with just a few stickers and some cardstock.

I kept the angle layers going on the inside, echoing it on a photo and journal card. I decorated the page with all the colours and patterns from Birthday Bash. In the middle I used one of my favourite SN@P! page protectors, It has a 2x8 pocket on the inside edge and if you cut it apart from the rest of the protectors it’s great to use as a divider. It’s a fun way to separate things, add more layers or just embellish more.

Inside my little divider with all kinds of stickers and enamel dots. I sealed it up with the scalloped border from the Combo Sticker sheet with washi stuck to the back and put a big chipboard sticker Happy Birthday Banner on top.

I love instant photos so I used the fun plaid pattern on the Wish Big! Cardstock to make an instant photo inspired frame to go over my photo. I used the deep blue Birthday Boy cardstock as the background and added a ton of embellishments. Those glitter enamel dots are a favourite.

This photo had an ugly air conditioner hanging out in the back so I used the It’s My Party cardstock just like on the cover to hide it. I added a splash of Bits & Pieces, Chipboard Stickers, Enamel Dots, Brads and more to make it extra cute. The balloons in the 3x4 Element next to it matches the rainbow stripes perfect. Birthday Blast was just what I needed to go with these photos.

Supplies

Make your little guy's next birthday party a blast with the "Birthday Blast" Collection! Today I'm sharing just a few ideas for party favors and decorations...let's take a look at the complete ensemble:

I started by making goodie bags featuring the adorable robot stamp:

The image was stamped (onto Neenah cardstock) with Tuxedo Black Memento Ink and then colored in with the Copic markers shown above.  Next, I die cut the image with a 2" circle and then layered it onto a larger die-cut shape.  The bags were simply crafted from  6" X 12" strip of patterned paper.  For this 4" X 6" X 0.5" size I scored at 4", 4.5", 8.5" and 9" and then turned and scored at 0.5"

After folding the bag into the shape and securing the edges, I added a pipe cleaner for the handle!  I also stamped the "Thanks a bot" phrase onto the orange balloons paper and used a tag die to cut out.  

Next is a set of 2X2 flags for paper straws! I cut apart select squares from the "2X2 Element Sheet" and used a standard hole punch to make a hole at the top and bottom.  The straw threads easily through the holes and done!

The chair banner is great for photo-shoots and can also be used as a wall or high chair banner.  I started by laminating one of the 6X8 papers from the paper pad.  Next, I punched two holes at the top right and left corner and tied on a yard of ribbon at each side (use more or less as needed).  Paper strips in various widths and lengths (1.5" wide with lengths ranging from 4" to 6") were attached to the back of the ribbon with hot glue.  The banner can be tied around the chair or across a window...this is such a versatile project!

Finally, I decorated a wooden picture frame with a layer of patterned papers, chipboard pieces and enamel dots; looks so cute as a tabletop decoration or photo prop!

Other ideas: popcorn covers, paper hats, dress-up photo props, mini scrapbooks and guest journal cards (have guests write messages on 4X6 journal cards and add them to an album).

Thank you for joining...now wasn't that a blast!?!

Shellye

Supplies

Hello friends! It’s Jen today with a new layout using the amazing new Color Vibe papers and alphas. I can’t even with how amazing the textured cardstock is – pair that with the accompanying alpha stickers and you have just what you need to create beautiful projects.

For this layout, I pulled colors from the Basics, Bolds, and Brights papers to match the colors in my photo along with the Simple Stories Wreath (214849) and Butterflies (58850) cut files from the Silhouette Design Store. With only a few pieces of paper and some stickers, I was able to create a project with a lot of impact.

Once I had determined which colored cardstock to use, I began cutting wreaths from each piece. One of my favorite parts about the textured cardstock is that one side is plain while the other has polka dots, which is what I used on this project.

To keep everything from disappearing into the background, I used the Cedar woodgrain patterned paper from my SN@P! Basic papers. Choosing the dark background really makes the bright colors pop.

With all of the wreaths cut, I set about machine stitching them onto the patterned paper. Doing this allowed me to fold the leaves up and added just the right amount of texture.

The butterflies were cut next using the scraps from the same papers I used to cut the wreaths. To give them a bit of variety, I stitched the opposite sides together and then folded the wings upward. These were adhered to the wreath using foam squares.

When placing my photo, I chose not to back it or use embellishments since the wreaths and butterflies are already so prominent – I didn’t want it to get too busy.

Next was the title, and I used the foam alpha stickers in coordinating colors with the Alpha Sticker Book – Basics.

In the bottom-right corner of the layout, I used the tear strip from the woodgrain paper and my manual typewriter to note the occasion and date. A few enamel dots from my Simple Stories stash completed the project.

Here’s one more look at the finished layout.

If you haven’t picked up the Color Vibe patterned papers and alpha stickers yet, be sure to do so. The possibilities are endless and they coordinate with the other Simple Stories collections beautifully. Thank you so much for stopping by today, and I hope you are inspired to create.

Supplies

Hi there and welcome!  Its Tya here and it is my turn to share my latest batch of handmade cards! I created 5 cards using the awesome new “Color Vibe” papers and stickers! This collection makes great basics that can be used with any of the numerous collections that Simple Stories has. So when I was assigned to create my cards using “just” the Color Vibe products, I was a little nervous… would I miss all my beloved bold, pattern paper and ephemera? Could I create cute cards using just paper and stickers? Challenge accepted! I hope you like what I created!

One of my favorite ways to use basic type pattern papers is to make my own die cuts so I turned to the Simple Stories library over on the Silhouette Design Store. There are so many cute cut files over there so I decided on a few basic shapes and then got to creating.

My first card features the “Lights” paper and stickers. I cut out 5 different sized hearts using this cut file over on the Silhouette Store (Hearts – shape #83043).  Using the offset feature duplicated the heart 5 times in different sizes. I then backed each of the hearts 5 different papers. The pattern papers have a solid side and the other side has tone on tone dots. I used the dot side of the papers. I then turned to the ‘Lights” Alpha Sticker Book for my sentiment by mounting the letter stickers on some white cardstock and then trimming it down and adding it to the card base. To finish off the card I added some enamel dots in the same shade of the paper to the hearts.

This card is so bright and fun! I got creative and made my own striped “pattern paper” by cutting strips of each of the 6 papers from the “Bolds” paper. I then turned to the “Best Year Ever” Combo sticker and used the navy dot scallop border sticker on the top and bottom edges of the card. These colors matched perfectly! To create my sentiment I cut out the “Hello” using this Silhouette cut file (Hello Script – shape #188029). I turned to the black type stickers from the “Basics” Alpha Sticker Book. I then grabbed some heart stickers from the “Best Year Ever” Combo Sticker and the 4x6 Sticker Book. The “Best Year Ever” collection has some great basic shapes that worked really well as little accents for my cards.

I have had this cute embellishment of cream colored flowers with cardstock “buttons” in the centers on my Pinterest board forever and so I thought I’d recreate it with the Color Vibe papers. I made the flowers from the “Cream” Color Vibe Basics and then the centers are from the “Lights”, “Brights” and ‘Bolds” papers.  I used this Silhouette cut file to create the flowers and the flower centers. (Flower – shape #58854). I cut a scallop rectangle using a metal die and some of the “Black” Color Vibe Basics paper. I then mounted the flowers on some white cardstock and then glued that to the scallop rectangle. The sentiment on this card is made from the “Black” letter stickers from the “Basic Alpha Sticker Book.

This cute card was super fun to make and just in time for Mothers Day. I loved the color combo of coral, black, cream and grey so I cut out this floral cluster using this Silhouette Cut file (Happy Haunting Halloween Flowers- shape #301886) and then papers from the “Basics” and then “Bold” papers. I layered these together and glued them to the bottom right corner of my card. I added a cream button to the center of the largest flower and tied some coral twine to the center. To make my sentiment I used the cute and fun “Coral” Foam Alphas. I spelled out the word “Mom” with the foam stickers and added them to the card base. I wanted to add a little bit more so I turned to the “Basics” Alpha Sticker Book. I love the type stickers so I spelled “love u” with the cream type stickers.

My last card is super bright and bold! I of course used the “Brights” Color Vibe Basics to make this card.  I cut out 2 popsicles using this Silhouette Cut File. (Orange Popsicle – shape #62886). The cut file is of a solid popsicle, but I wanted some striped popsicles so I cut out a base from the “Cream” paper and then cut 4 other popsicles using the Pink, Orange, Yellow and Teal papers. I simply snipped off the colors I wanted, in the order I wanted, and then glued them down on the cream base. I wanted a really vivid background to put my popsicles on so I created my own background using some Distress Oxide Inks in Pink, Orange, Yellow and Teal. I blended them together and glued my new colorful background to my card base. I then cut a stitched rectangle from some of the Pink paper and placed some white cardstock to the center. I mounted my popsicles to this part of the card with foam tape. The sentiment was made using the “Brights” Alpha Sticker Book. I liked the mix of the type stickers and the tall, bold stickers. I needed a few finishing touches so again turned to the “Best Year Ever” Cardstock stickers and 4x6 Sticker Book for the sun and hearts. I tied some orange bakers twine along the bottom and added 2 clear sequins to the popsicles for a little shimmer.

I truly had so much fun making these cards.  It really made me stretch my creativity to use just the few items that I did- and I kind of like how they all turned out!  I hope I have inspired you to create some cards of your own using the “Color Vibe” papers and stickers! They are great basics and I know I will use them over and over again! Thanks for coming by and Happy Crafting Friends!

Supplies

Hi everyone! Thanks for stopping by today! It’s Kylie back with you to share a brand new layout I have been working on. Even though it’s almost Winter here in Australia, doesn’t mean I can’t dream of Summer and recall sweet moments! The Summer Farmhouse collection was perfect for a layout I wanted to create.

When I first saw the papers’ I was immediately drawn to the “SIMPLE PLEASURES’ paper and the cute pinwheel graphics. It was from this paper, that I knew I wanted to include a pinwheel into my design!

From a 4”x 4” square, I cut and folded the pinwheel from the “SWEET SUMMER” paper and added a second one behind from the “BACKYARD BBQ” paper. To centre my pinwheel, I added one of the gorgeous decorative brads.

For my background page, I layered together the “CHOOSE TO SHINE”, “SUNNIES AND SANDALS” and more of the “SWEET SUMMER” papers. Using a decorative punch from my craft stash, I added a strip made from white cardstock.

I think a large title can add so much to a layout, which is why I chose the ‘SUMMER’ title from the chipboard stickers.

I added a 1.5cm strip of the “SWEET SUMMER” to the lower section of my page, for a little added colour balance. I layered my two photos into the bottom right hand corner and embellished them with some of the die cuts. Some were added with foam tape to give a little more dimension.

To complete my design, I added the sweetest sun and cloud die cuts, positioned above my title. The finished result screamed Summer and I loved the bursts of colour.

Thanks so much for taking a look at my layout. I hope it has given you a little inspiration for your own Summer layouts!

Take care,

Kylie

Supplies

It’s Mik with you today and I bring you an inspiration using the beautiful Hip Hop Hooray collection!

Spring is almost over, I know, but for me it is the most beautiful and expected season of the year, so it’s never too late to make a spring album. When I think of spring, I immediately think of outdoor walks and picnics. So, I decided to braid the Hickory / Cream Grid 12”x12” paper, which you can find in the Sn@p! Wood Basics collection. This braid reminds me of a picnic basket, and I thought it would be perfect to make my cover background. I used a spring cut file from Paige Evans and I backed it with blossoms paper. Next I glued it in the center of my page using 3D foam adhesives to add some dimension. With this done I started to embellish my Sn@p! Binder.

Embellishing is always fun. I added flowers from the 6x12 chipboard and some ephemeras. To finish my cover, I used enamel dots on the flowers and butterflies.

For the first page of my album I decided to use the so sweet paper. I cut it at the height of the album and folded the sides so that it was closed like a window. To link one side to the other, I used a card that you can find on 4x4 elements paper. I picked combo sticker stickers to decorate it. When opening, you can place a 4x6 and a 4x3 photo on it.

As you know I like to leave a page with lines to be able to write about my photos. I love to add photo flips, so on the lines’ page I also added a photo flip with a card.

Adding unbound cards is also something I really like. That must be part of my "planner soul". I think that it makes each album more fun and colorful.

Here I used one of the kraft dividers, to make a page where I can place a 5x5 photo.

Except for the binder stripe, all 6x8 Sn@p binders come with 10 pocket pages (4 -6 x8”, 3 -4”x6”, 3 -3”x4”/4”x6 ”), but here I used the 3”x3” pocket page, which enables me to put smaller photos and make it more cute.

Did you know that the sheets that come in the 6”x6” basic pad have their backs ledged, gray or dotted? This makes it much easier when we want to do journaling. I love it!

So, I created a journal card on a 3x4”/4x6” and 6x8” pocket page.

Doesn’t looking at this page remind you of a picnic? If the answer is “yes”, prepare a super picnic and take lots of photos to remember that even if we have to stay at home, we can make a delicious snack and enjoy beautiful family moments.

I hope you’ve got some inspiration from this idea and enjoyed it! If you have any questions, would like to talk some more about Sn@p! come and check out my IG account.

Thanks for stopping by and have a creative day!

Supplies

Hi beautiful Simple Stories friends, Cristina here with you today to show you a new project I made with the brand new Simple Vintage Coastal collection. When I saw this collection I immediately wanted to use it to make a mini album. A vintage-style summer theme full of marine elements but not the usual ones that are proposed for the summer it would be perfect.

For a long time I wanted to give a gift to a dear friend who travels a lot. She has no way to collect all the photos she takes during her travels so she leaves them on the phone or computer. So I decided that this collection would be perfect for her day in Terracina.

I chose a 5x7” horizontal size so and I made the pages a 4x6” size. I added two 3x4/4x6 Sn@p! pocket pages. I cut one at the middle to have two horizontal pocket pages, one 4x6 and one with two 3x4 size pockets.

Then I cut the inner pages for my mini book choosing those papers with patterns and soft colors in order not to create too many contrasts with the colors of the photos. I wanted to create the contrast on the cover by choosing a wood-effect paper from the Sn@p Wood Basics collection and which was perfect as a combination with the colors of Simple Vintage Coastal collection.

I think the designs in this collection are really beautiful and unusual for a summer collection, I loved them a lot especially for this. Pastel and delicate colors, scenarios that inspire silence and relaxation that made me dream of being under one of those palm trees perhaps abandoned on a rowboat in the middle of the sea.

To create some sentiments I used the beautiful foam alphabets available in all pastel colors suitable to be combined with this collection. They are so so amazing and come in an uppercase font and a very high foam quality. Then I had so much fun adding chipboard, brads, stickers, ephemera, frames, and so on. This collection is really full of everything you can desire to have to decorate your projects.

You don’t need to have anything else because all the embellishments are full of many elements to decorate your pages, mini book or anything else your creativity inspires you to do. So if you didn’t add the Simple Vintage Coastal to your own stash yet, this is the right time
to have it.

I hope you are inspired by my project! Thank you so much for joining me today and see you again in my next post.
Bye.
Cristina xxx
 

Supplies

Pages