May 2020 Blog Posts

The Simple Stories Summer Farmhouse collection is packed with bright colours and everyday summer fun! I had so much fun revisiting some summer adventures with this collection. The bold yellows popped out at me so I used the Yellow SN@P! binder with Summer Farmhouse

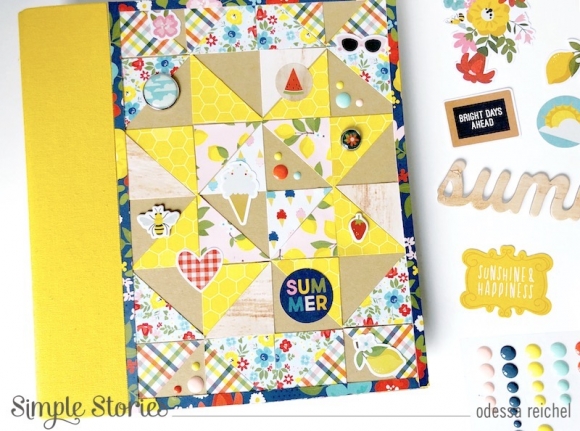
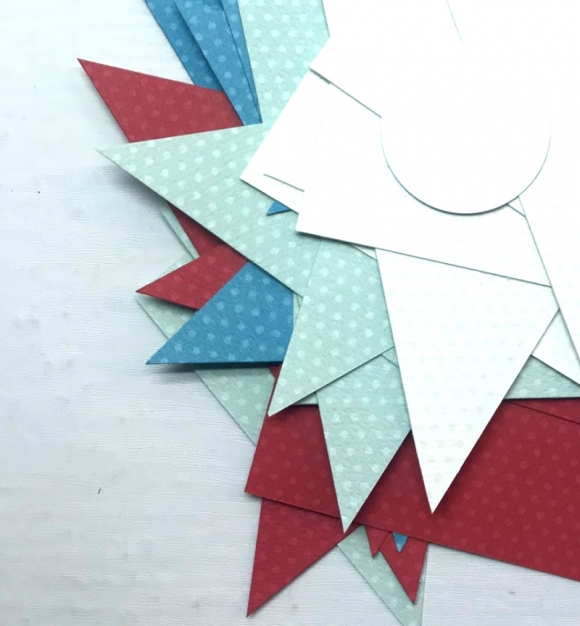
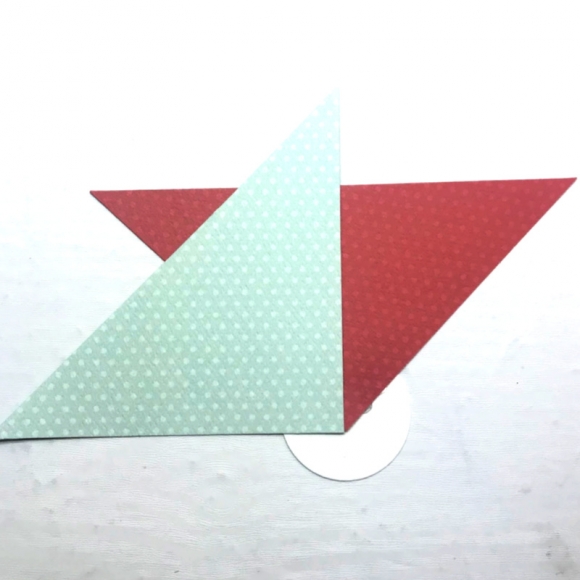
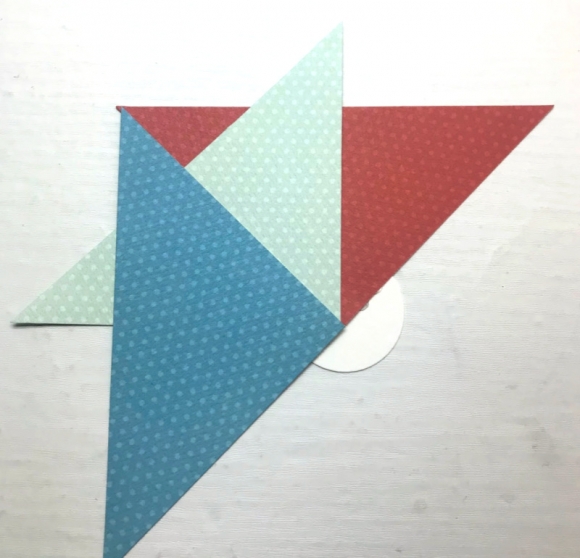
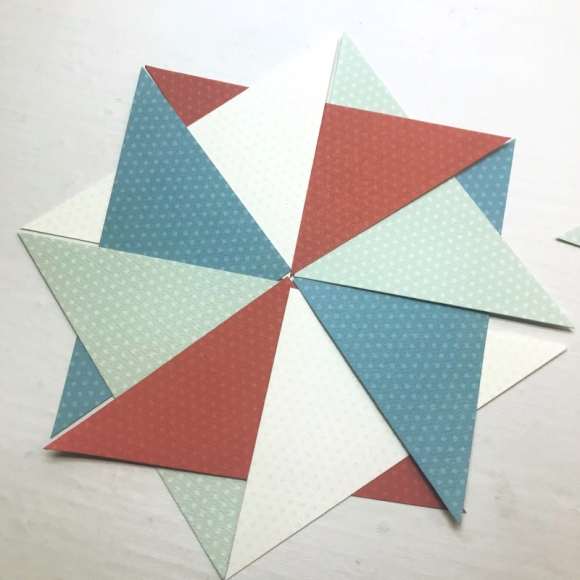
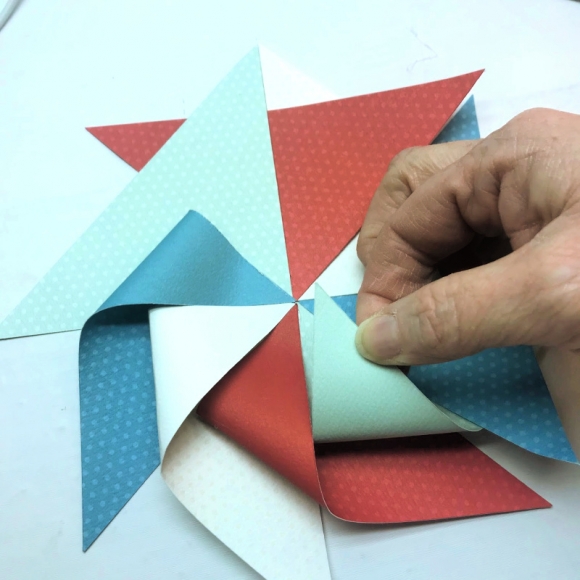
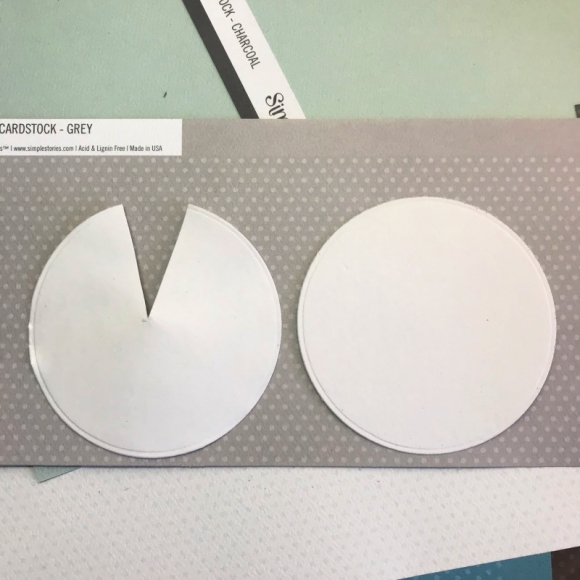
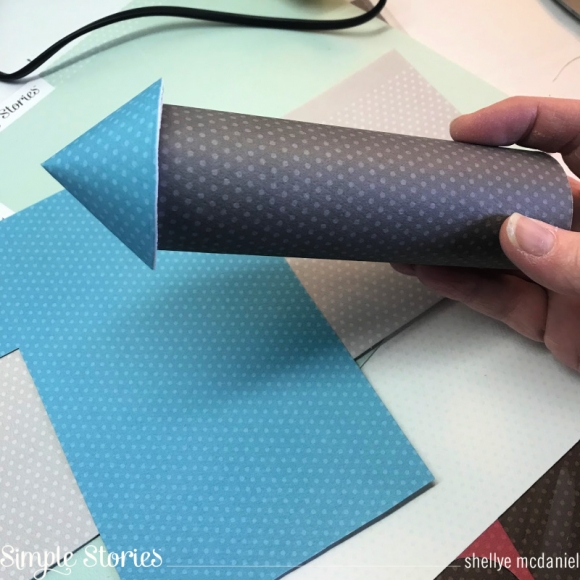
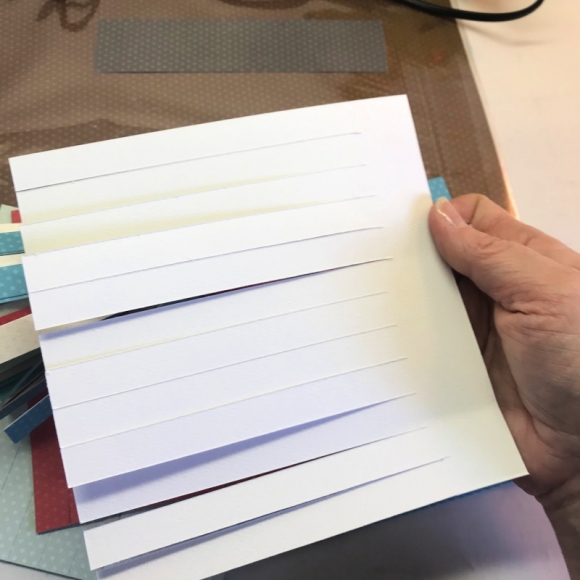
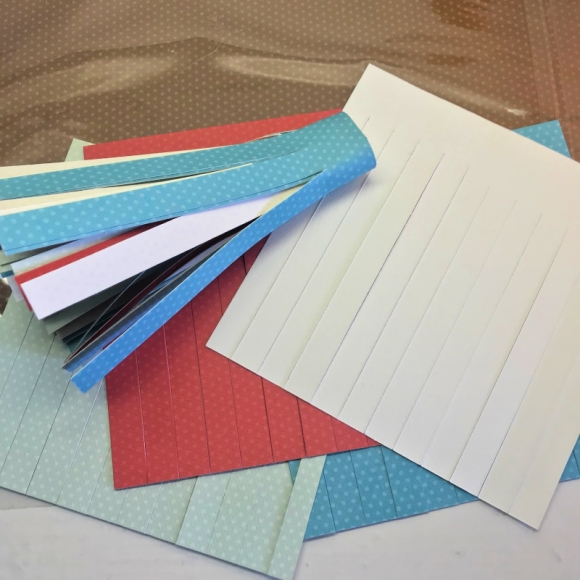
I was really inspired by the quilt-like pattern of the Simple Pleasures Cardstock and used that inspiration to decorate the chipboard cover of the Yellow SN@P album. I took a few of the papers from the Summer Farmhouse 6x8 paper pad and the regular 12x12 cardstock and cut up a bunch of squares which I then made into triangles. I played around with different quilt inspired configurations and settled on a simple starburst. The different patterns in Summer Farmhouse worked great to make a quilted album cover. It’s so much fun! I then used a bunch of the Bits & Pieces, stickers, enamel dots and brads from Summer Farmhouse to add some embellishments to the cover. I finished it off with some thin strips of the Backyard BBQ cardstock to frame my paper quilt. I really like how it turned out!

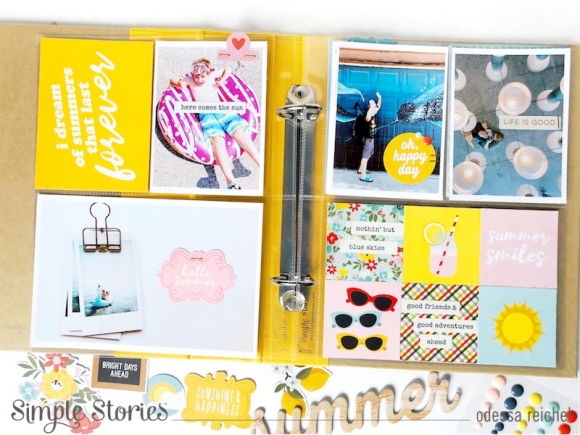
Inside there is lots more fun and bold yellows with sky blues accented with perky pinks and primary reds. The journal Bits & Pieces had just the right touches to add some words to my pockets and the Summer Farmhouse 4x6 sticker book has some great little tabs like that cute pink and red heart tab I added to a photo.

To fill this 4x6 pocket I used a handful of the Summer Farmhouse 2x2 Elements adhered to a piece of 4x6 cardstock. I like the cute patchwork effect that ties it in with the cover of the album.

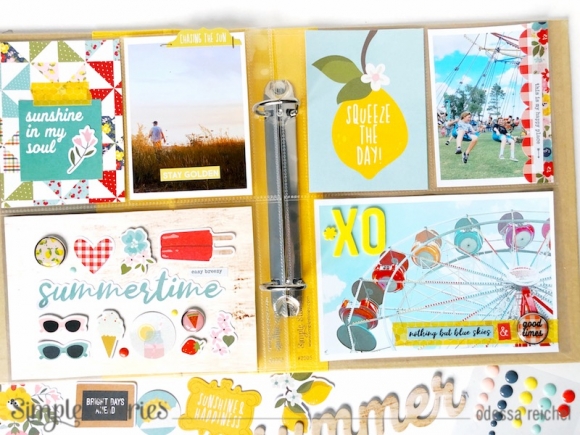
This page is popping with fun! I used the Summer Farmhouse Simple Pleasures cardstock here for more quilty fun with a simple 2x2 Element added to it. My photos all had a lot of sky blue so I used a lot of the yellows from Summer Farmhouse to balance it out. These fun colours and icons are just so cheery!

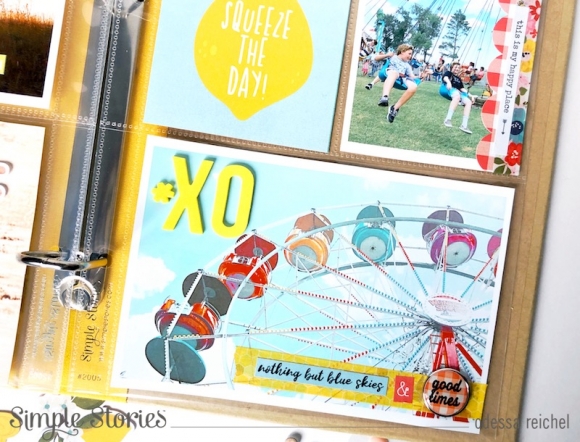
On this photo I used the new Colour Vibe Foam Alpha stickers in Yellow for a bold accent on my photo. These new Foam Alpha stickers are an instant favourite for me because they come in all of the classic Simple Stories colours and are easy to coordinate with different collections. The yellow on the blue sky goes perfect with the cute 3x4 lemon journal card above it. To balance the bright yellow stickers I added some of the Summer Farmhouse red gingham washi along the bottom with some phrase stickers and a cute Decorative Brad

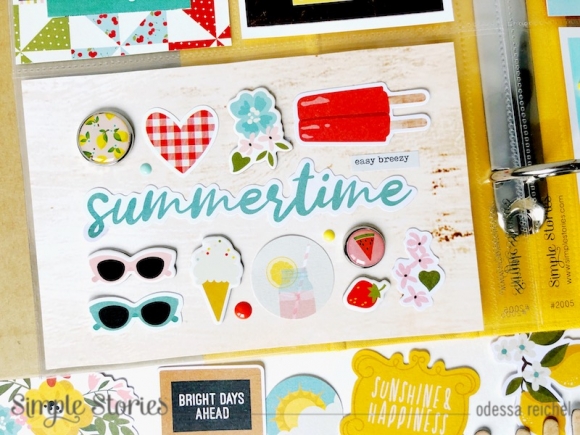
This pocket is probably my favourite and was the most fun to put together! I cut out a 4x6 piece of the Sunnies & Sandals cardstock and covered it with all things summer. I used a word die cut from the Summer Farmhouse Bits & Pieces in the middle of the pocket and arranged various Bits & Pieces, Chipboard Stickers, Decorative Brads, Enamel Dots and stickers from the 4x6 Sticker book and Combo Sticker sheet. I spent a bit of time rearranging everything just perfect, but it was worth it.

If you need some cheer right now, the bright colours of Summer Farmhouse and some photos of summer fun might help!

Supplies

Pinwheels and summer just go together, don't you think?  Today I'm sharing not one, but TWO adorable summertime projects featuring the "Color Vibe Collection" First, let's start with a patriotic set that I'll be displaying from Memorial Day all the way through July 4th!

I ran across this pattern for making pinwheels and thought I'd give it a try.  The pinwheels that I created are approximately 7" in diameter, so adjust the triangle sizes accordingly for larger or smaller versions.

Each pinwheel requires four squares of various colors/patterns.  I cut my squares to 4" and then cut across diagonally to form the triangles. Next, I punched a 1.5" circle to use as an anchor point for building the pinwheel.

Working counter-clockwise, add the triangles as shown above. Alternate the colors as you go! The very last triangle will tuck up under the first one, so be sure that you don't glue it down completely.  

Next, take the left tip of any triangle and glue to the center; repeat with the remaining tips until the pinwheel is complete. You can add these to dowels, straws, or a large clothespin for clipping!

And how about a couple of fireworks to go along with the pinwheels? I made two of the fireworks from a paper towel roll that I cut in half. I covered each of the rolls in patterned paper and then constructed the top:

To make the top, I die cut a 3.5" circle from lightweight chipboard, as well as a circle of patterned paper to match.  I cut a notch as shown above and then gently rolled into a cone shape and glued in place on the tube.

For the streamers at the bottom of the fireworks, I used the leftover 6X12 .  paper (from making the pinwheel) and cut 1/2" strips along the length.  I cut a small piece from each color strip and began winding the colored strips together to form a tassel.  I curled the ends slightly and then hot glued inside the open end of the paper towel roll.  

Again, I attached a large clothespin for clipping! Here is a look at all of the finished pieces after they were clipped on the little tree that I use for seasonal decorations!

As you can see, I used the Foam Alphas and stickers from the sticker books to embellish.  I also used die-cuts of matching papers to create flowers at the centers of the pinwheels. 

While making the patriotic pinwheels, I decided to make a few in the hues of summer!  I mixed and matched colors from the Brights, Lights, Bolds and Basics...they all coordinate beautifully!  

For this set of pinwheels, I decided to make a 'faux' letterboard from strips of dark gray paper.  Here's how it looked:

I simply created paper strips the width of a frame and added a fold to each side.  The sides were glued together and then attached inside the frame.  I wanted the strips to be the same width as the height of the Foam Alphas, so I made them approximately 1.25".  The stickers were attached to create the letterboard look!

So whether you're needing pinwheels for summer parties or holiday decor, I hope that you'll give them a try.  Stay tuned to my YouTube channel, as I will be sharing a tutorial on putting these together. 

Thanks for joining!

Shellye

Supplies

Pages