Jana Eubank's Blog Posts

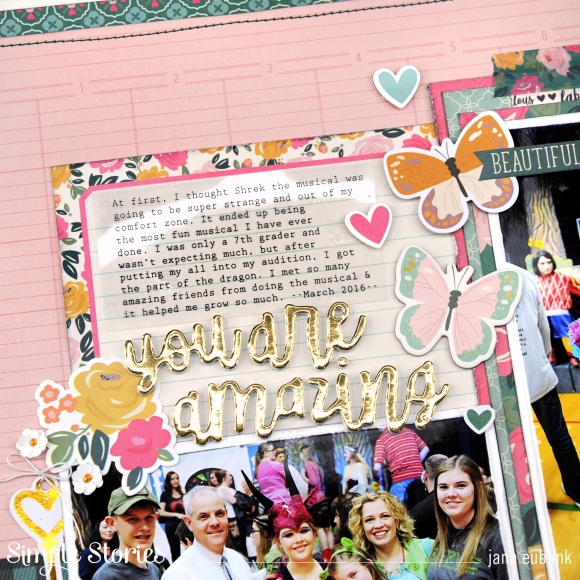
My daughter loves acting and singing and was so delighted to get the part of the dragon in their school play, Shrek Jr. I loved watching her on that stage because she was IN. HER. ELEMENT! Isn't it awesome seeing our kids shine in the things that they love to do?! I thought the butterflies and blooms in the I Am collection were a perfect way to record this "blossoming" moment of my daughter.
 
 
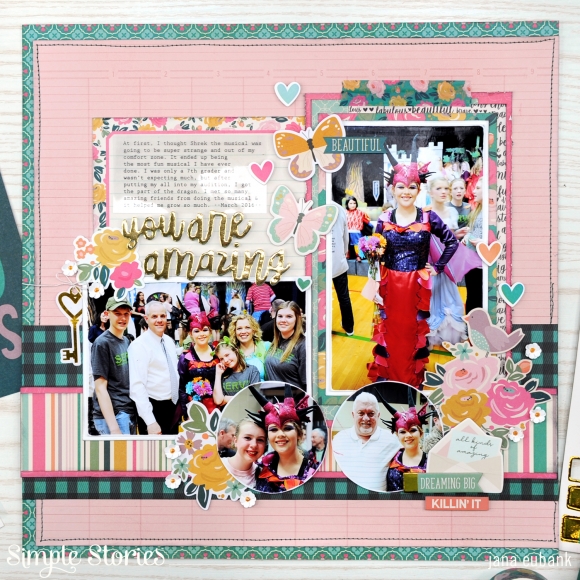
I love that the I Am collection includes "You are ..." phrases, too. I used one of the NEW Foam Stickers as the title here. The foam stickers for this collection are gold foil with all kinds of useful words. It's a set that you can use on many pages, which I love.
 
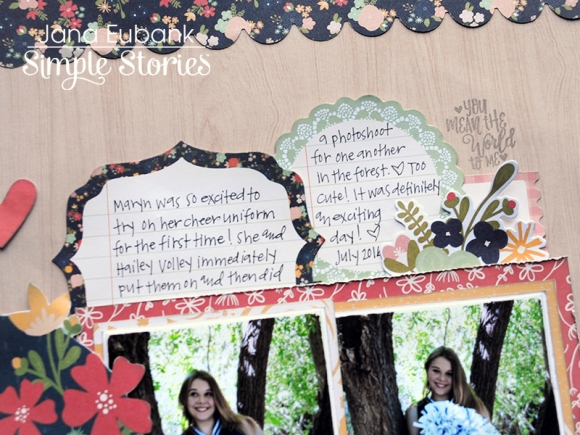
The journaling has a bit of a glare from the lights because I printed it on a transparency. This allowed me to fit the longer paragraph my daughter wrote onto the 4x6 SN@P! card. Once the page is in its sheet protector, you won't even notice.
 
 
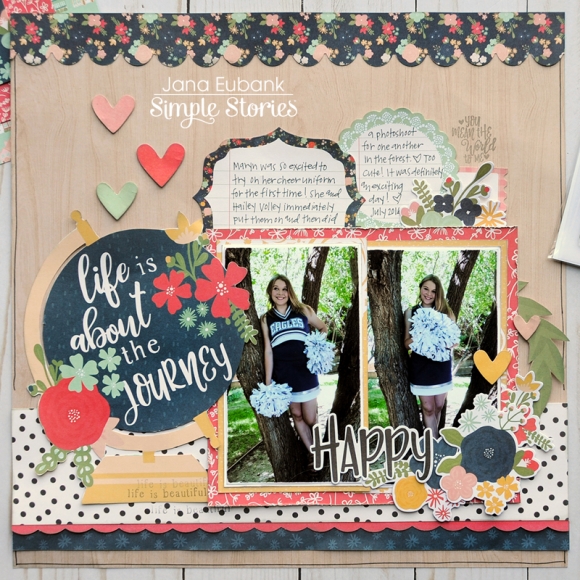
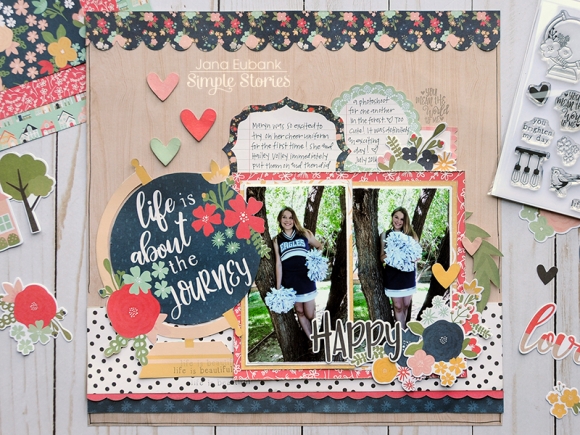
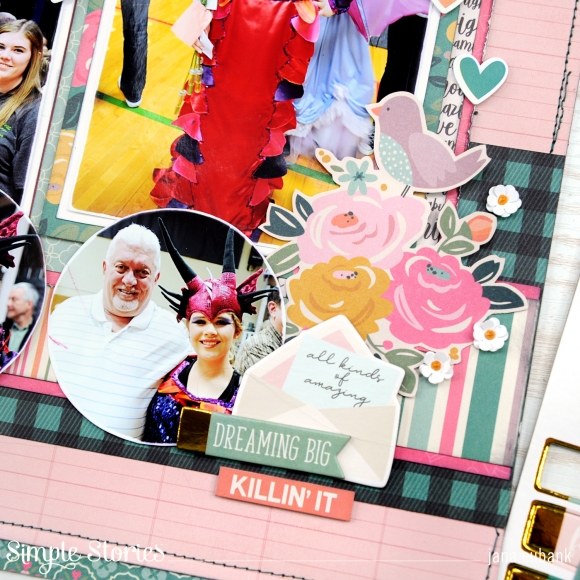
I chose to crop the supporting photos into circles and place them together at the bottom of the page. To the right of the photos, I added a cluster of embellishments.
 
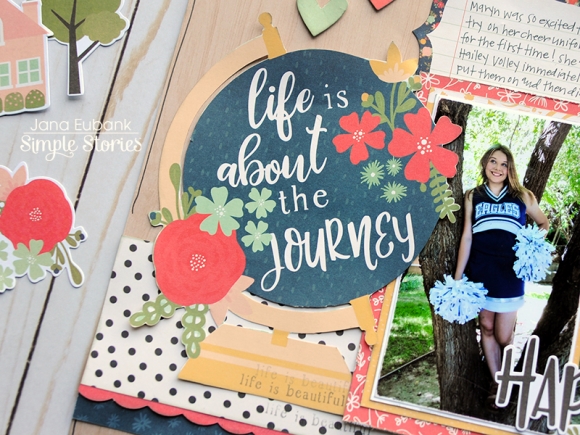
The bird and flowers were fussy-cut from a 3x4 SN@P! card, the envelope and 'Dreaming Big' phrase are from the chipboard set, and then the heart and the 'Killin' It' phrase are from the Combo Stickers.
 
I used a teeny, tiny flower punch to add the cutest little supporting flowers around each flower cluster on this page. I layered two punched flowers together, ruffled up their petals, and then added a golden center using a gold pearl pen. They turned out darling!
 
 
I love adding stitching on my page for a bit of texture, too. Even if it's a simple line around the edge of the page, it adds just the right touch, in my opinion.
 
 
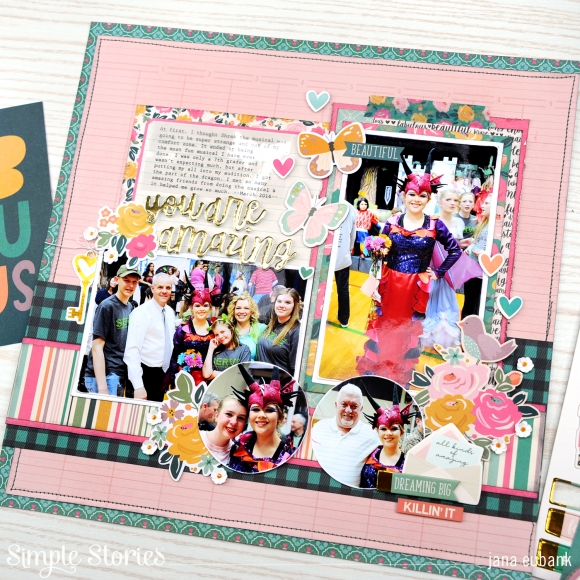
I hope that you enjoyed my I Am page today and that it inspired you to record those shining moments in your family's life.
 
Have a great day!

Supplies

The soft blanket of snow that covered the yard last week is so beautiful and always makes me want to cozy up in my craft room and do a little creating. Hello, friends! It's Jana Eubank. Today I have two new cards to share with you using the Simple Stories Winter Farmhouse collection!

Not only is the Winter Farmhouse collection perfect for your winter projects, but they are lovely for your holiday creations as well! If you're looking for a collection WITHOUT Santa and his elves, or you just want the versatility to bounce back-and-forth from holiday projects to winter projects, this collection is a great choice!

On this first card, I used the papers from the 6x8 paper pad to build up my background. I then layered up several of the Journal Bits & Pieces and added the adorable red house from the Chipboard Sticker Sheet. A sprinkling of deep yellow enamel dots adds a bit of shine.

I couldn't help but feature the mitten banner from the Chipboard Stickers on this second card! They are so cozy and CUTE! Again, I used the 6x8 Paper Pad to build up my background and then added a cluster of Journal Bits & Pieces die cuts and a red chipboard house in the bottom right corner. 

There's nothing like creating cards on a snowy day as you listen to Christmas music and enjoy a mug of hot cocoa. These cards will be perfect to send as a holiday greeting or to warm up someone's heart in January if they are feeling bogged down by the winter blues.

I hope you'll take the time to treat yourself to a quiet afternoon of creating this winter. It's the perfect remedy for a cold, winter day!

Enjoy!

Supplies

Every year I look forward to the Christmas cards that come from family and friends. It's a wonderful way to send a small "gift" to someone each year letting them know that you are thinking about them and are grateful for the impact they have had in your life, even if you haven't seen then for awhile!

Hello! It's Jana Eubank and today I wanted to share a few Christmas card ideas using the beautiful Country Christmas collection.

When I am designing cards, I like to design the focal point of the card first and then move backwards to the paper layers and card base underneath.

I spread out the embellishments I plan on using over the surface of my desk. It looks best (and is the most fun!) to combine a variety of materials, like paper die cuts, stickers, and chipboard elements. From there, I shuffle things around, auditioning pieces in different ways to create a variety of embellishment clusters. Sometimes I start with a 3x4 card or a frame as a background; other times I choose my favorite Bits & Pieces die cut that I really want to use as the focal point of my design. The fun part is playing around and combining things together. Don't overthink it too much. Listen to your creative heart and go with the flow!

Once I have my clusters and focal points put together, I am ready to decide what size card base I should put them on. I try different colors of paper layers underneath each clusters and add decorative paper strips as colorful accents. My final step is to add additional detail, if needed, like twine, enamel dots, or buttons.

I hope you'll give this technique a try this year! Turn on your favorite holiday album or Christmas movie, keep a mug of hot cocoa nearby, and spend the afternoon playing with your supplies! It's a great way to create special cards (gift tags, too!) for loved ones.

Merry Christmas!

Supplies

Pages