Jana Eubank's Blog Posts

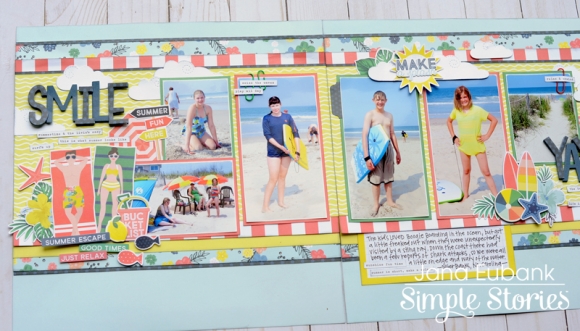
Happy Friday, Simple Stories Friends! Jana Eubank here with a double-page layout featuring the super-fun Sunshine & Blue Skies collection!

Four years ago my family checked off a bucket list item when we took our summer vacation to the Outer Banks in North Carolina. We stayed in a beach house and spent our days playing in the ocean, collecting shells, and eating good food. It was amazing! The Sunshine & Blue Skies collection is perfect for scrapbooking all of the beach photos I took while we were there!

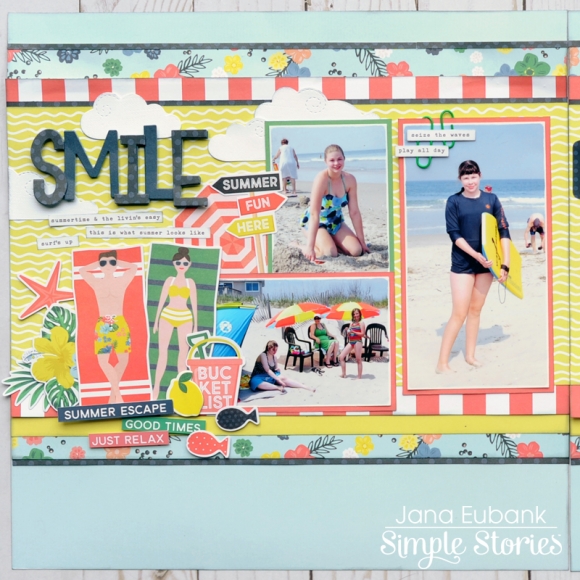
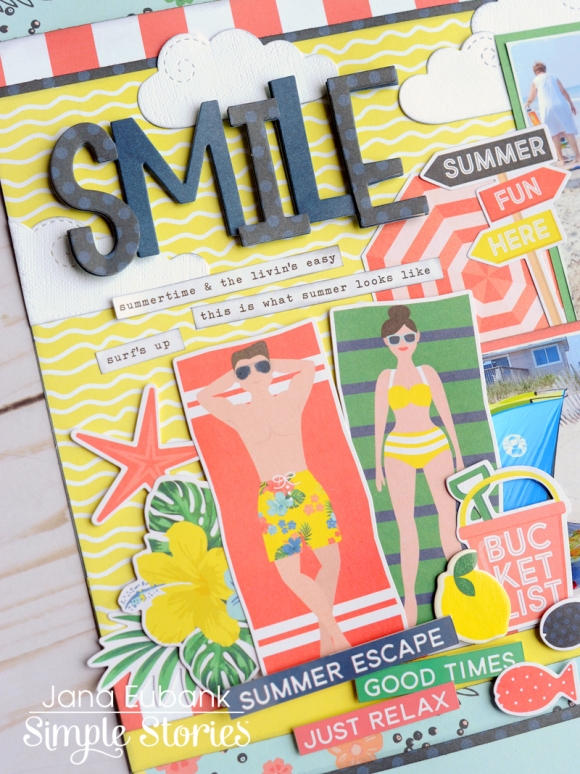
I pulled out the Say Cheese 4 Fun Words Large Metal Dies to create my title. I die cut the title three times. Two layers are from Navy/Emerald paper, and the third layer is from the navy dot side of the Let's Escape paper. I layered them all together with foam tape to give the title lots of dimension.

I LOVE the Pool People Bits & Pieces and couldn't resist creating a little scene with them below the title. I surrounded them with phrase stickers from the Combo Stickers and 4x6 Stickers, and added in more accents from the Bits & Pieces pack and Chipboard Stickers.


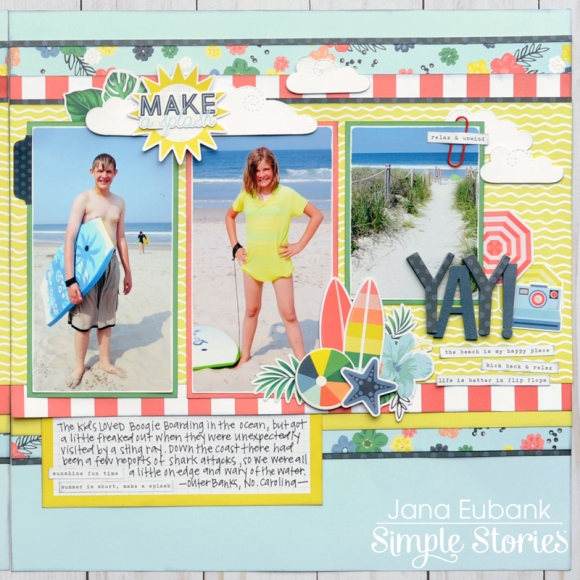
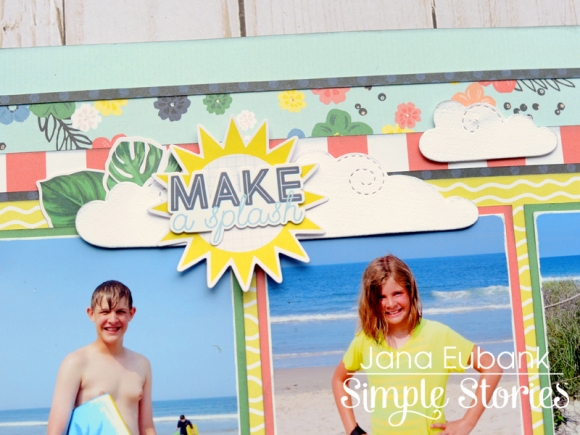
I used dies from my stash to compliment the Sun die cut at the top of the page. I used foam tape to add a couple of leaf stickers and a phrase from the Combo Sticker Sheet.


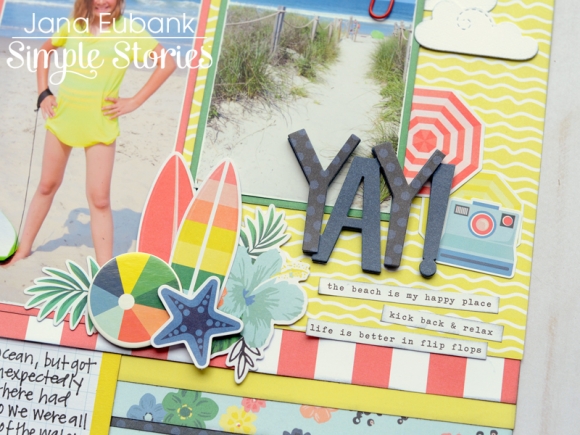
This embellishment cluster on the right page was a lot of fun to create. I love combining die cuts in an "L" shape to accent the corner of my photos. I also added another Say Cheese 4 die cut word to this side, as well, accenting it with the hexagon umbrella shapes, phrase stickers (4x6 Stickers), and adorable polaroid camera sticker!


I love how beachy this collection feels! It was the perfect way to document our beach adventure on the East Coast!

Supplies

Hello, Simple Stories fans! Jana Eubank here with a fun summer project to create with your kids. Today I am sharing a Summer Treasure Box created with the Sunshine and Blue Skies collection. I adore the vibe of this collection! Not only is it perfect for creating seasonal summer projects, but with the palm trees and hibiscus flowers, it would be perfect for documenting your tropical vacation memories, too!

Every year my three daughters each create a treasure box to keep their summer and vacation mementos in. As we go on our family vacation, road trips, and other summer outings my girls place trinkets they have collected along the way inside.

Some of the things they have added to their boxes have been smooth rocks and seashells from a beach trip, amusement park and movie tickets, and even business cards from restaurants and stores that they want to remember. They love going through their boxes later and reminiscing about all of the places we have been. It's almost like their own little 3d scrapbook! 

The Sunshine and Blue Skies papers were so cute for this box! I love the popsicle pattern of the 2x2 Elements paper on the lid and the Pool Party patterned paper on the inside. I feel like those happy swimmers are beckoning me to come join them in the pool every time I open it up. Awwww, summer!  

I decorated the front of the box with the super-cute chipboard Ice Cream Truck, palm tree, and sun. I'm craving a frosty treat right now just looking at it!

If you're looking for a craft idea to do with the kids this summer, try making a Summer Treasure Box! Your children or grandchildren will love having a special place to store their mementos!

Supplies

Hello, Simple Stories Fans! Have you checked out the latest Simple Sets? With six papers (2 each of 3 designs) and a coordinating 6x12 Sticker Sheet, they are the perfect solution for a quick project or two!

Today I am working with the Springtime Simple Set. Butterflies and flowers are not only perfect for Spring, but work great for everyday memories, as well. This page is about my daughter achieving recognition in her writing class at college. Definitely, a "bloom where you're planted" moment for her!

Butterflies are a perfect symbol for growth and transformation, as well as following your own path. I fussy-cut the butterflies from the 3x4 & 4x6 Elements Paper and then adhered themto the page with foam squares as embellishments.

I layered several of the stickers together in this embellishment cluster, anchoring them with strips of patterned paper across the bottom and a scribble-style circle that I die cut using my electronic die cutting machine.

On the opposite side of the photos I used several patterned papers from my scrap bin and some metal dies from my stash to create a pair of dimensional flowers.

I hope this page will help my daughter remember to always celebrate her accomplishments! There is so much in our lives to be grateful for!

Thanks for stopping by!

Supplies

Pages